3D Printed Railway Bogie Sets

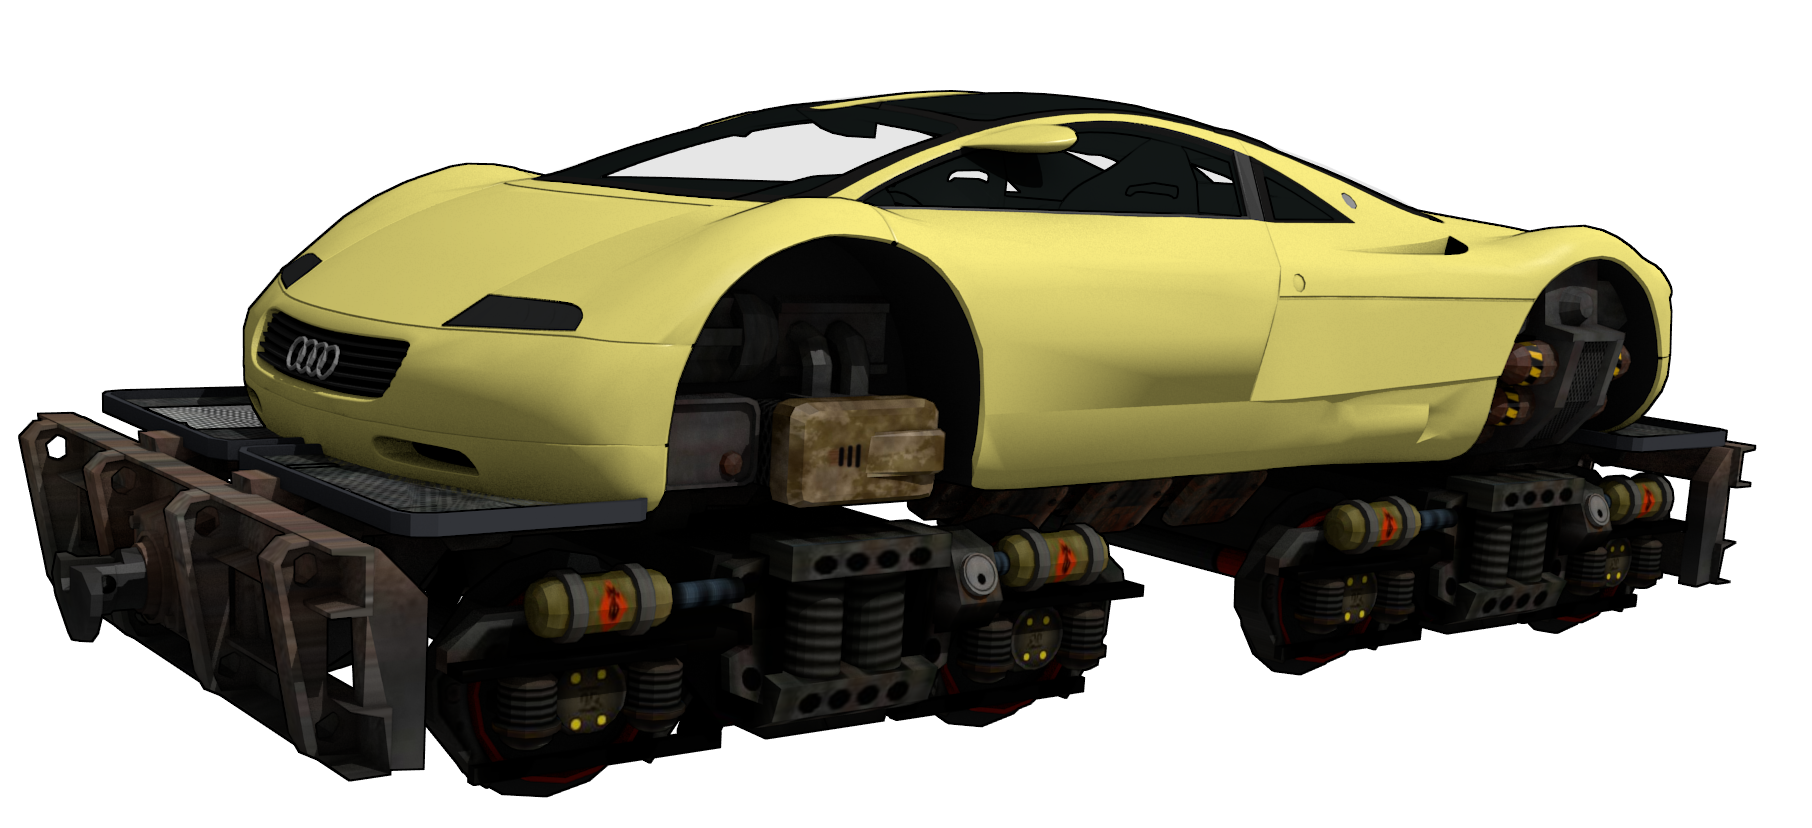
Over many years I have imagined creating some unholy fusions of cars with locomotives. All of these designs were typically a car body on an articulated chassis.

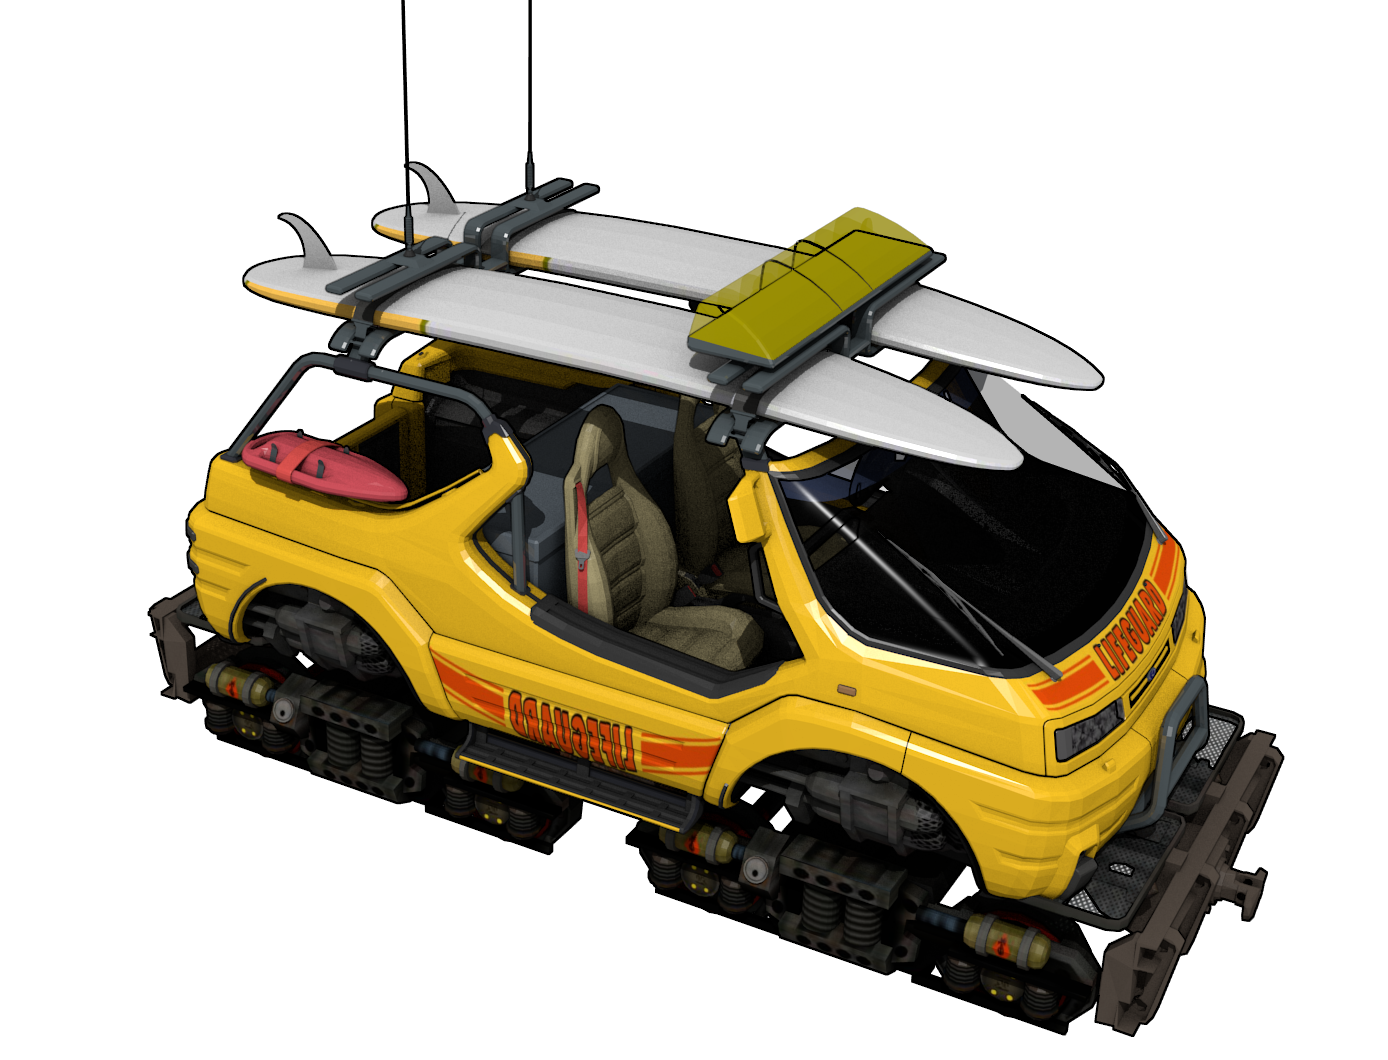
Yeah I know. How useful is a lifeguard truck mounted on a railway? Not very.
With the success of the Mine Trolley and Mine Truck models, I was inspired to turn my imagined monsters into something real. I came across a very nice model of a Ford Mustang in 1:24 scale by Maisto.
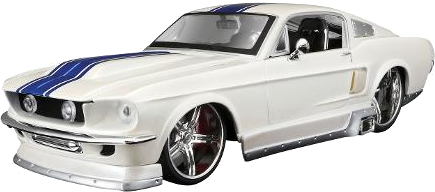
Maisto 1967 Ford Mustang GT
This I intend to convert to a rail mounted monstrosity in the vein of some of the concept designs shown before. One question I needed to answer was what gauge to design for. Here in New Zealand we have an unusually narrow gauge (which has been a major obstacle in developing high speed rail here – aside from lack of political will etc.) I figured a standard gauge would be the best one to go for seeing as it was the most common. At 1:24 scale this gave a distance of 60mm between the inside edges of the rails. As it happens the narrow gauge version of the bogie set (described later in this article) is close to the 1:24 scale New Zealand gauge track.
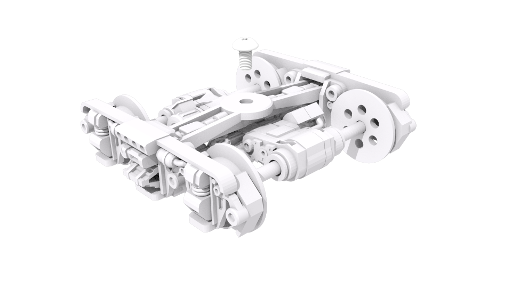
While I’m still a way off finishing the projects, the bogie sets are a useful stand-alone design to share seeing as it can be incorporated into many other designs. Update: This project has finally been released. Check it out here: 3D Printed Railcar Chassis
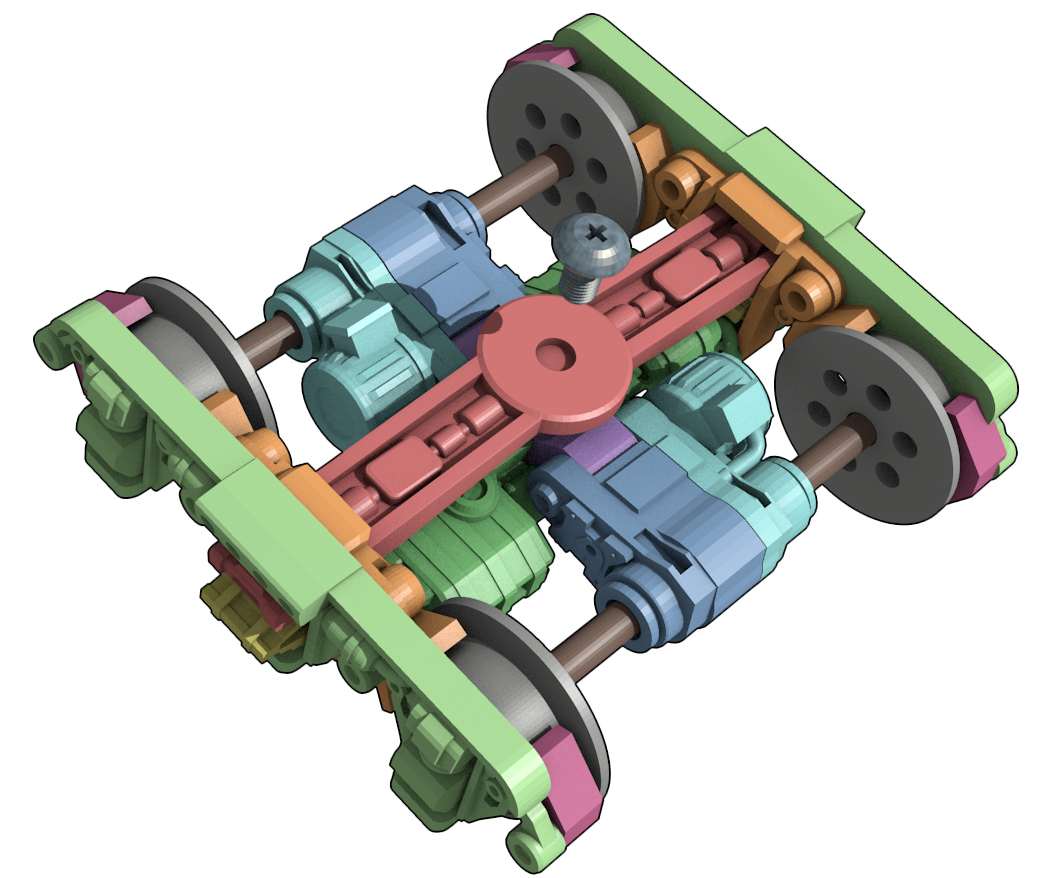
The bogie details were designed based on a large number of powered bogies for railcars, and diesel electric locomotives. I wanted to create a bogie set that looked plausible. I was also keen for the arrangement to give the impression of being an electrical drive as well. I figured that if you were going to do the project for real and make use of the existing vehicle engine, hydraulics and pneumatic drive systems were less viable options. My reason for thinking this was they have a greater need for precision engineering and with the high pressures involved, I felt they were less easily repaired in the field. An electrical drive system seems more robust and can also be fixed with a nail or bit of fence wire across a broken connection or some such rough temporary fix. That was my estimation based on my own experience fixing electrical systems in the field but little experience with hydraulic drive systems.
To design these models, I used Blender 2.58. I have included the Blender files which will be usable in any Blender version later than 2.5.
There are a couple of non-3D printed items you will need for these projects;
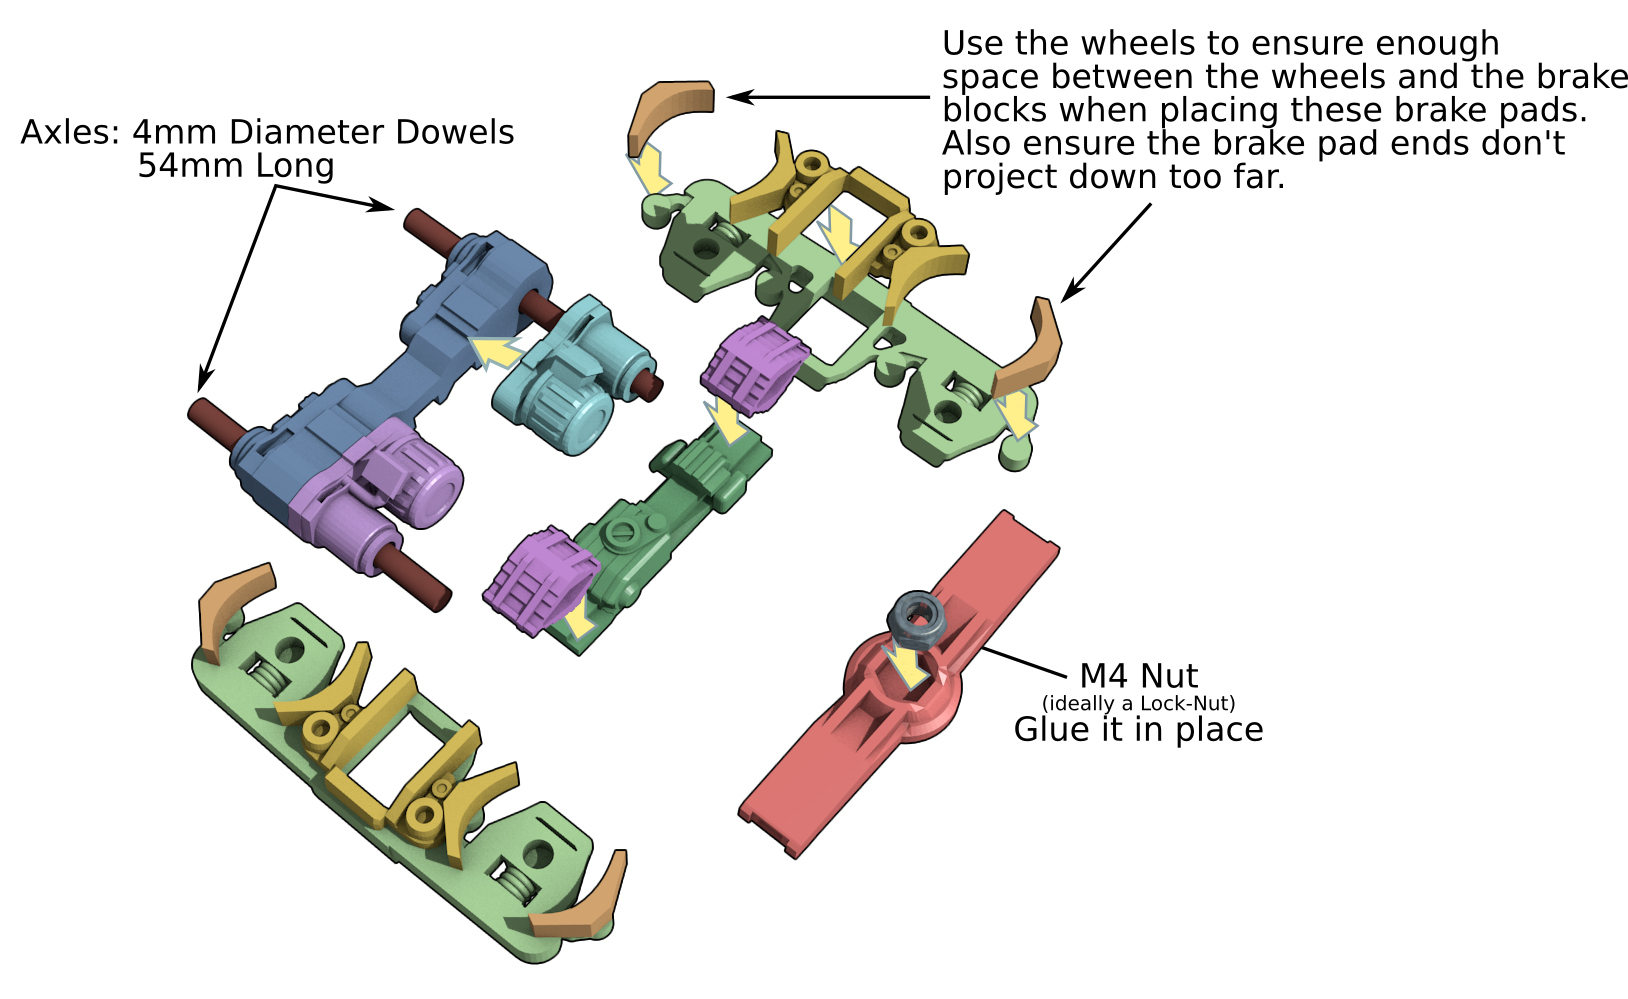
- Both designs incorporate an M4 nut for the pivot connection to whatever structure you want to add to them.
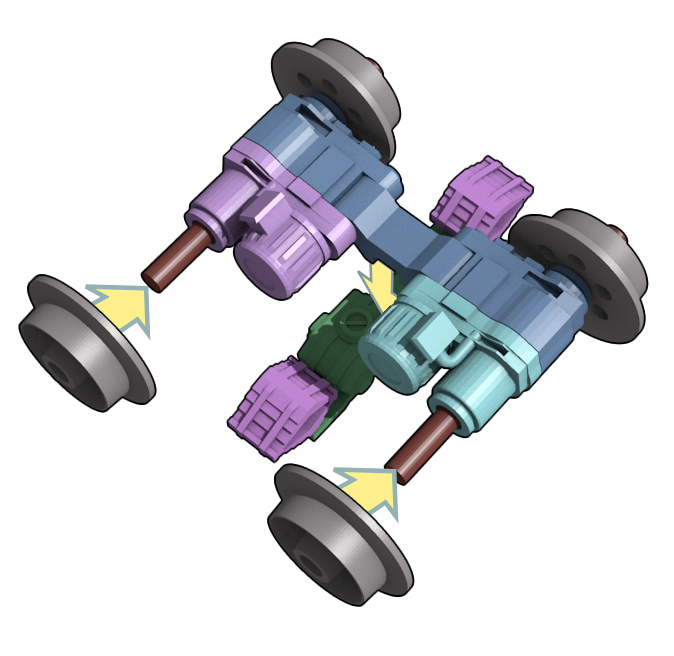
- They also make use of Ø4mm wooden dowel for the axles. In the 1:24 scale version, there are a couple of small Ø4mm dowel pins. Any material will work for these components.
1:24 Scale Bogie Set
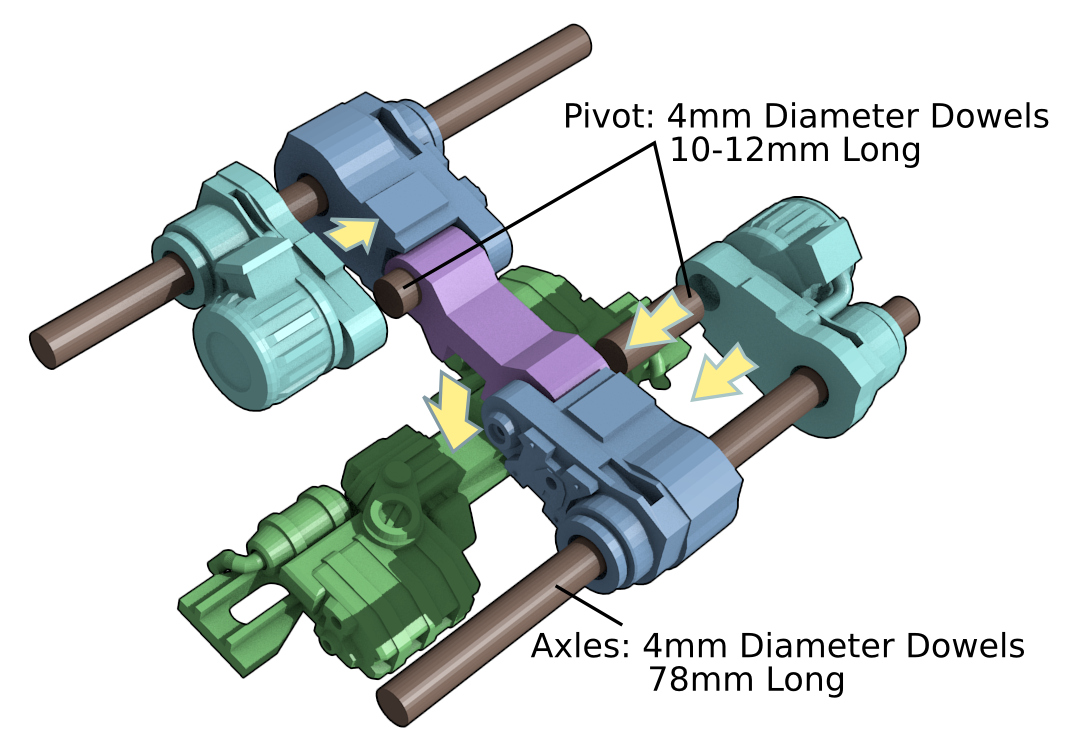
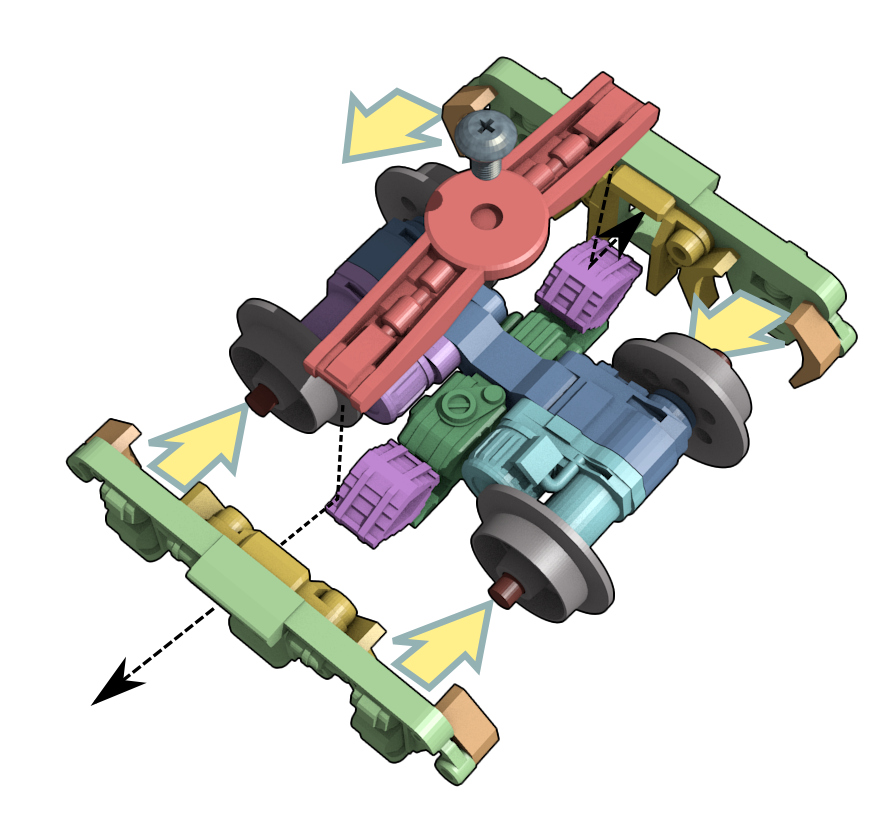
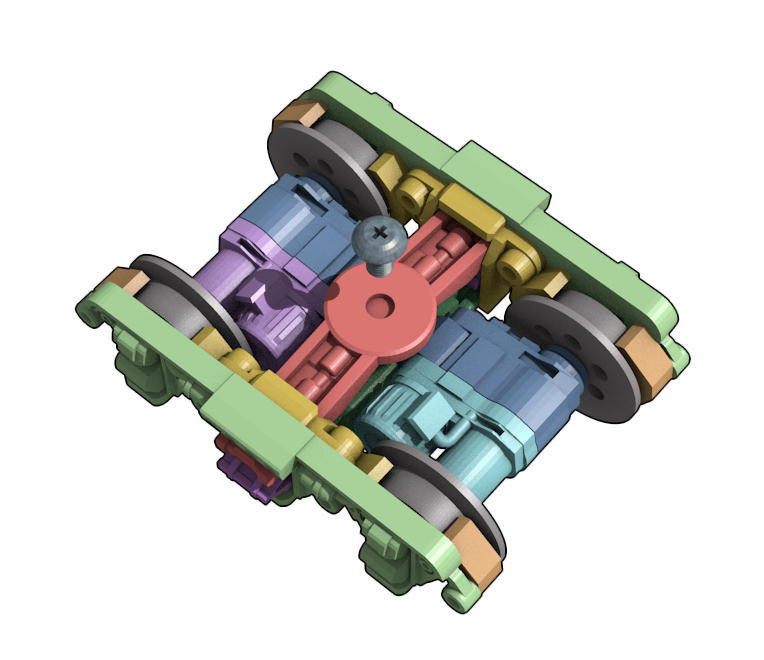
So here is the 1:24 scale bogie set that will suit any 1:24 scale kit-bashing you’d like to do. The overall dimensions of a single bogie are; 85mm wide, 80mm long, and 25mm high.
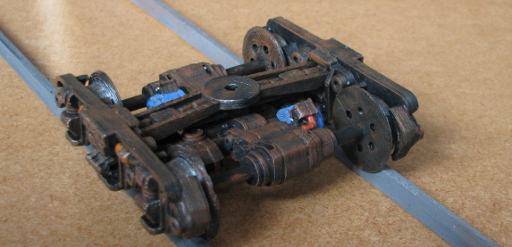
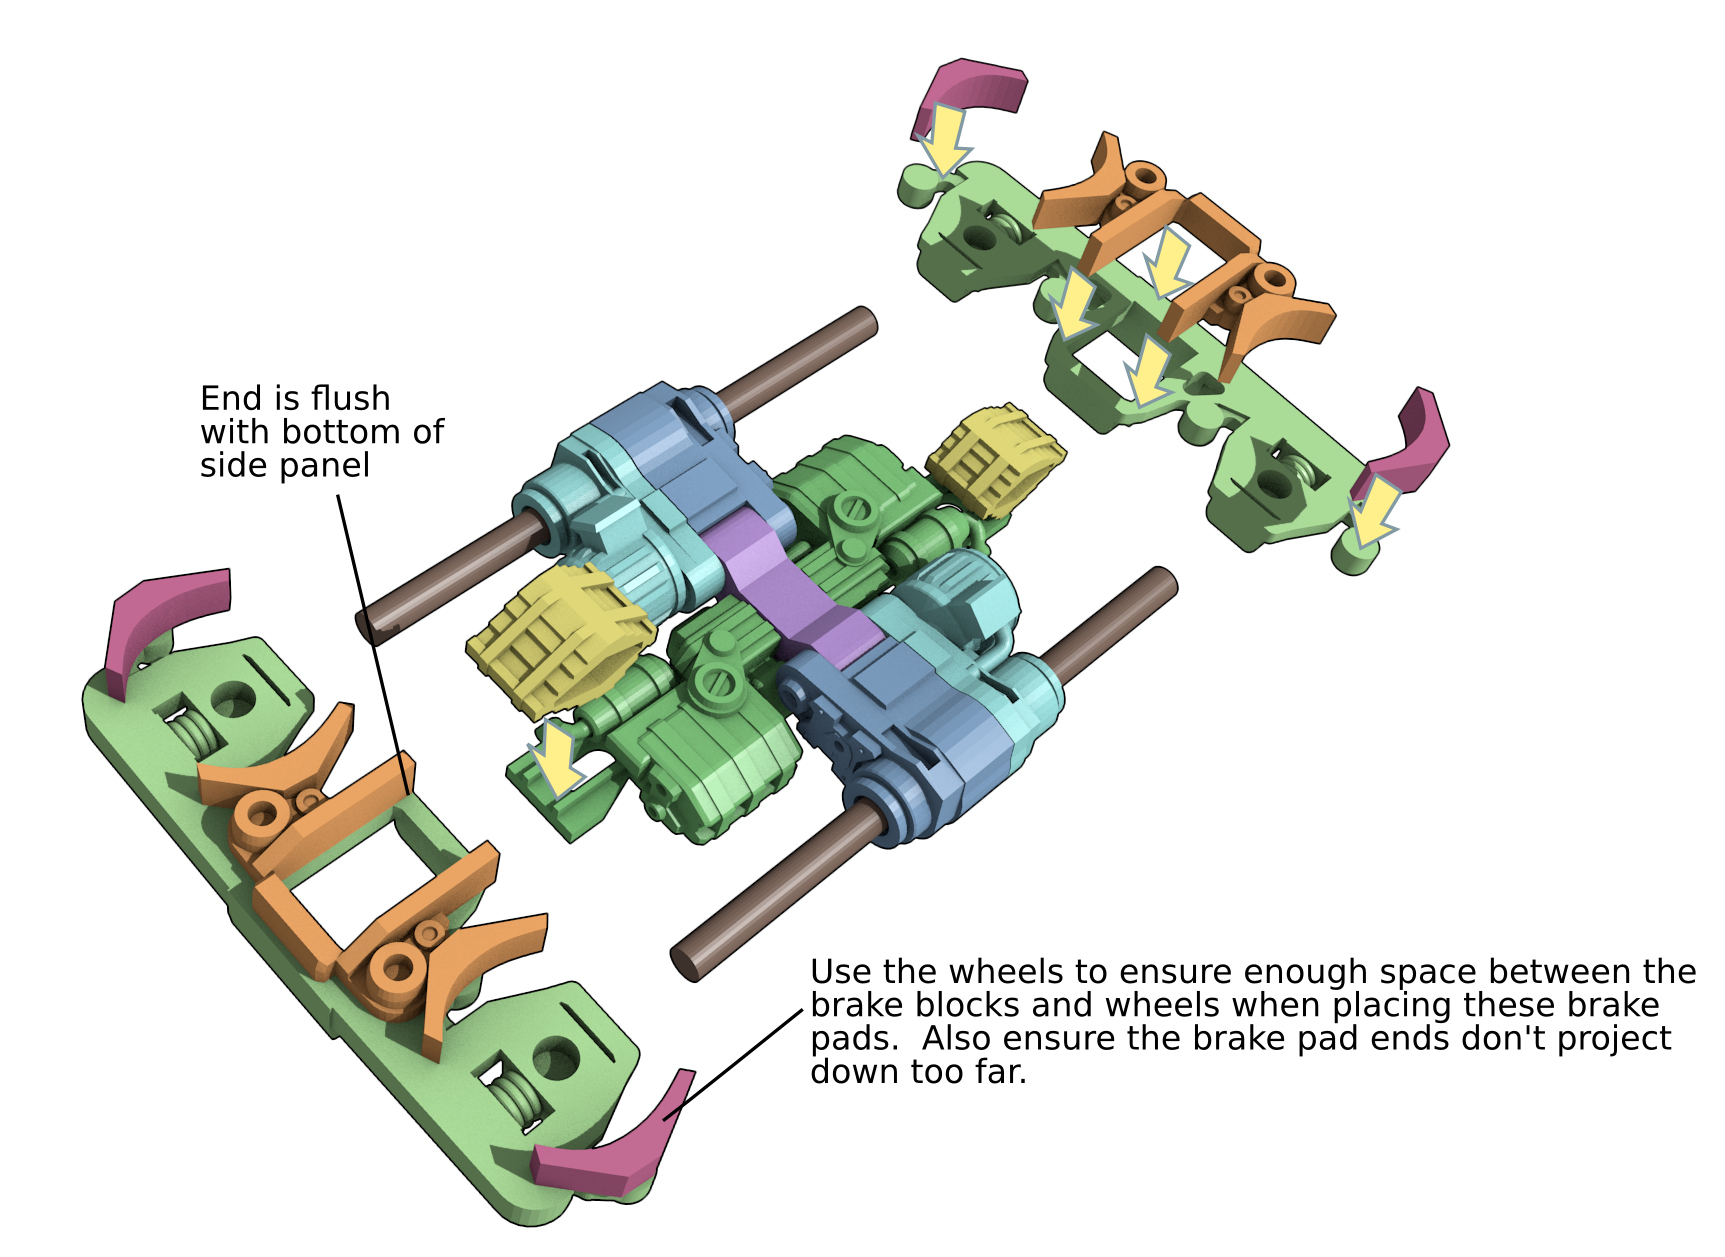
The Ø4mm dowel axle lengths are about 78mm long. The two small dowel stubs used to pin the motor assemblies to the lower central span are 10-12mm long. The hinging arrangement for the motor and axle parts allow for some distortion of the side panels during printing and make assembly easier. You may prefer to ignore the small dowel stubs and hinge arrangement.
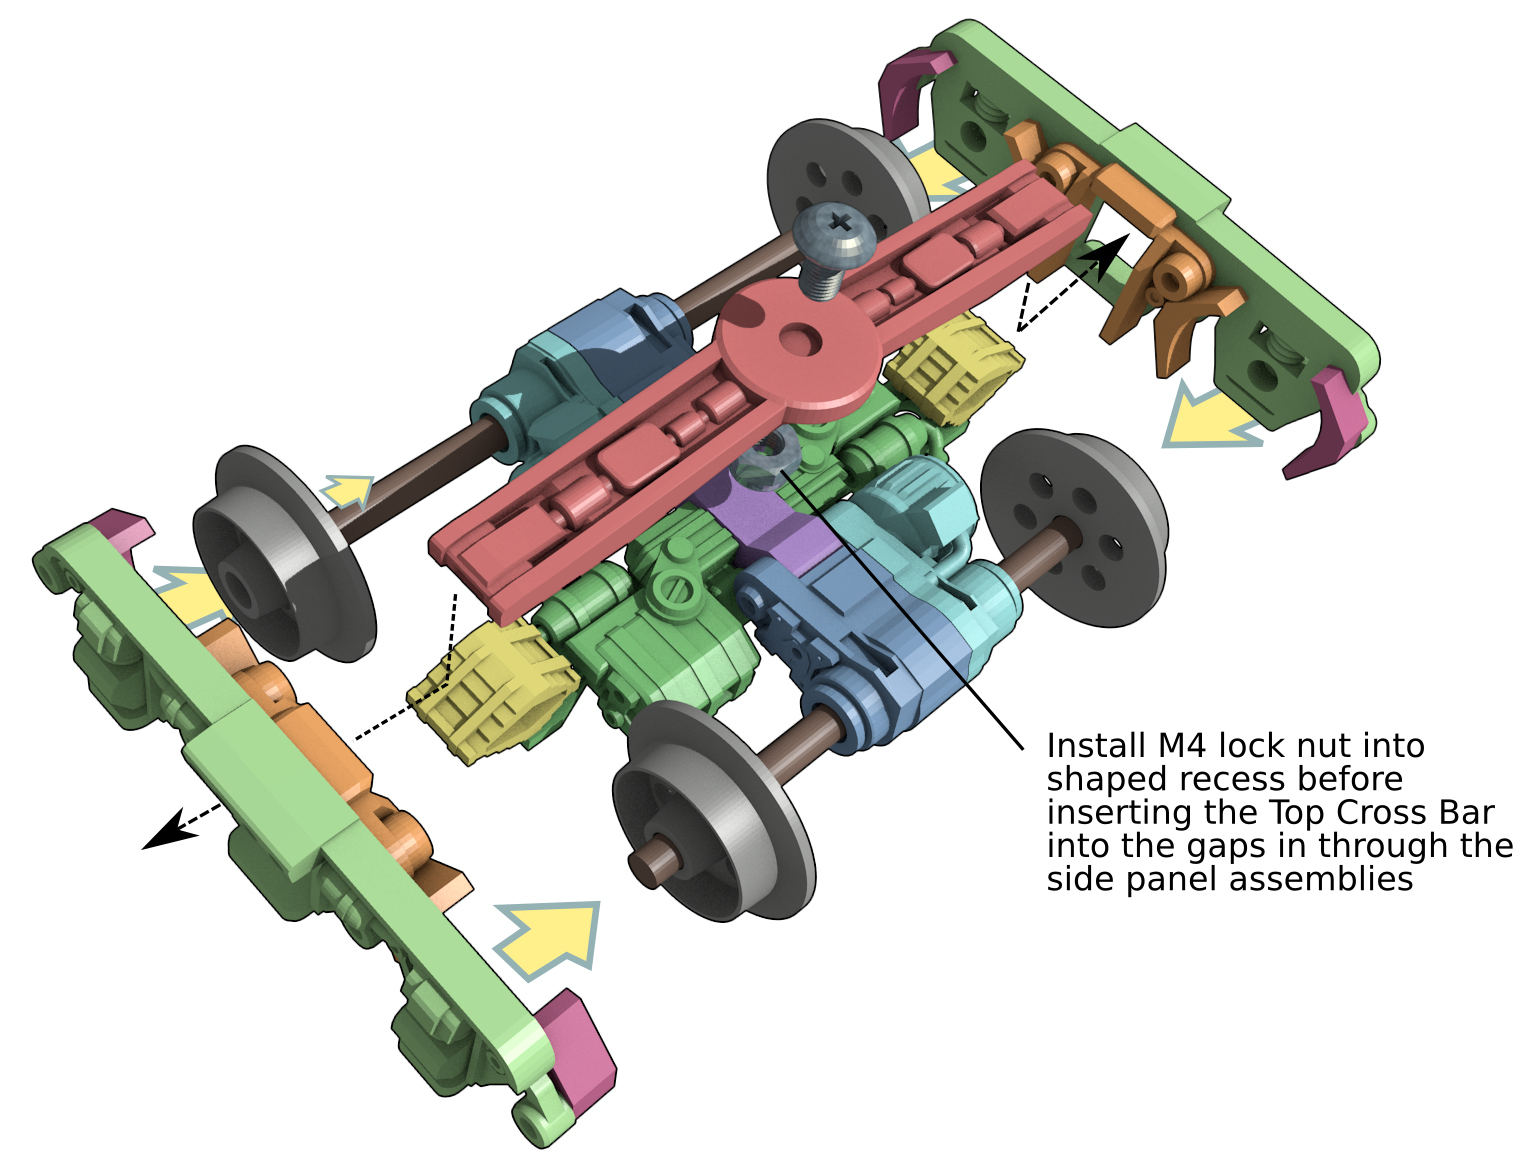
The nut needs to be installed in the top cross spar early in the assembly. I would suggest gluing it into the socket.
No support is required. There are some break-off bits on a couple of the motor components.
Assembly
Step 1
Step 2
Step 3
Finished Assembly
1:24 Scale Bogie Set Downloads
The STL filenames include the number of times you will need to print of each bit. You can download the models from a bunch of different sources;
From this website:
Blender Model: PoweredBogiesv11-blend258.zip
Collection of STLs: PoweredBogiesv11-STLs.zip
From other websites:
From Thingiverse - Thing 2561780
From Youmagine - 1:24 scale powered bogie set
If you are looking for tracks to display your model based on this bogie set, then have a look at these parametric track models. You will just need to set the track gauge to 60mm and sleeper length to 80mm to be compatible with this model.
Narrow Gauge Bogie Set
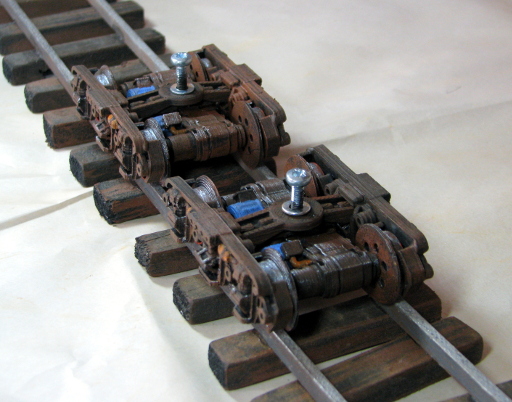
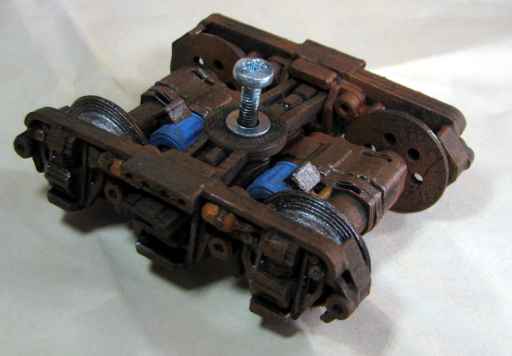
After designing the set described above I was keen to add a version of these to my existing collection of Mine Trolleys and Mine Trucks. This meant some minor redesign to get it all to fit into a narrow gauge configuration. At this scale the track gauge is 36mm between the inside edges of the rails. The overall dimensions of a single bogie are; 62mm wide, 80mm long, and 25mm high.
The wooden dowel axle lengths are about 54mm long.
For this model I had in mind an even more diabolical scheme. Over the years I had also conceived of some very mean looking rail-bike fusions. I had a couple of Maisto motor bike models kicking around awaiting some kit-bashing project. One of these is a Harley Davidson – I think the scale is 1:18. It started out with some nice shiny silver motor and components. After some short work with the black primer and dry brushing it looks much more bad-arsed.
Here are some early concept images of what I had in mind.
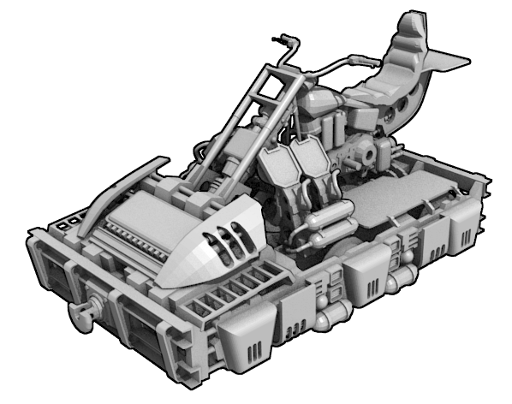
An early Rail-bike - The original 6-wheeler concept
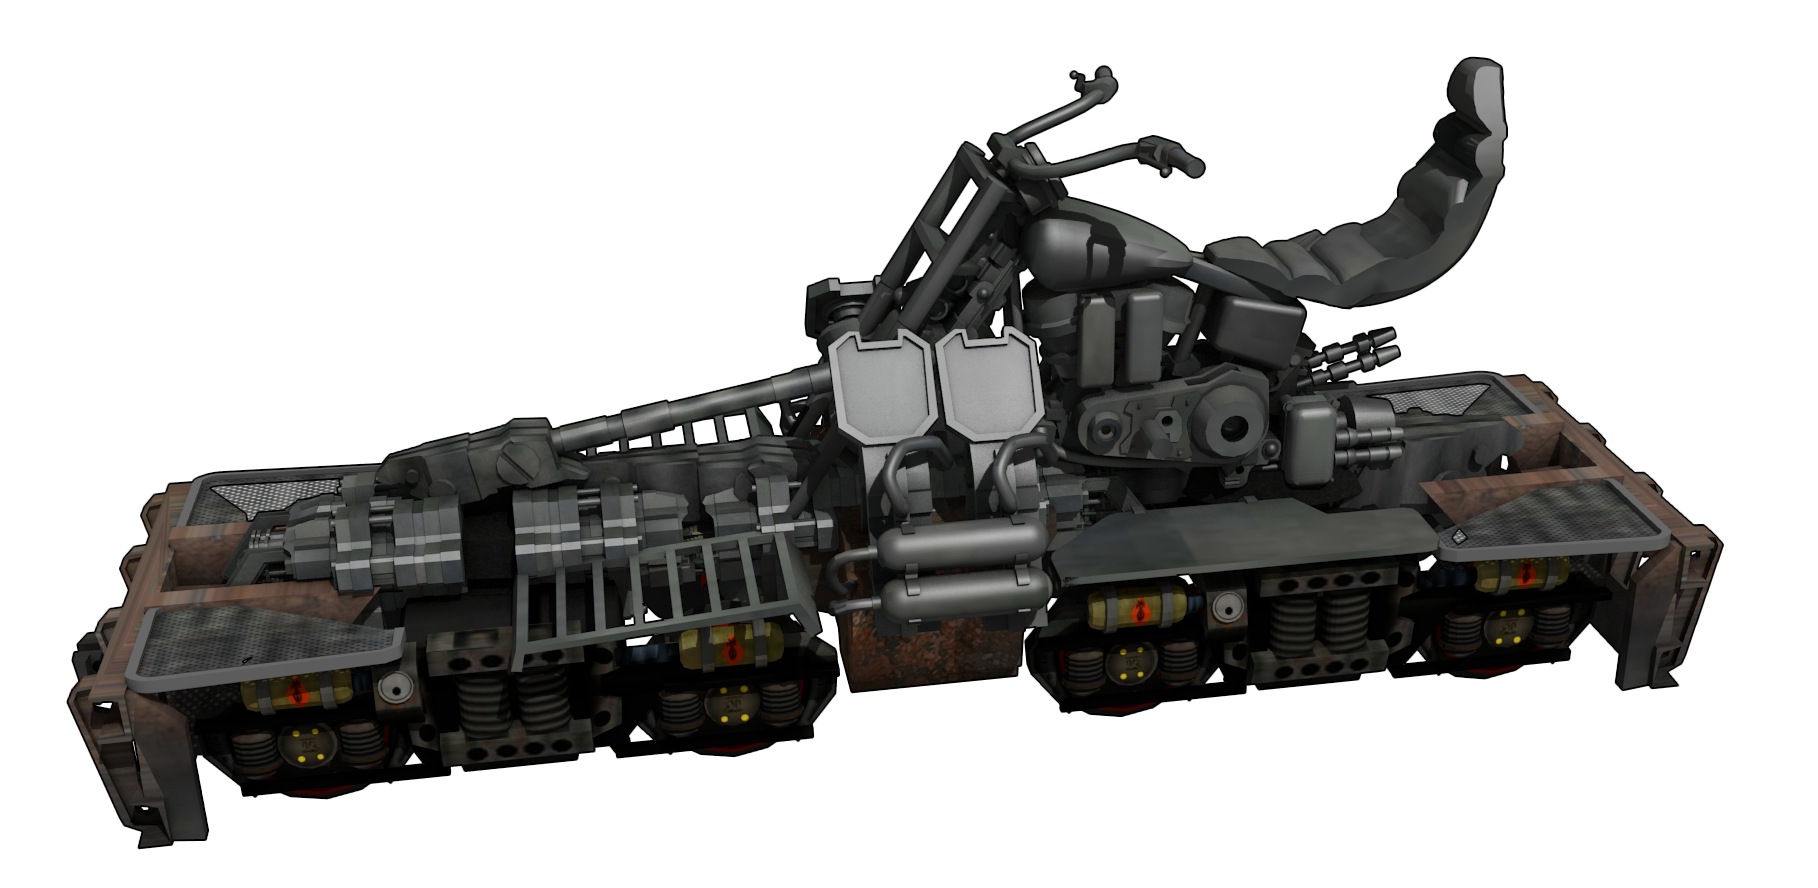
A completely over-the-top articulated rail-bike concept
And here is the article describing the finished project; 3D Printed Railbike
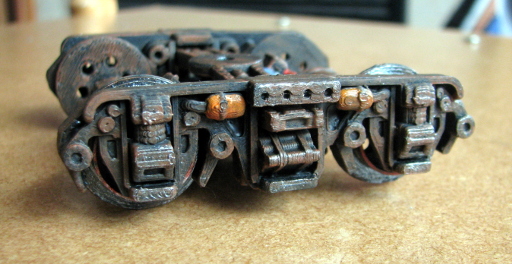
So here are a couple of pictures of the narrow gauge bogies, printed and painted awaiting the rest of the rail-bike assembly. Not the best shots, sorry.

Assembly
Step 1
Step 2
Step 3
Completed Assembly
Narrow Bogie Set Downloads
The STL filenames include the number of times you will need to print of each bit. You can download these models from a bunch of different sources;
From this website:
Blender Model: NarrowPoweredBogiev2-blend258.zip
Collection of STLs: NarrowPoweredBogiev2-STLs.zip
From other websites:
From Thingiverse - Thing 2561782
From Youmagine - narrow gauge powered bogie set
from Cults3D - narrow gauge powered bogie set
If you are looking for tracks to display your model based on this narrow gauge bogie set, then have a look at these parametric track models. You will just need to set the track gauge to 36mm and sleeper length to 58mm to be compatible with this model.


This design by Hamish Trolove is licensed under a Creative Commons Attribution-NonCommercial-ShareAlike 4.0 International License.