3D Printed Railcar Chassis
Quite some time ago (like 30yrs ago) I decided that I liked the idea of a car body on an articulated railway chassis. I made one up with the limited skills and tools I had at the time. It was a matchbox car on some HO rail bogies with a metal rod for the chassis spine and some bits of plastic crudely cut for buffers and other details. It was kinda crude.
The theme persisted and became better developed as I started playing around with computer graphics in Carrara and Bryce. This was transferred to Blender and suddenly the project became viable with the arrival of 3D Printers.

So, continuing with this theme started with the Mine trolley for Stop Motion, here is the railway chassis for fitting to 1:24 scale model cars. It is designed to fit 1:24 scale standard gauge tracks.
I have found that it works really well with Die-Cast muscle cars from Maisto and MZ. I have also built one using the DeLorean Model by heisenberg333. Scaling the Delorean model down to 1:24 scale was quite problematic at printing time because of thing sections in some areas and poor quality geometry. Quite a bit of air dry clay was required to fill some of the slicing errors. Having said that, there are no shortage of very cool looking car models on Thingiverse. If you are looking to build this project you may need to modify the Mainframe component (Railcar-Mainframe.stl) to fit whatever model you choose to use, but I have set up the mesh to be quick and easy to modify with any halfway descent modeler capable of working at the vertex and polygon level.
The component filenames include the number of items required of each. For instance Railcar-BogieInSidesx4.stl needs to be printed four times. If there is no number noted, then just print it once.
The model also makes use of my Parametric Footplate model. So if you don’t like the footplates included in this package you can easily use the OpenSCAD script or the Thingiverse Customiser to generate something that meets your needs.
Downloads and Things
Download the STLs from here:Railcar-Chassis-STL.zip
You can find an assembly guide here: Railcar_Chassis_Assemblyv0.pdf
Additional things you will need;
- A 1:24 scale car body
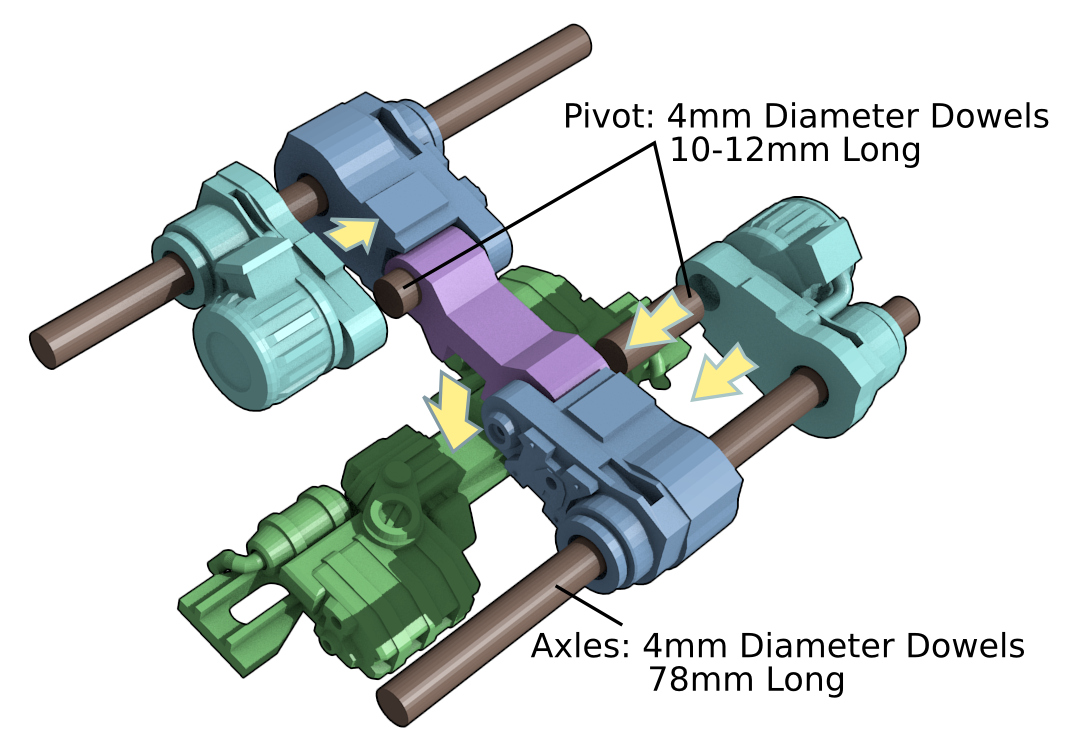
- Some 4mm diameter dowel for axles and locator pins (or M4 threaded rod)
- M4 x 10mm dome head cap screws, washers, and nuts to secure the bogies to the frame (if you want them to move that is)
- Some wire for pipes (7.5A insulated wire is about the right size)
Here is the list of my previous projects that have been incorporated into this project;
- Bogies for 1:24 Scale Standard Rail Gauge
- Parametric Footplate model
- Vintage Railcar
- Railbike Chassis
If you are looking for tracks to display your model on, then have a look at these parametric track models. You will just need to set the track gauge to 60mm and sleeper length to 80mm to be compatible with this model.
Happy building

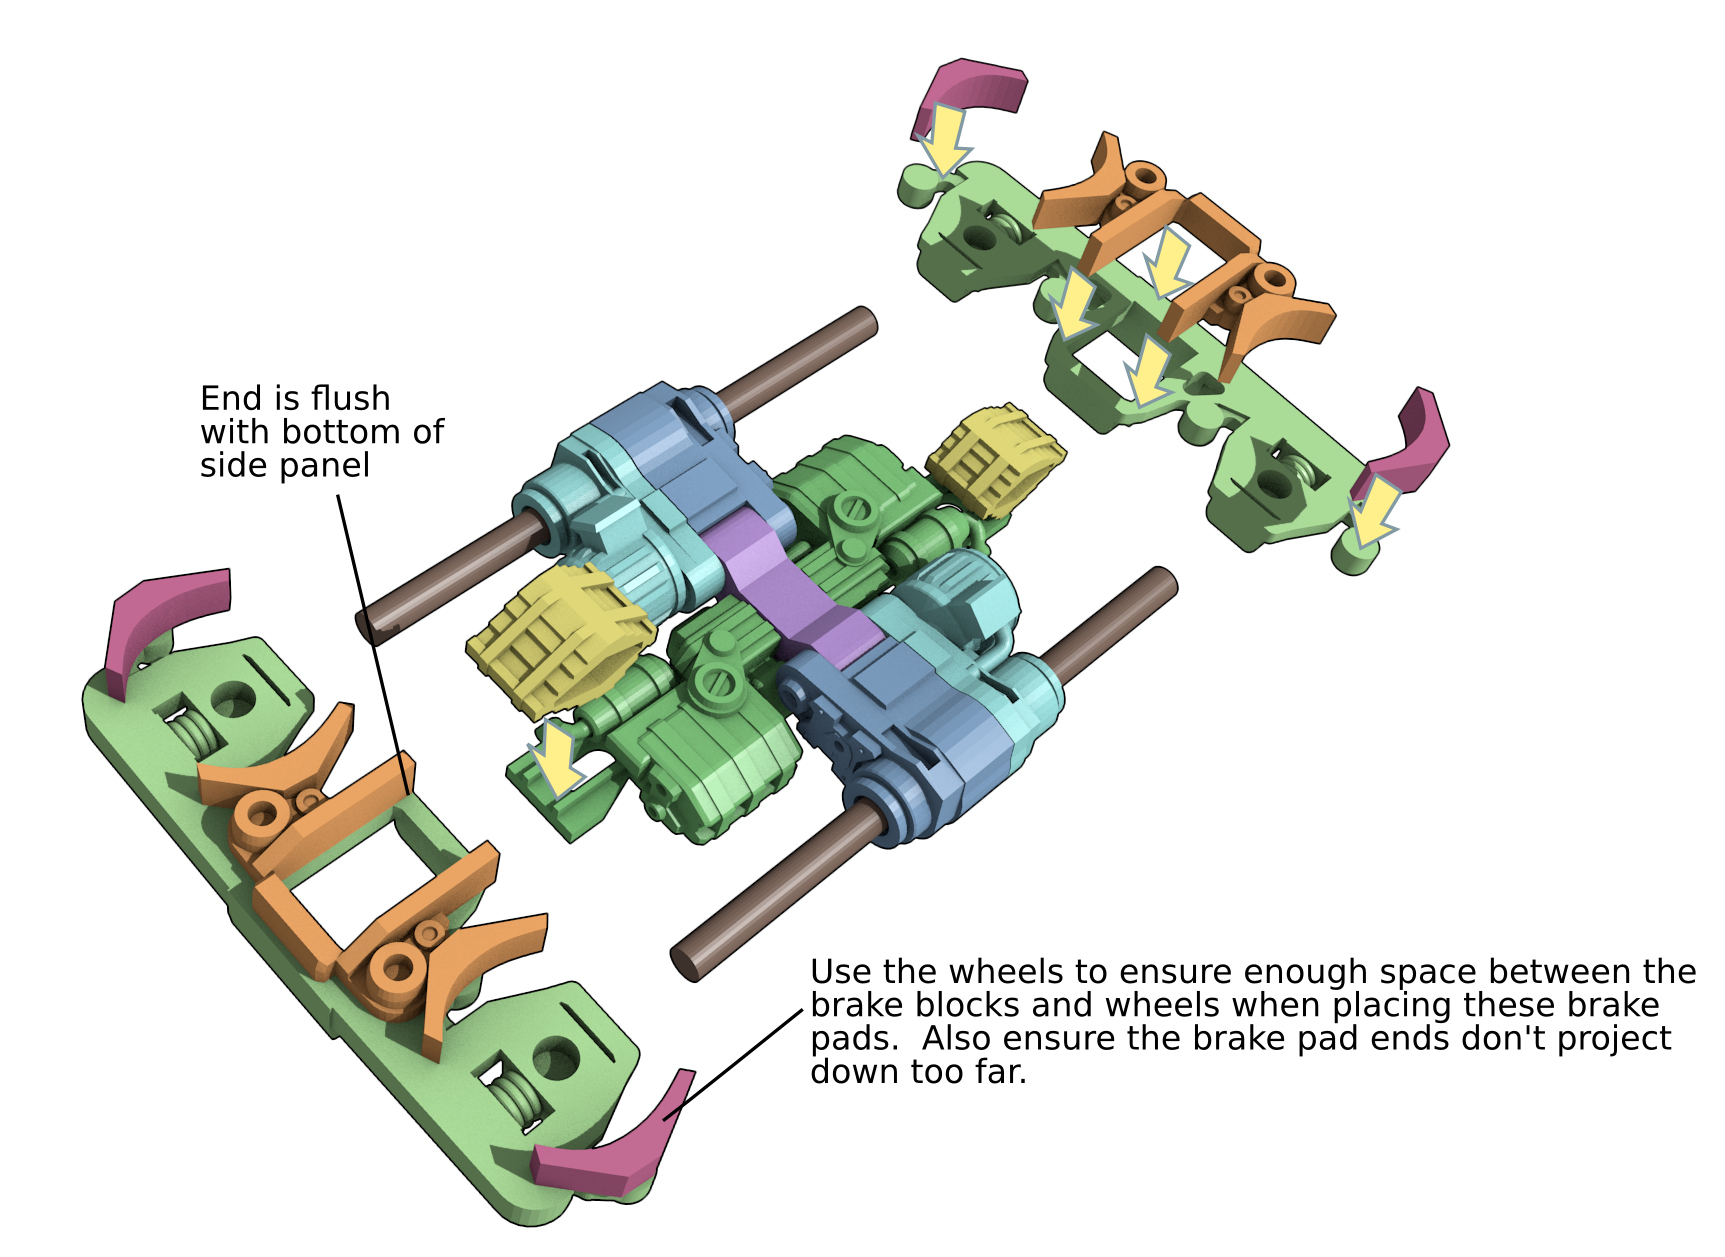
Assembling the Bogies
The two bogies are exactly the same. As you assemble it be aware you will need to install a nut into the upper cross piece (Railcar-MainSupportSpanx2.stl) and do all painting before final assembly of the bogie.
Step 1
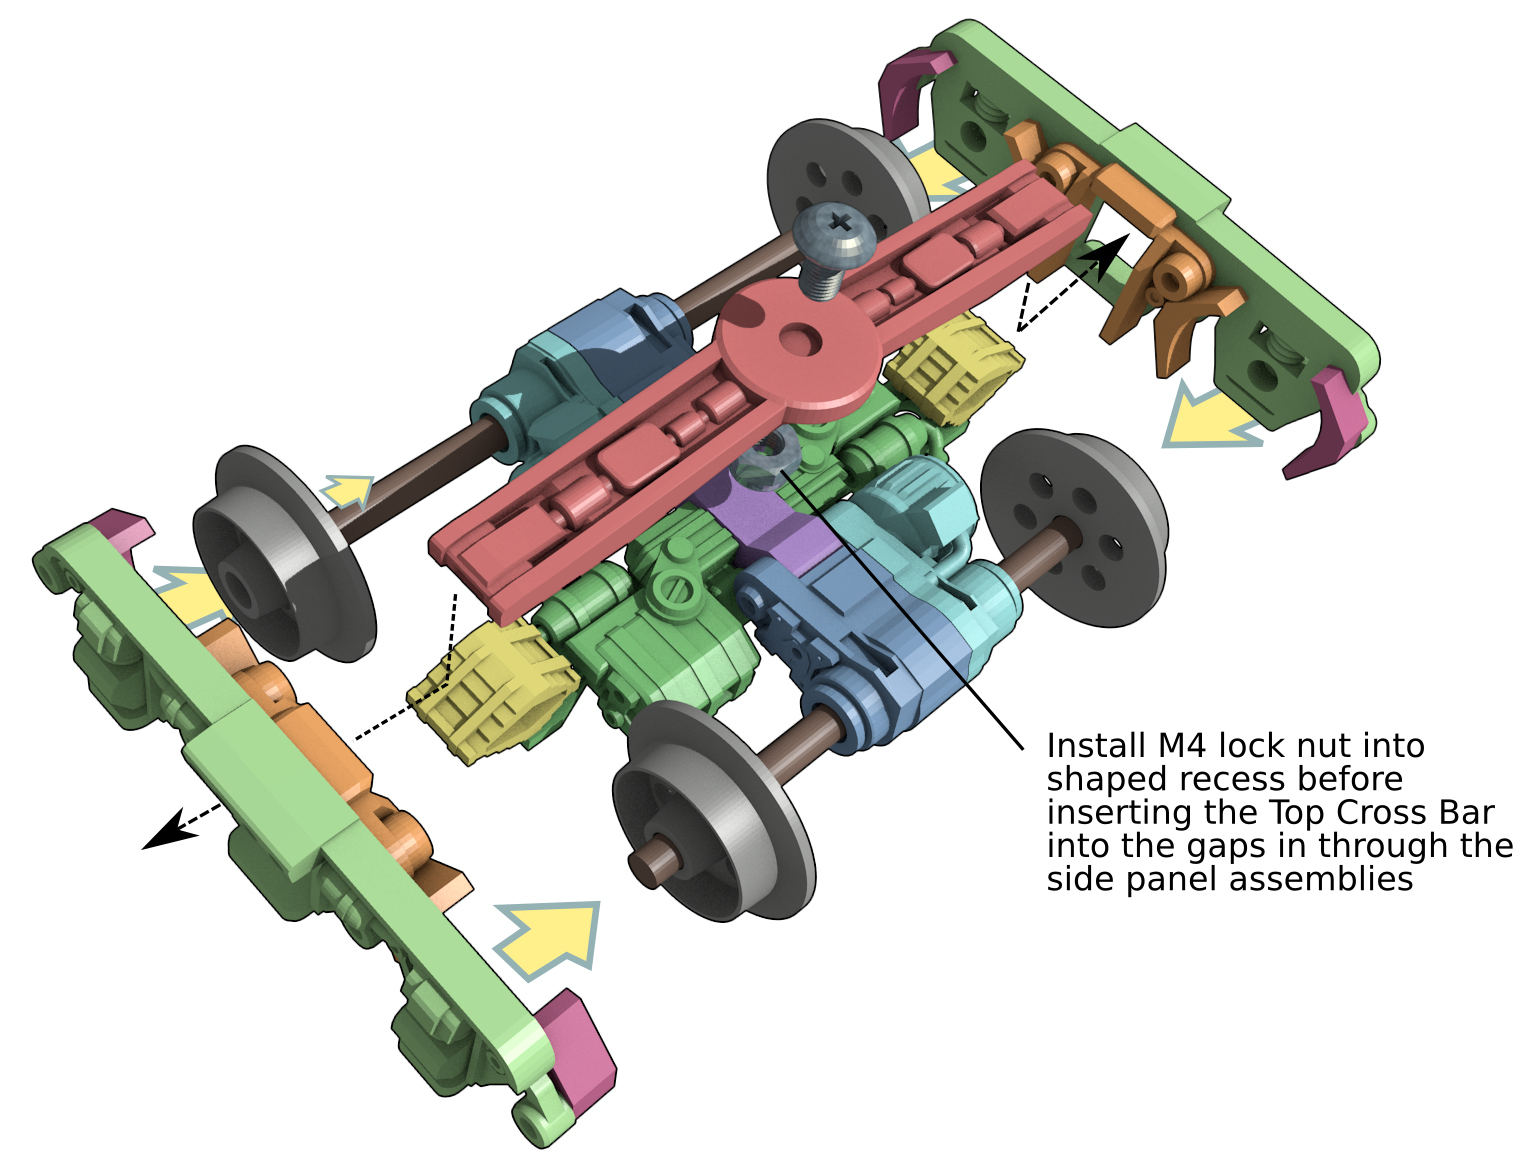
Step 2
Once this stage is completed it is worthwhile painting all parts of the bogie.
Step 3
Finished Assembly
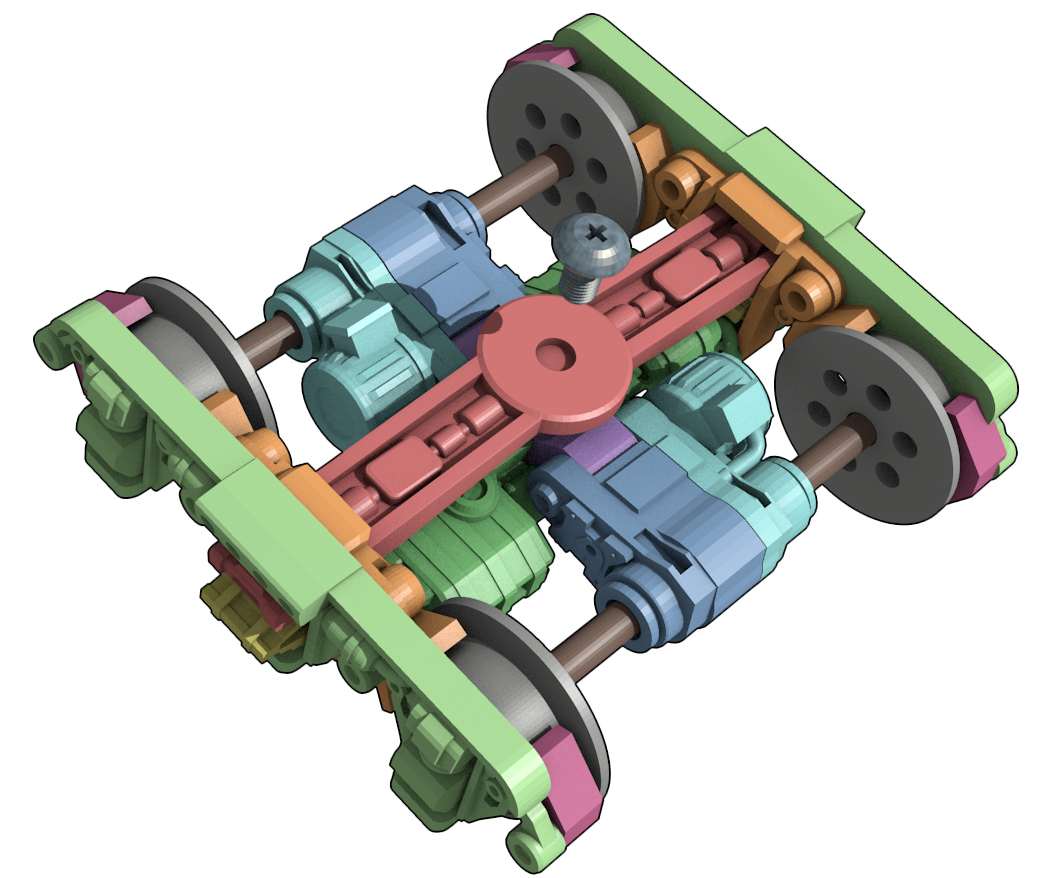
That completes the two bogies.
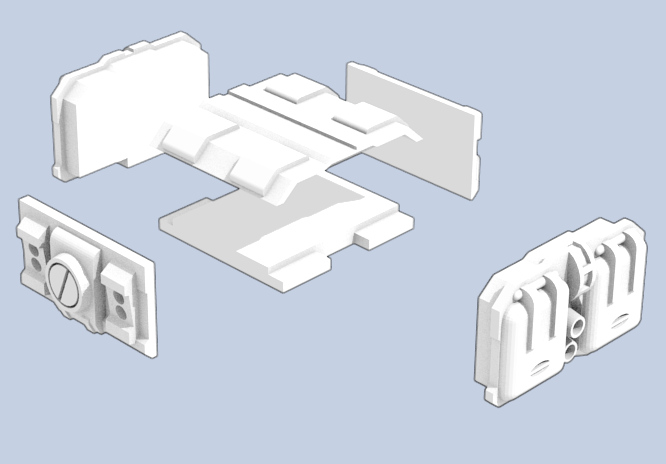
The Main Frame
Step 1
Assemble the box thing that goes under the frame.
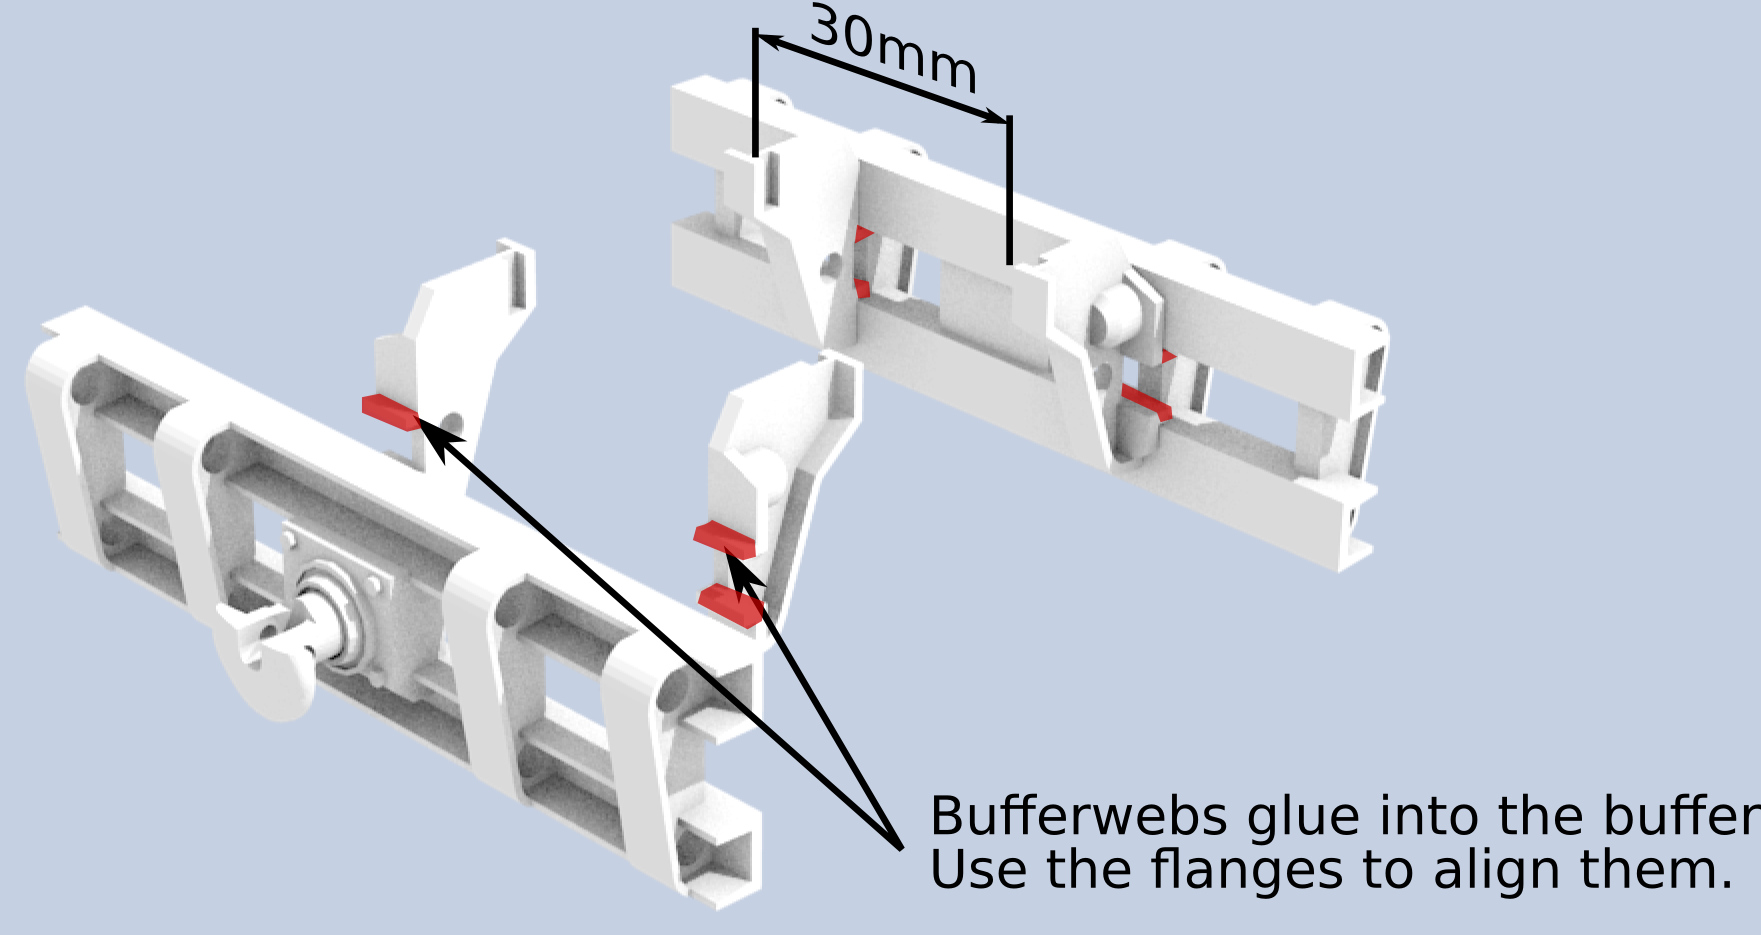
Step 2
The buffer webs can be located with the small flanges as shown below. The space between the webs is about 30mm, but check this against the width of the Main Underframe’s ends.
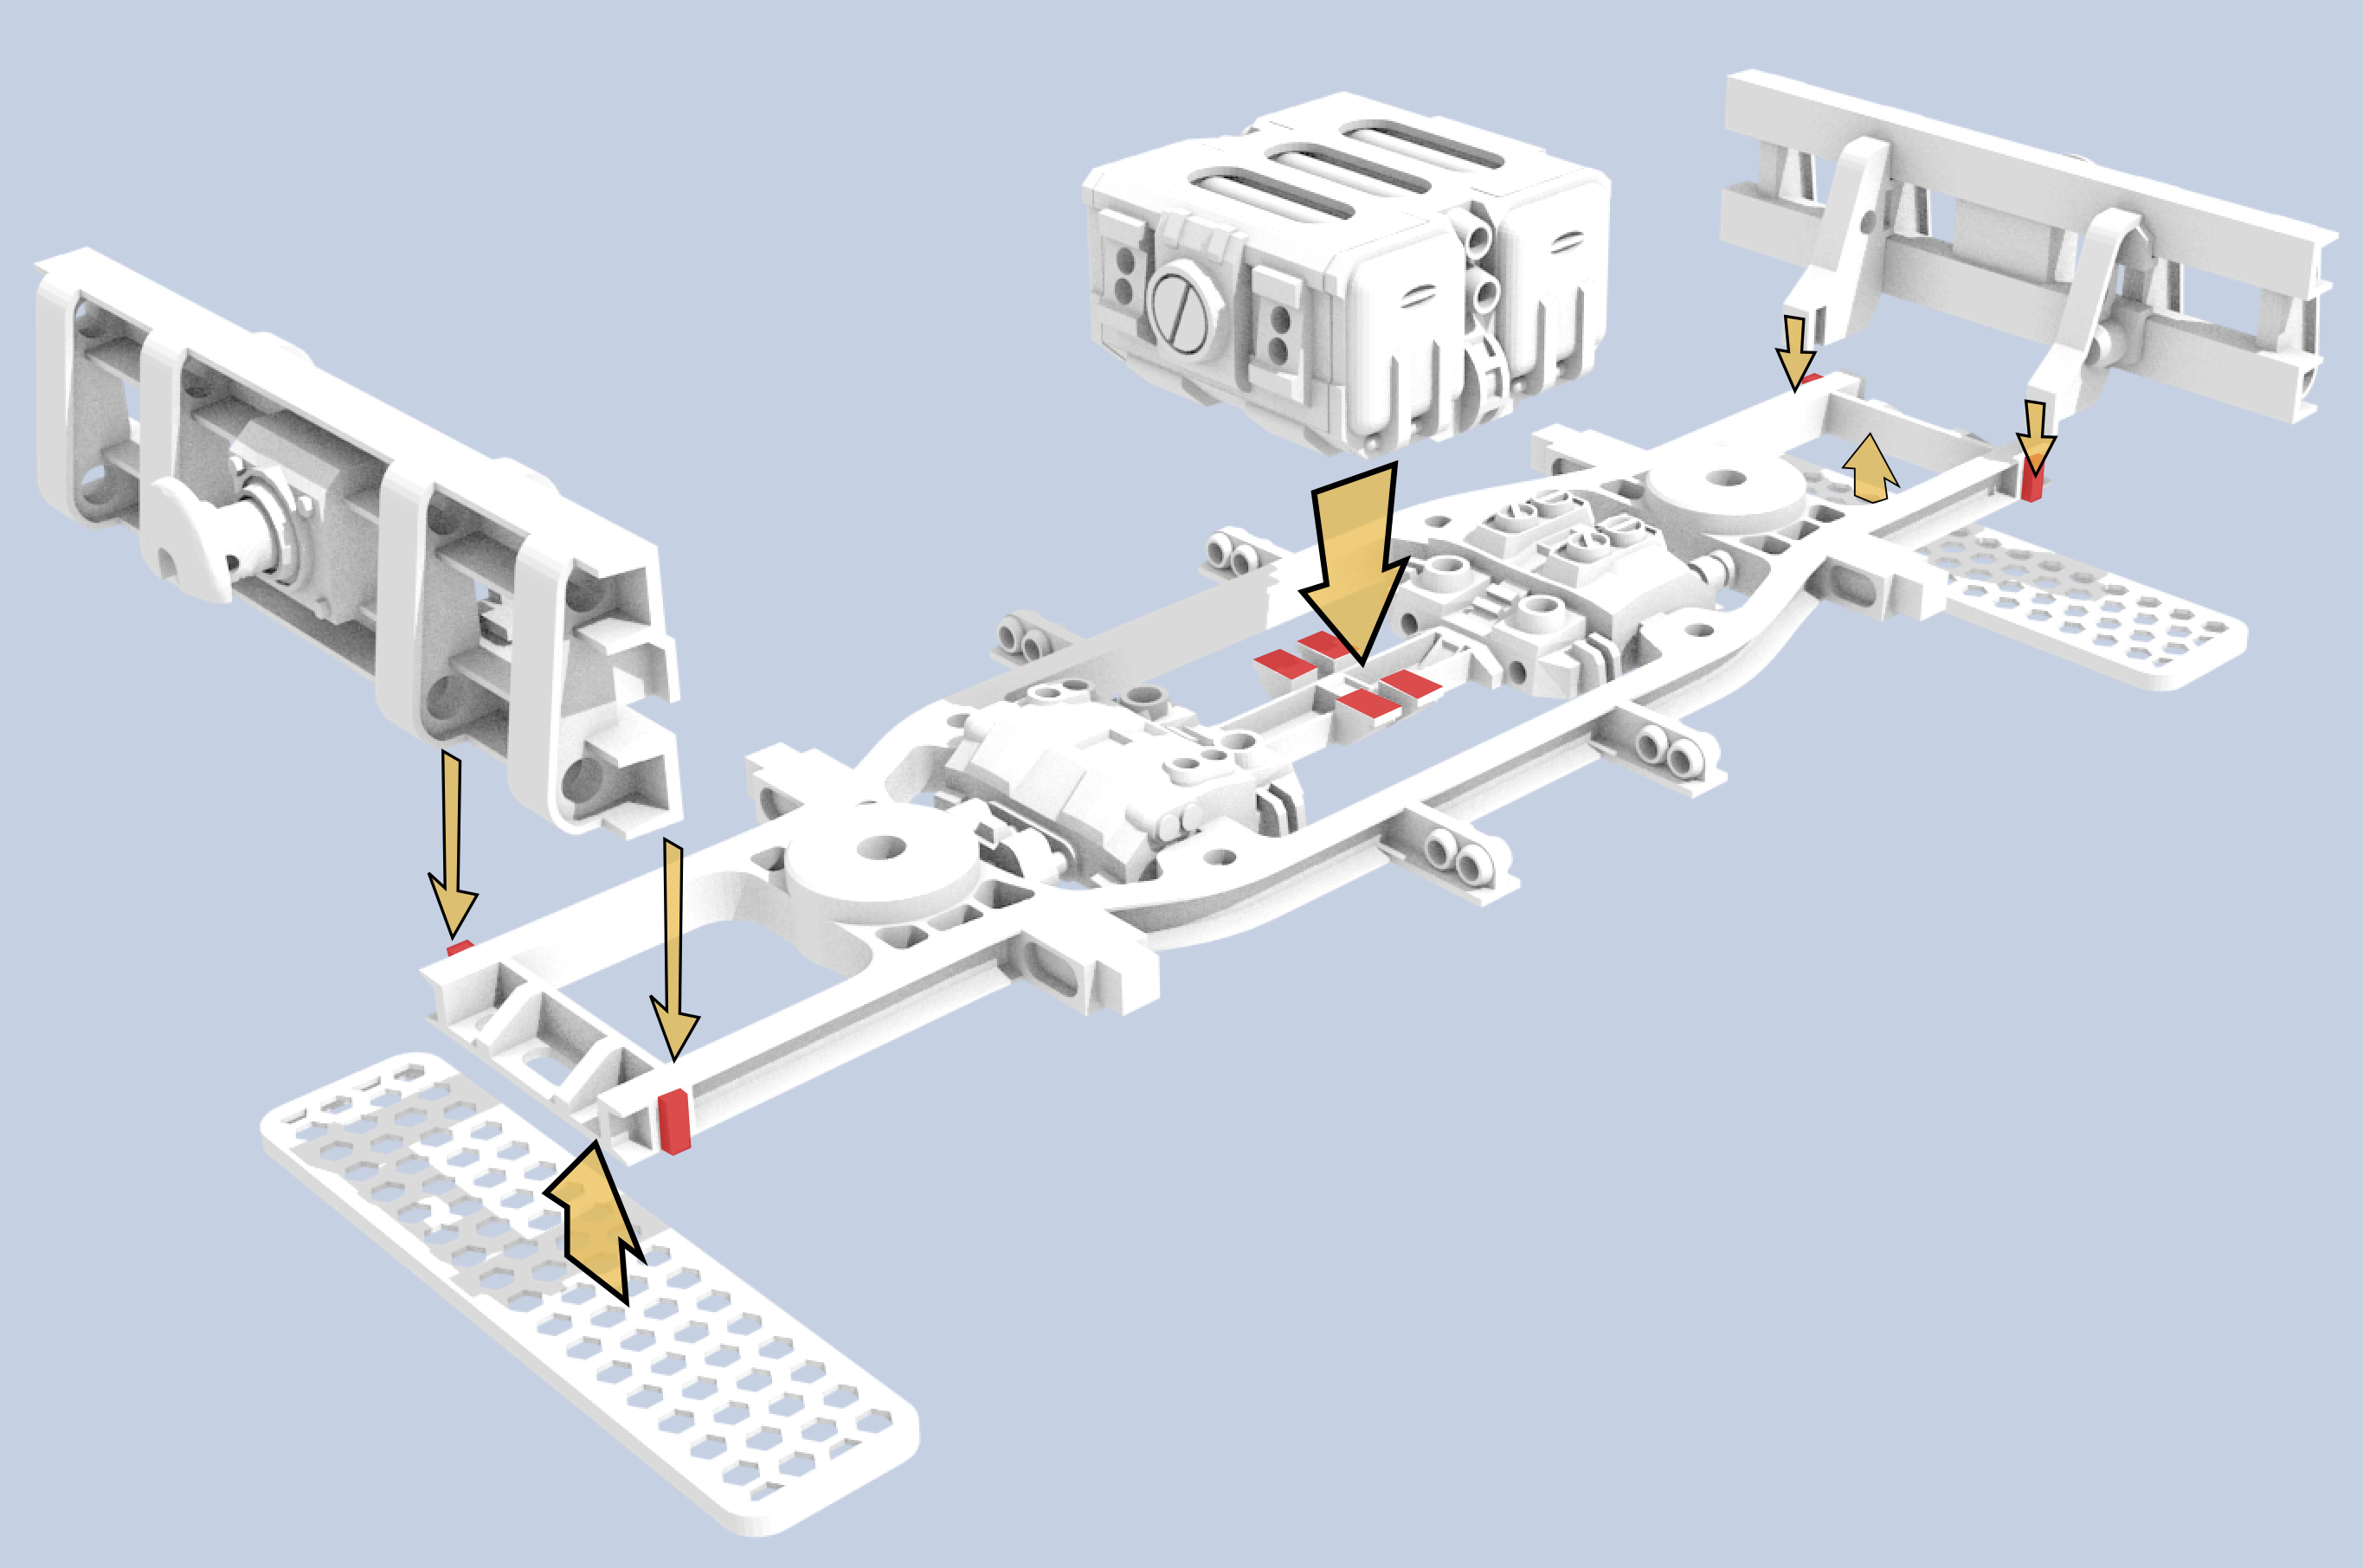
Step 3
Glue the box under the frame onto the pads shown. The side with the four holes in it faces towards the front of the frame. You can tell which end is the frame’s front by looking at the detailed bits near the middle of the frame. The detailed bit with the four holes (that strangely look similar to the four holes on the front of the box) is the front end. The buffer assemblies can glued onto main frame using the locater lugs to position them. Glue the footplates in place.
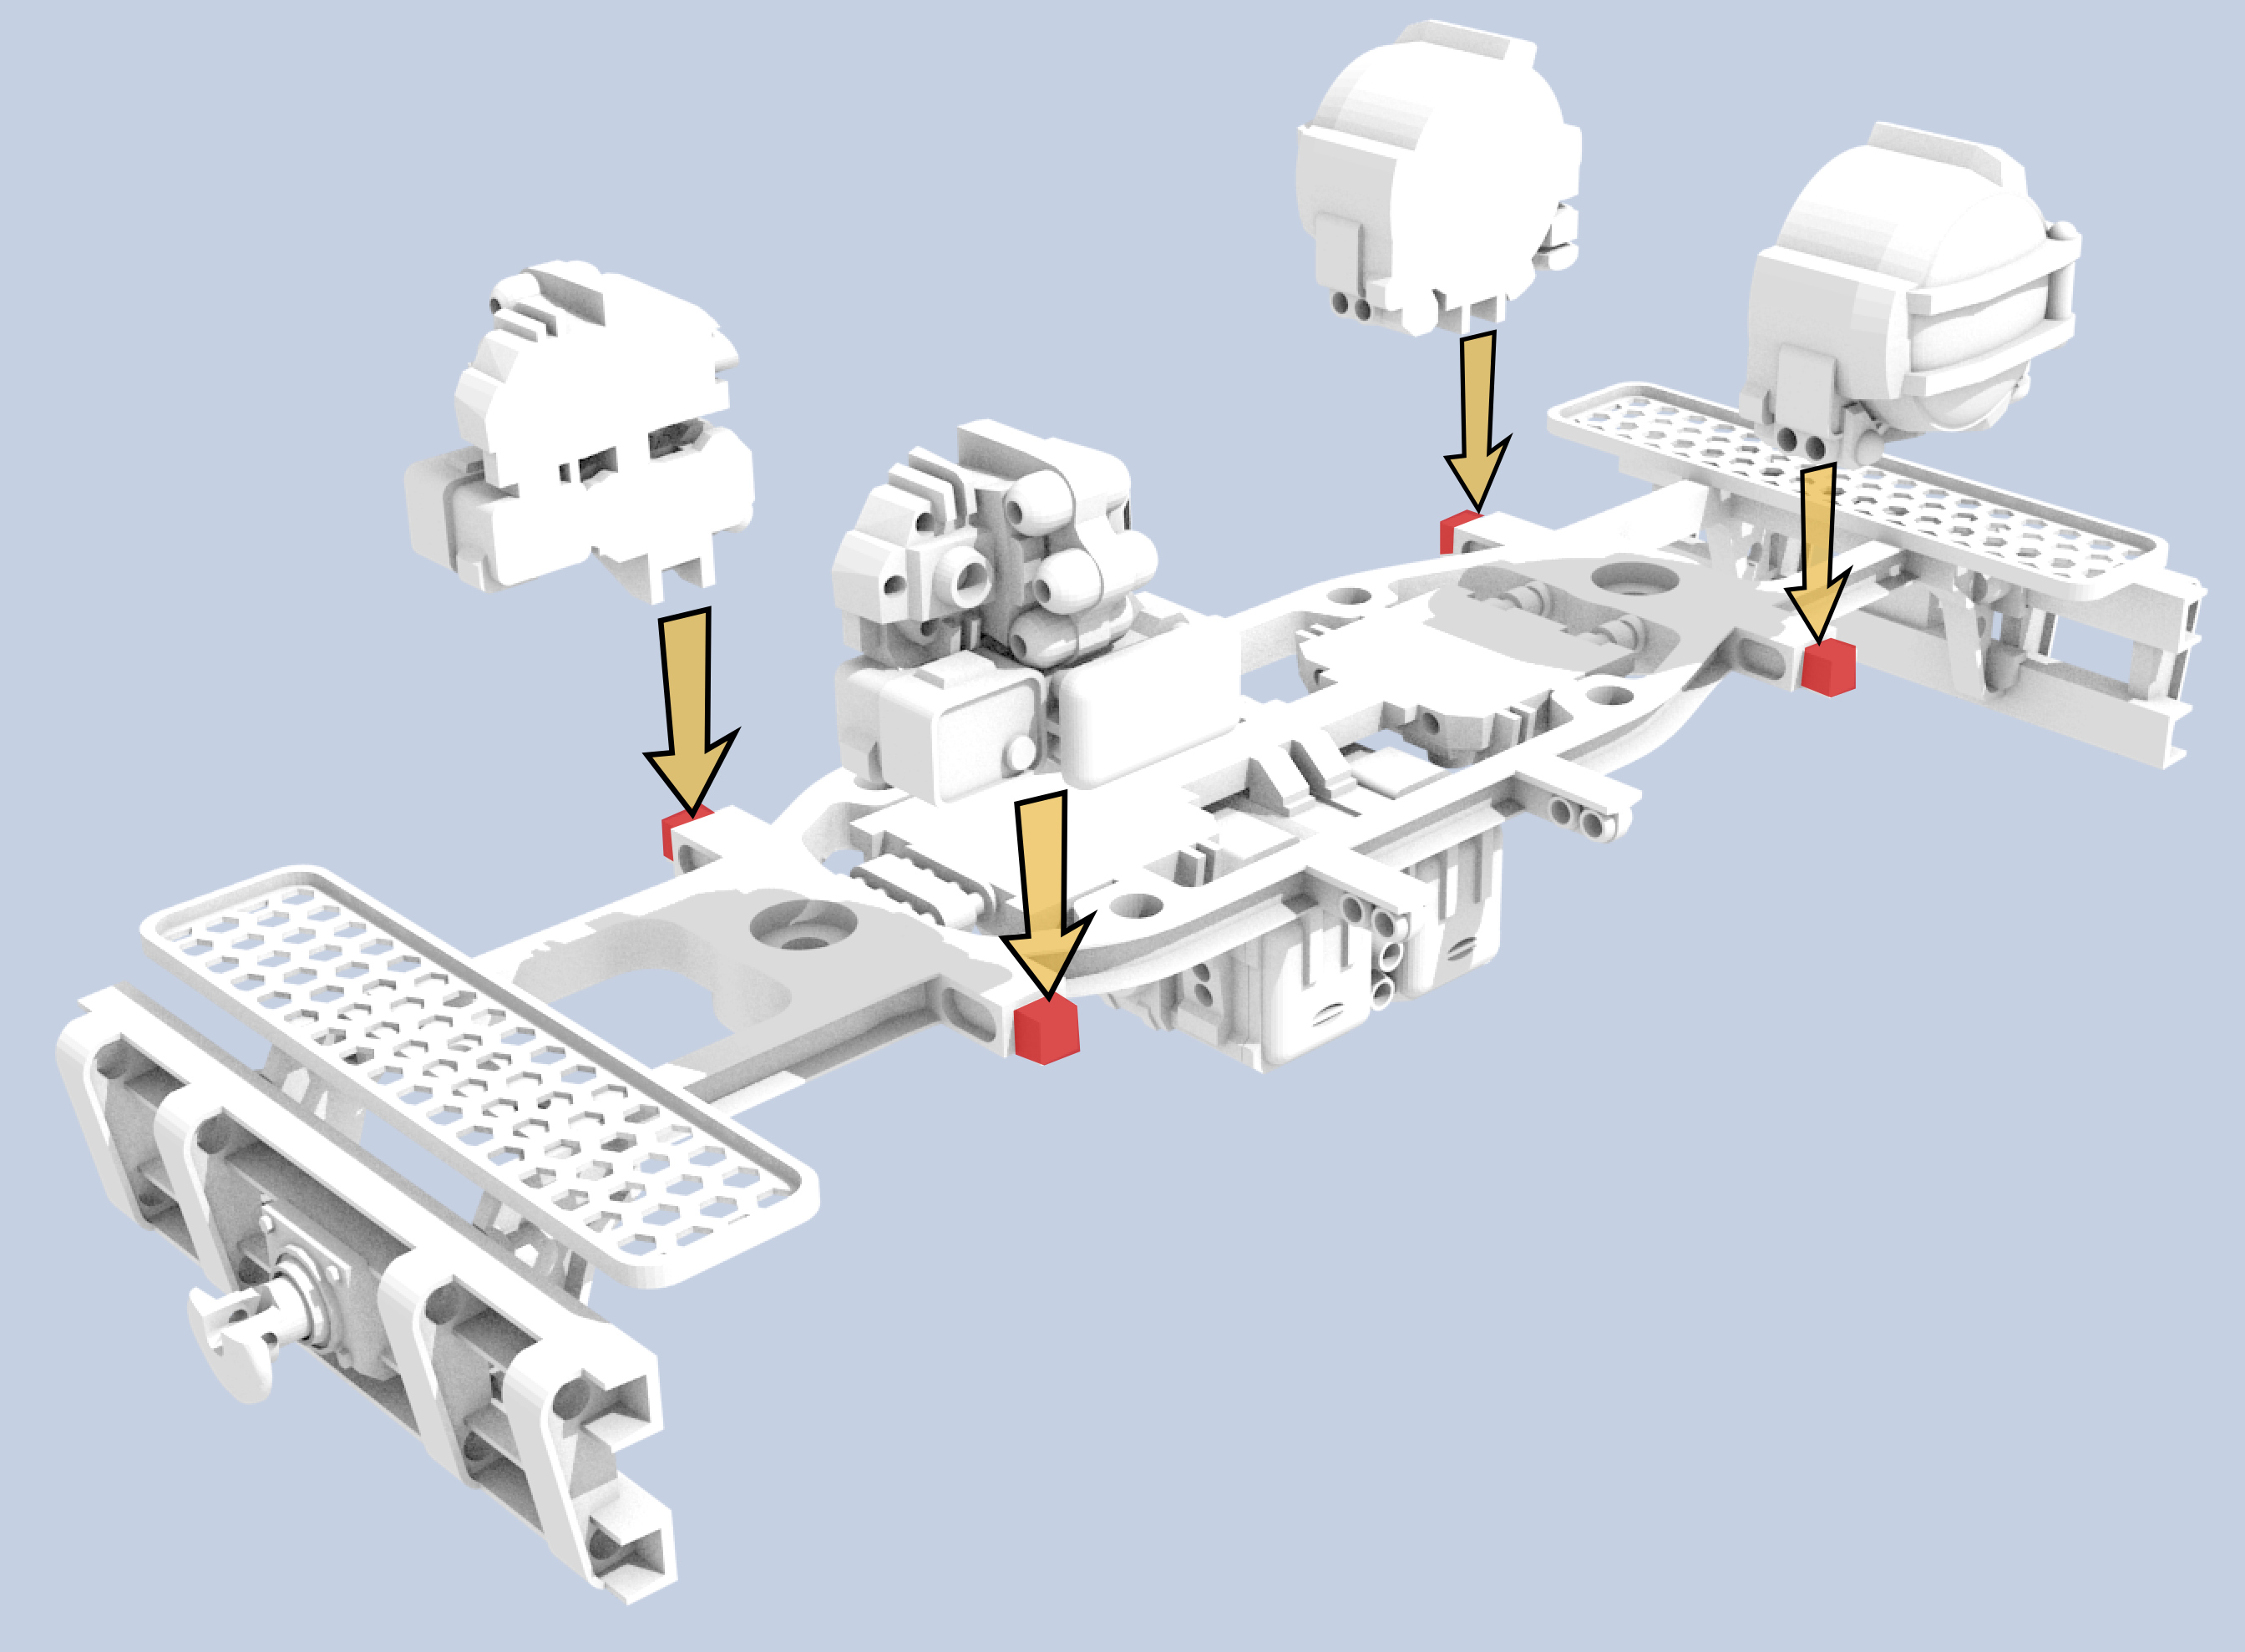
Step 4
Depending on the clearance around the vehicle body’s wheel arches you can glue the front and back wheel arch details in place on their respective lugs. Be aware of which end of the frame is the front. The big dome-like detail bits go to the back. You may need to install these bits at a later stage once the car body is in place.
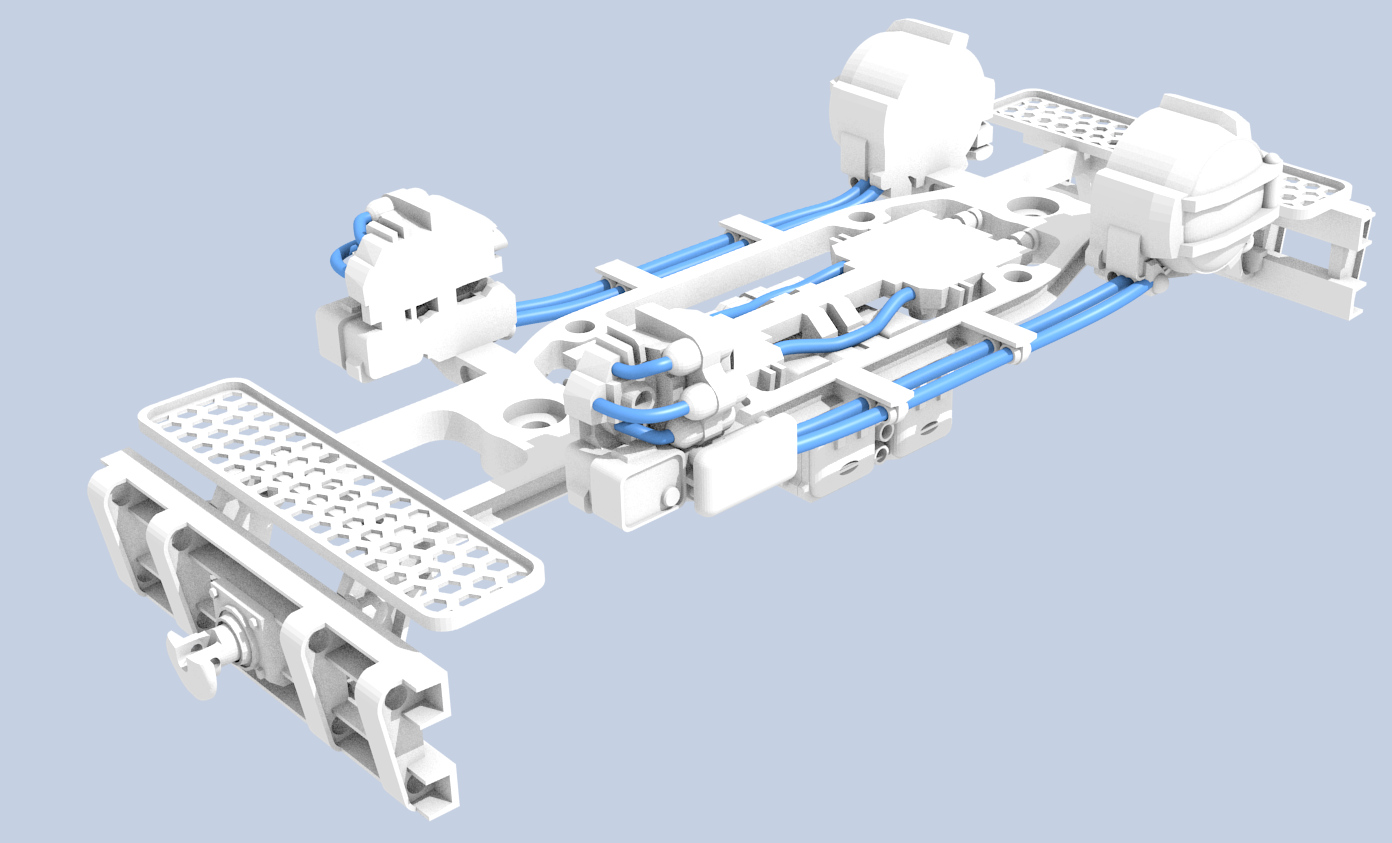
Step 5
Install the wires. There are also four short wires underneath joining the underside box to the main frame using those small holes referred to in Step 3. If you were unable to install the wheel arch detail bits in Step 4, put them on the wires running along the side of the frame, but leave them hanging until the car body is installed.
Step 6
With M4 screws (10mm long), screw through into the nuts embedded in the top beam of the bogies.
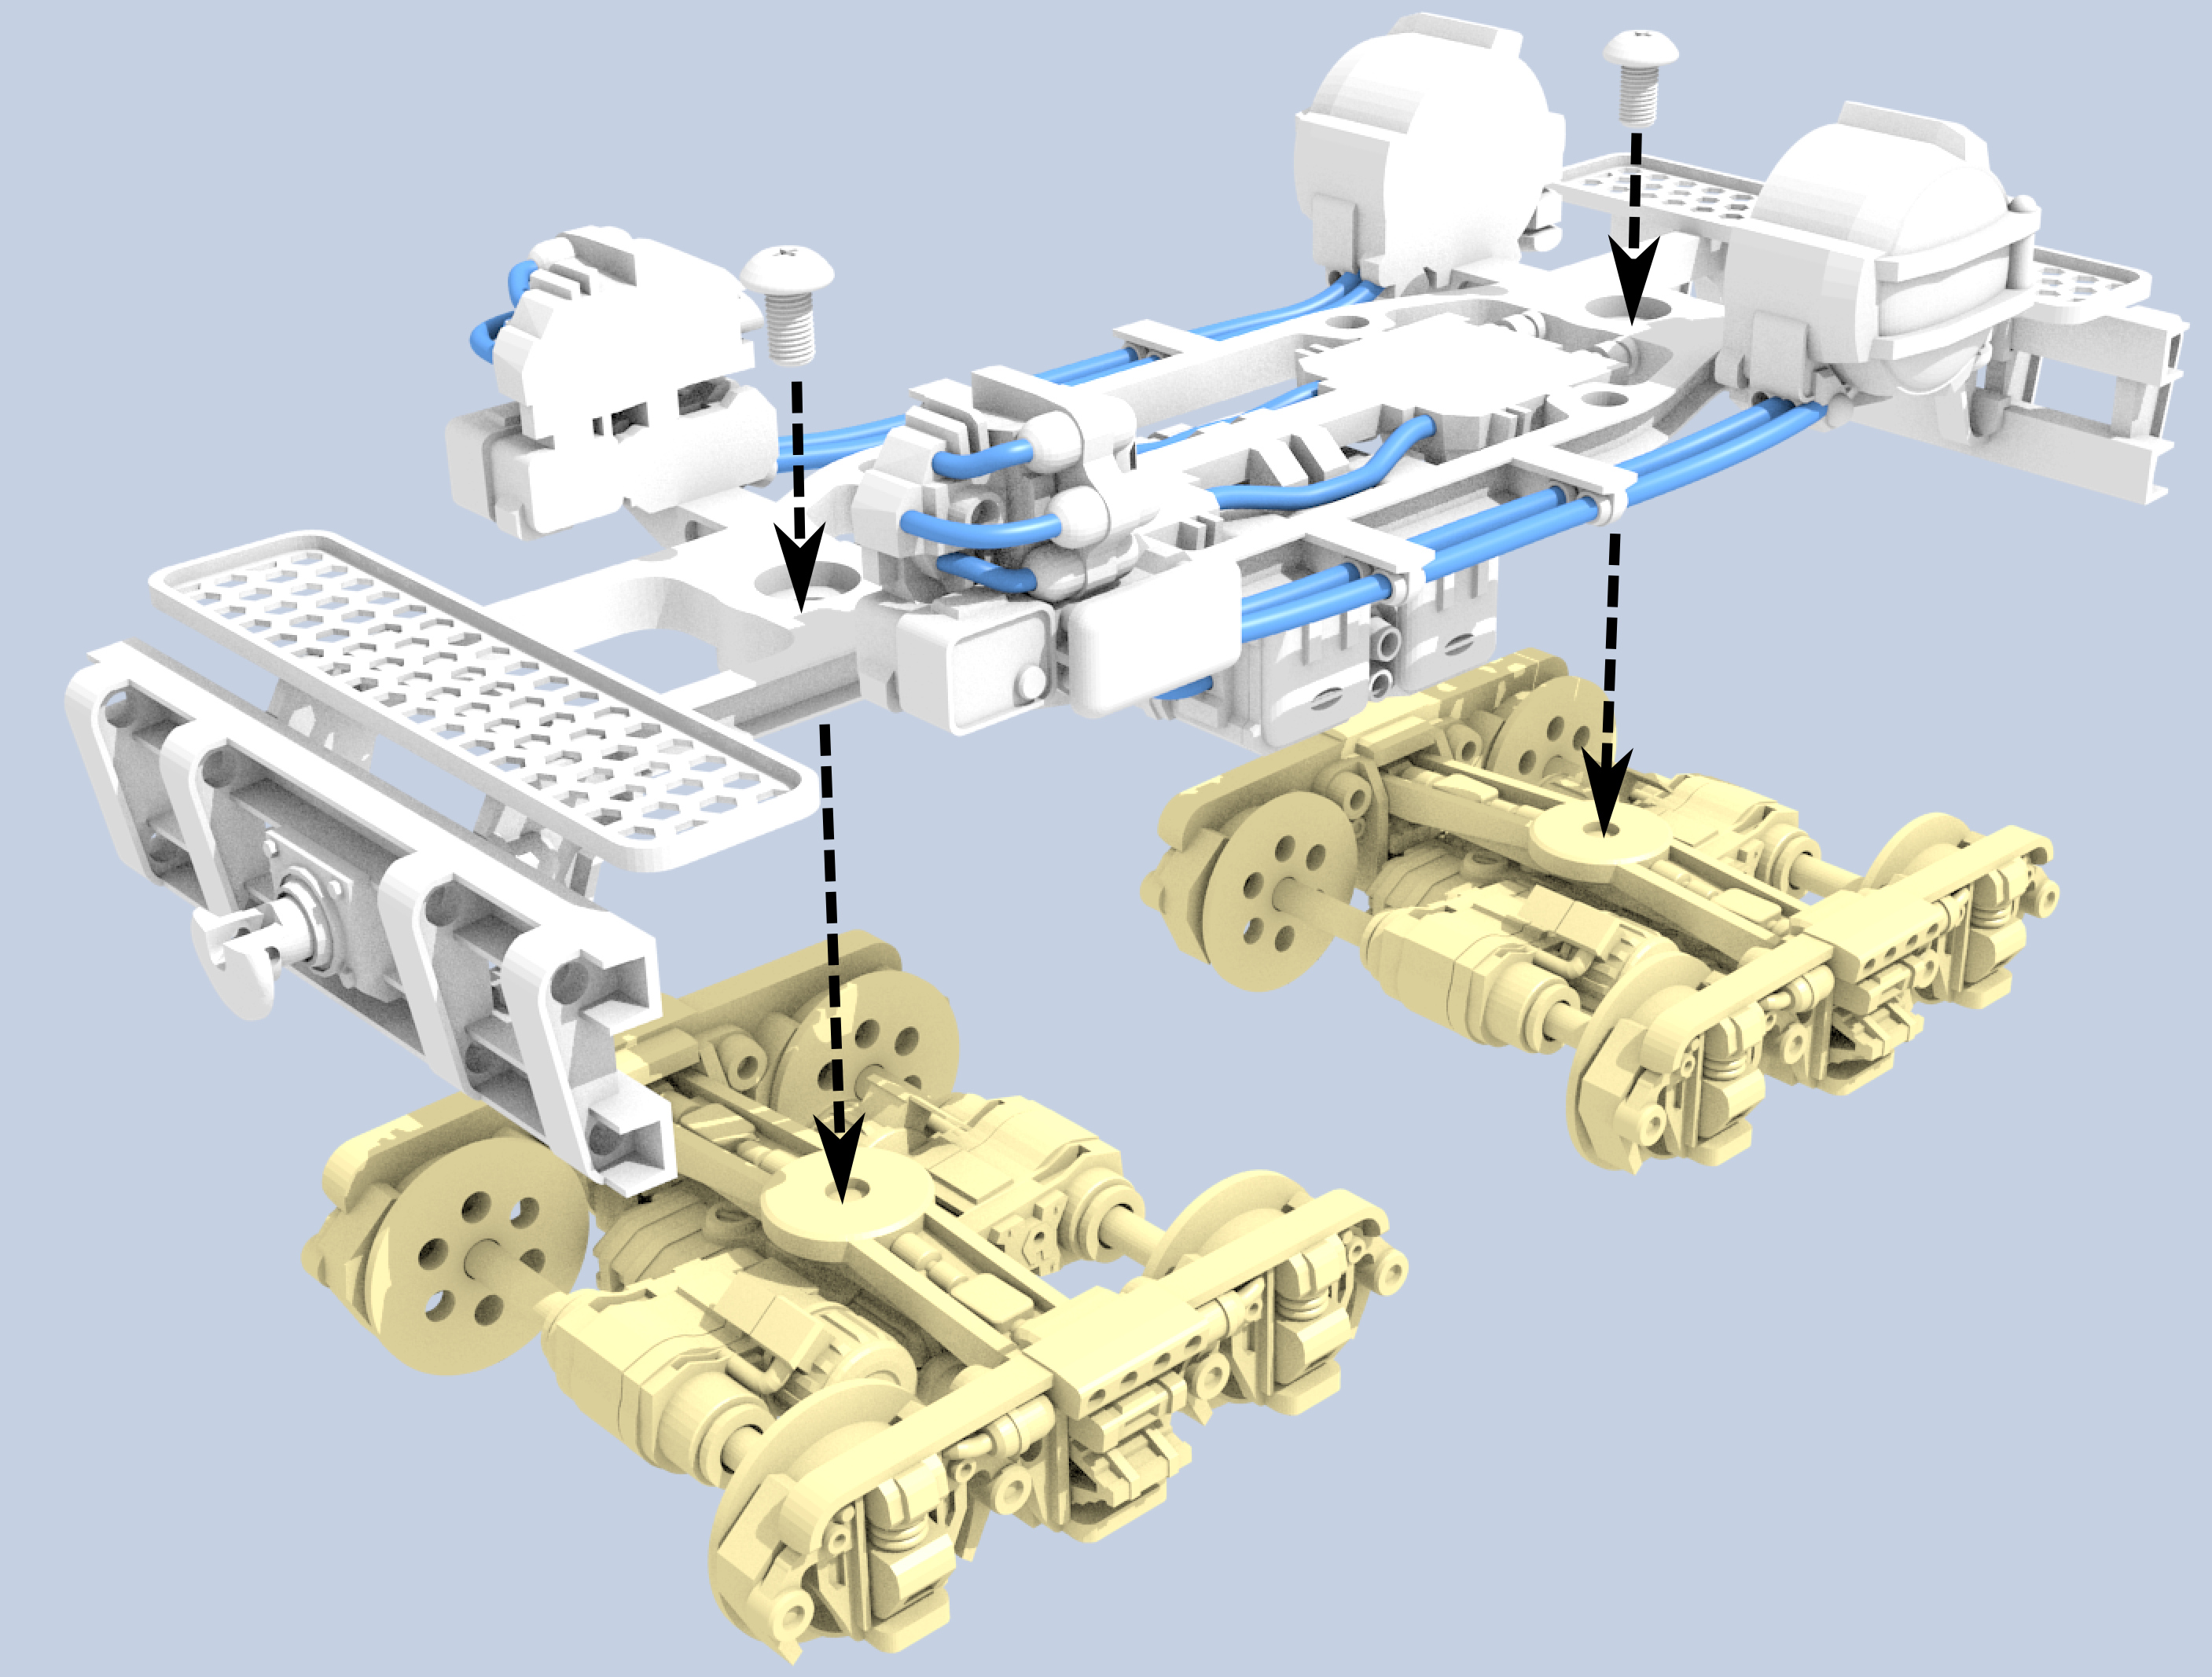
Step 7
Install the vehicle body (and wheel arch detail bits if you have had to wait).
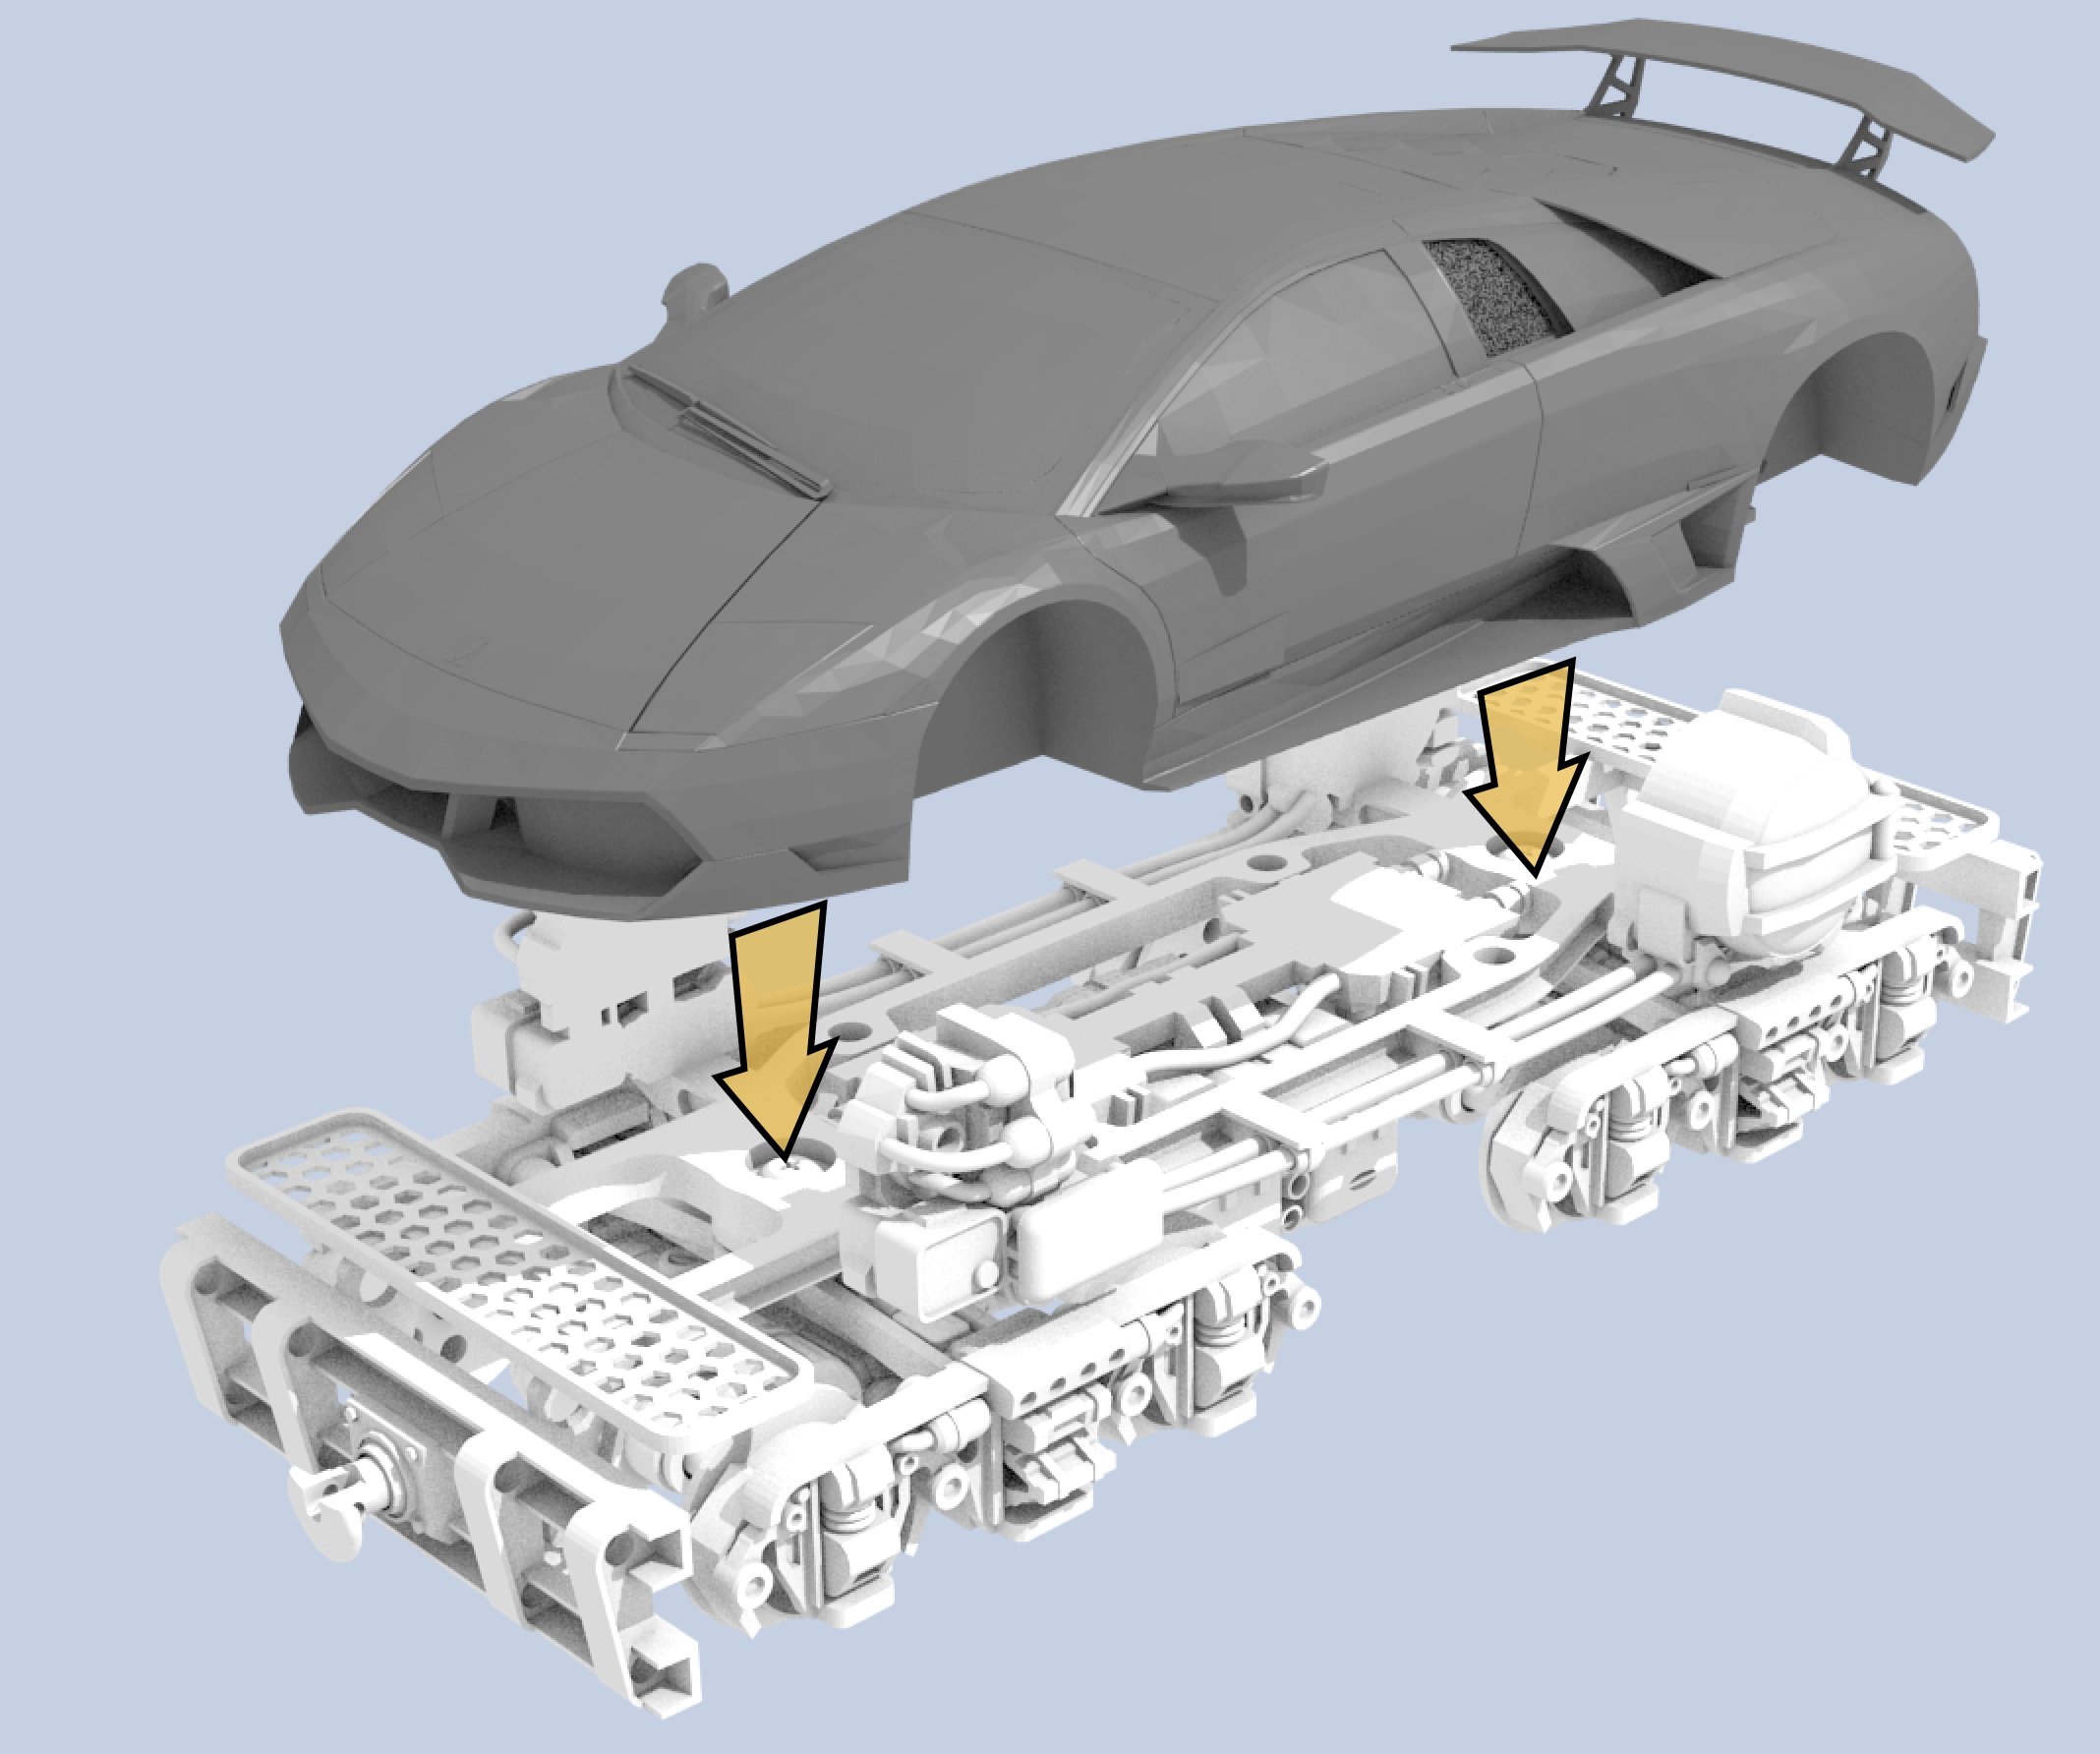
And that’s it. Done!
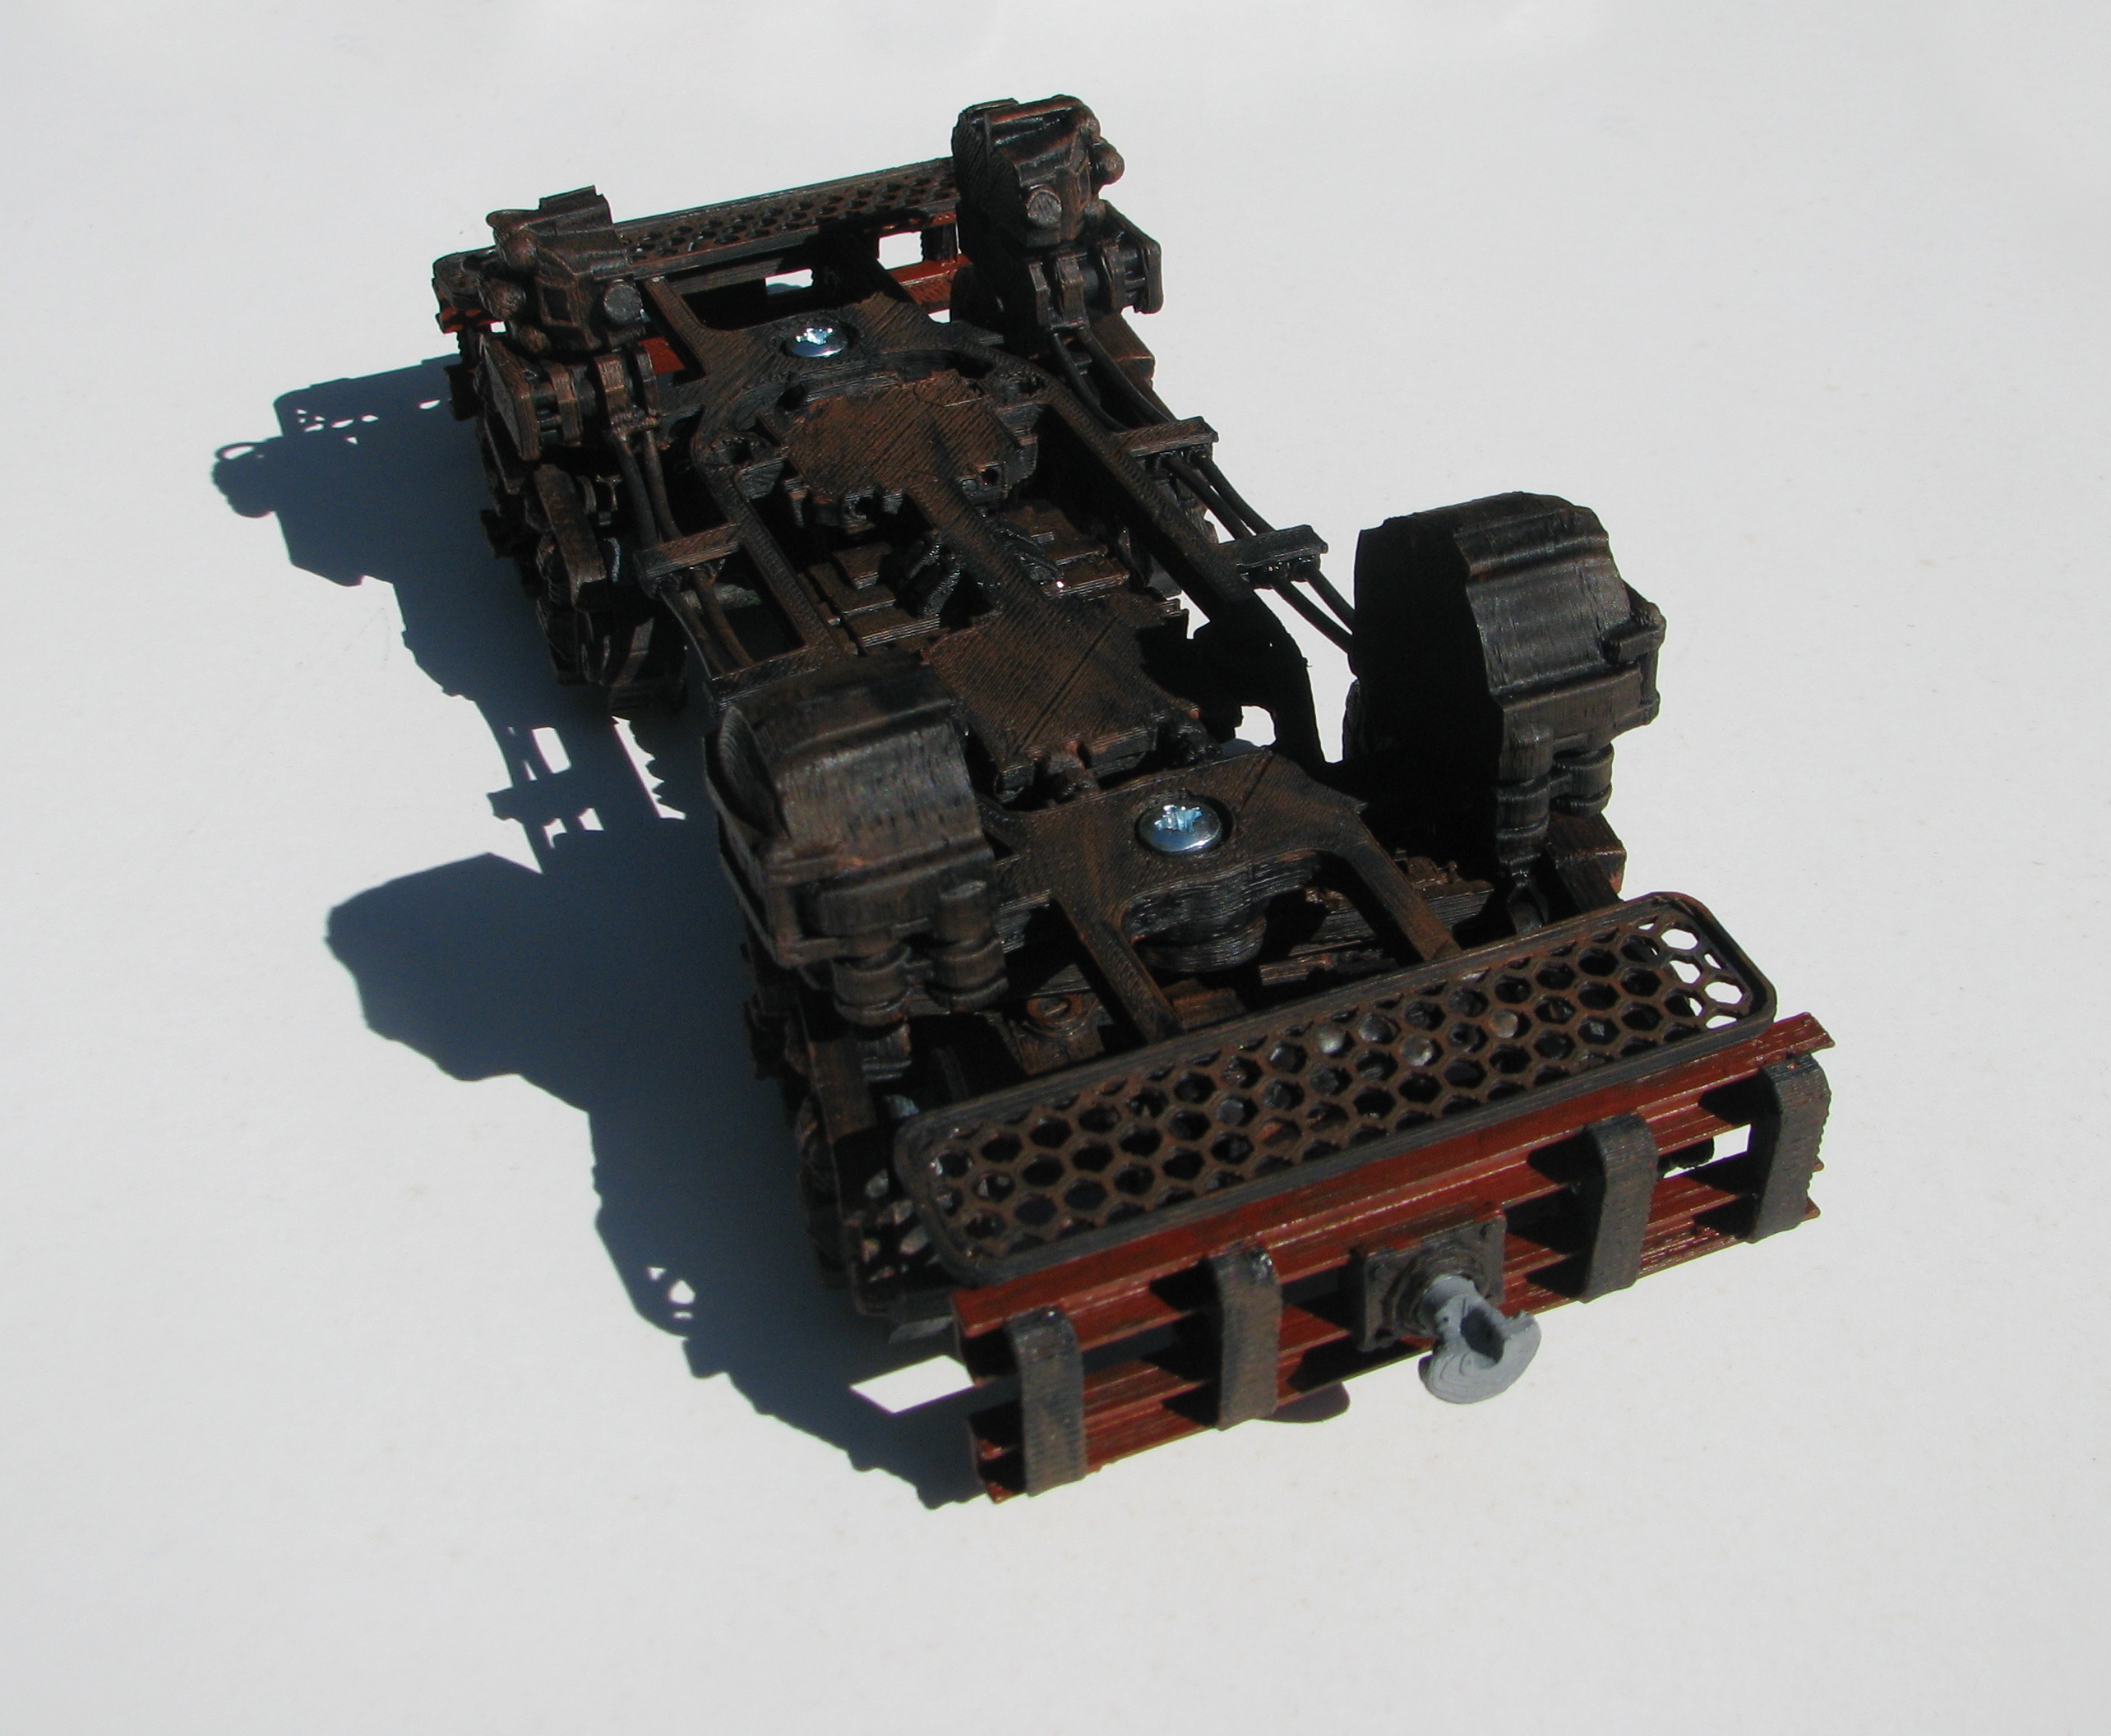
Some Pretty Pictures

The chassis on its own
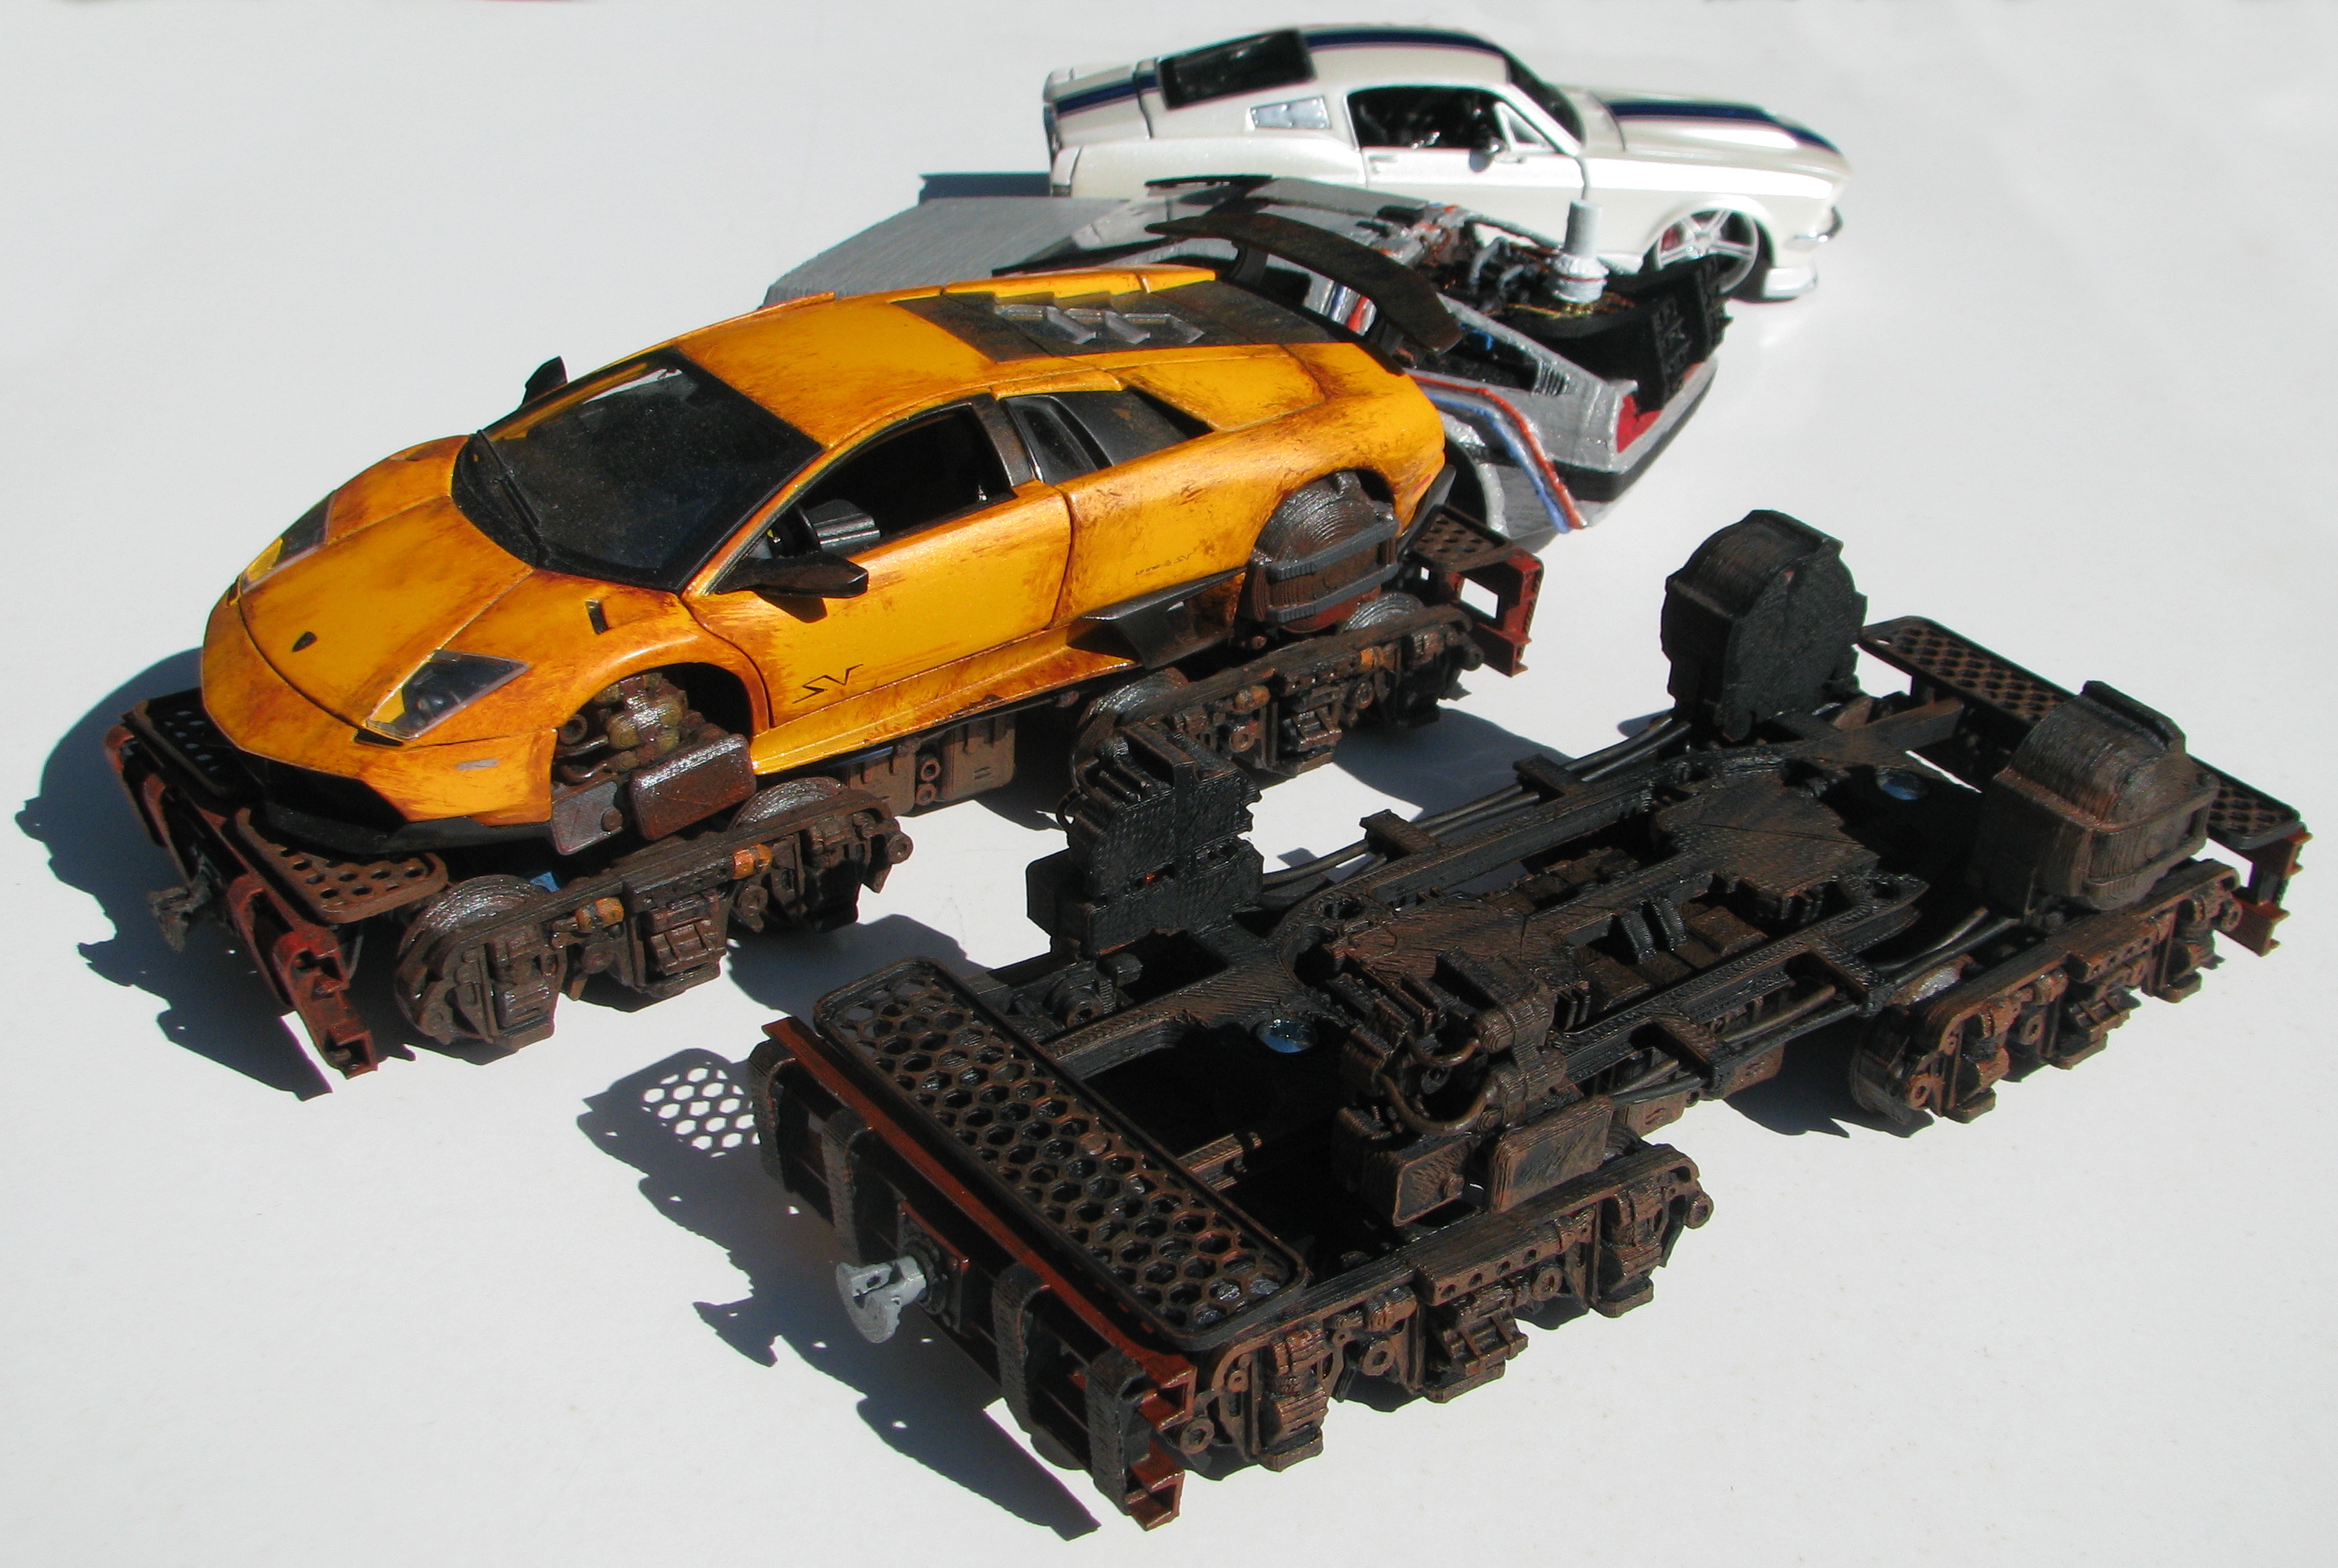
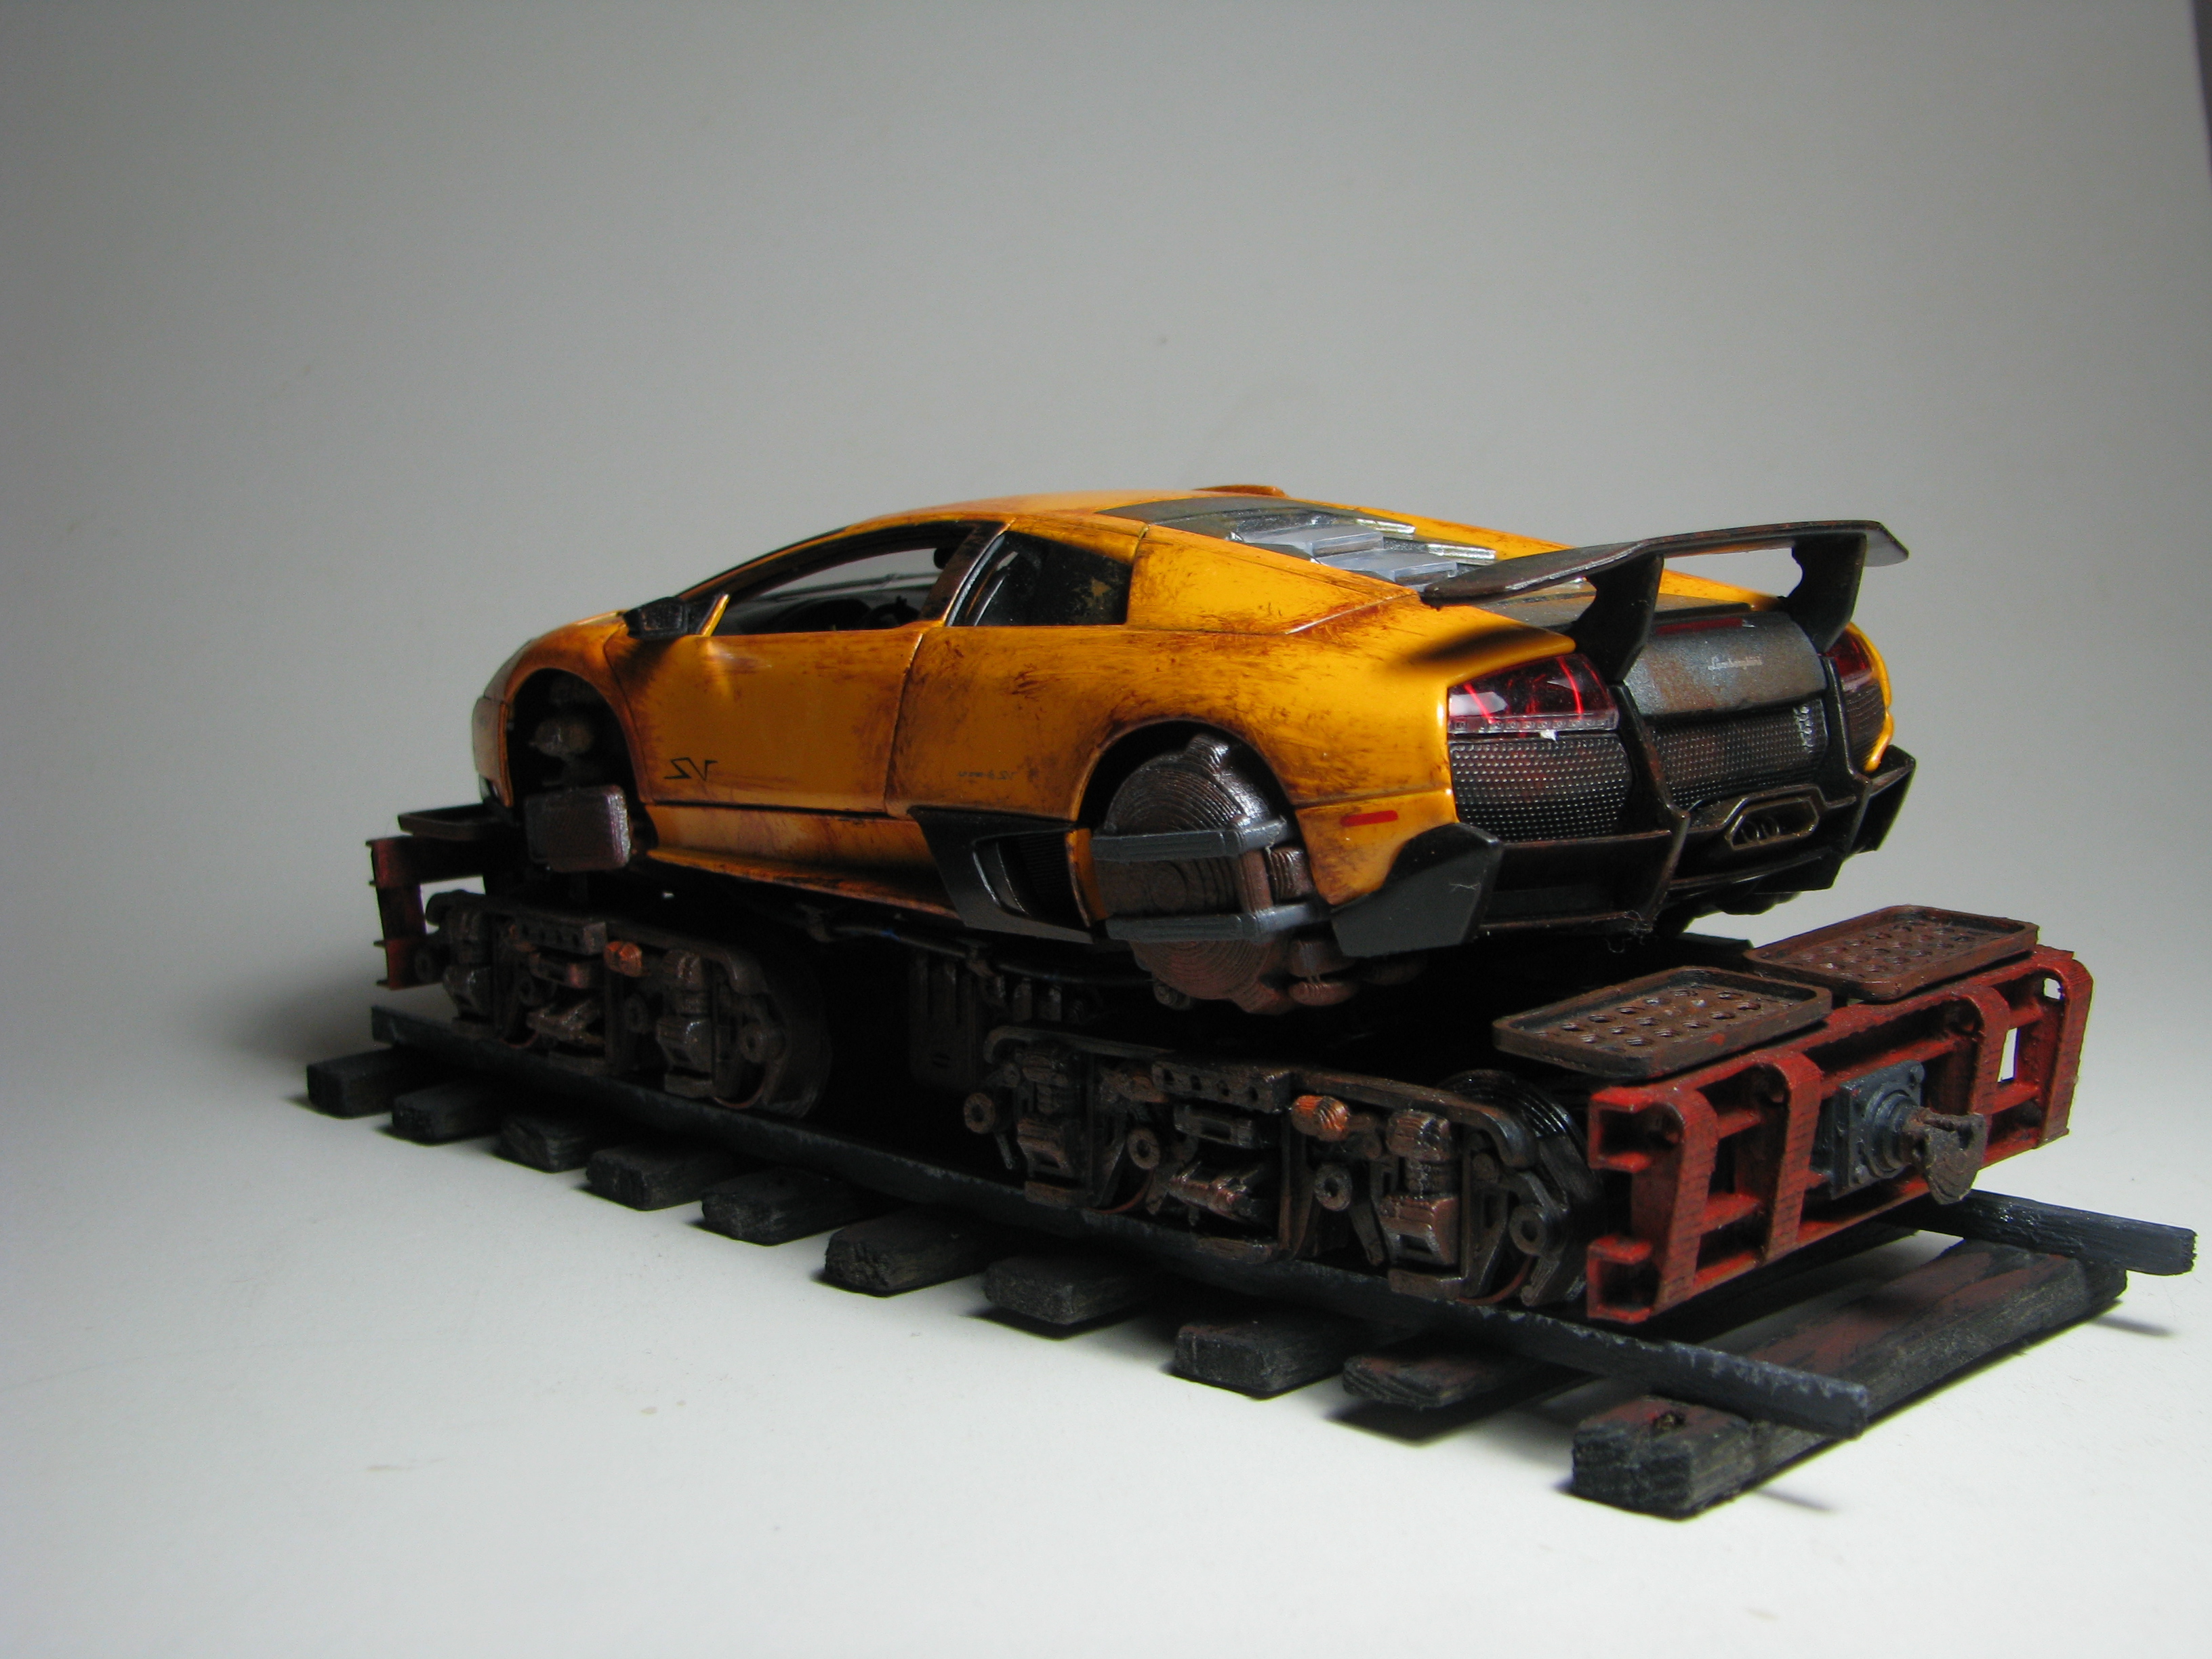
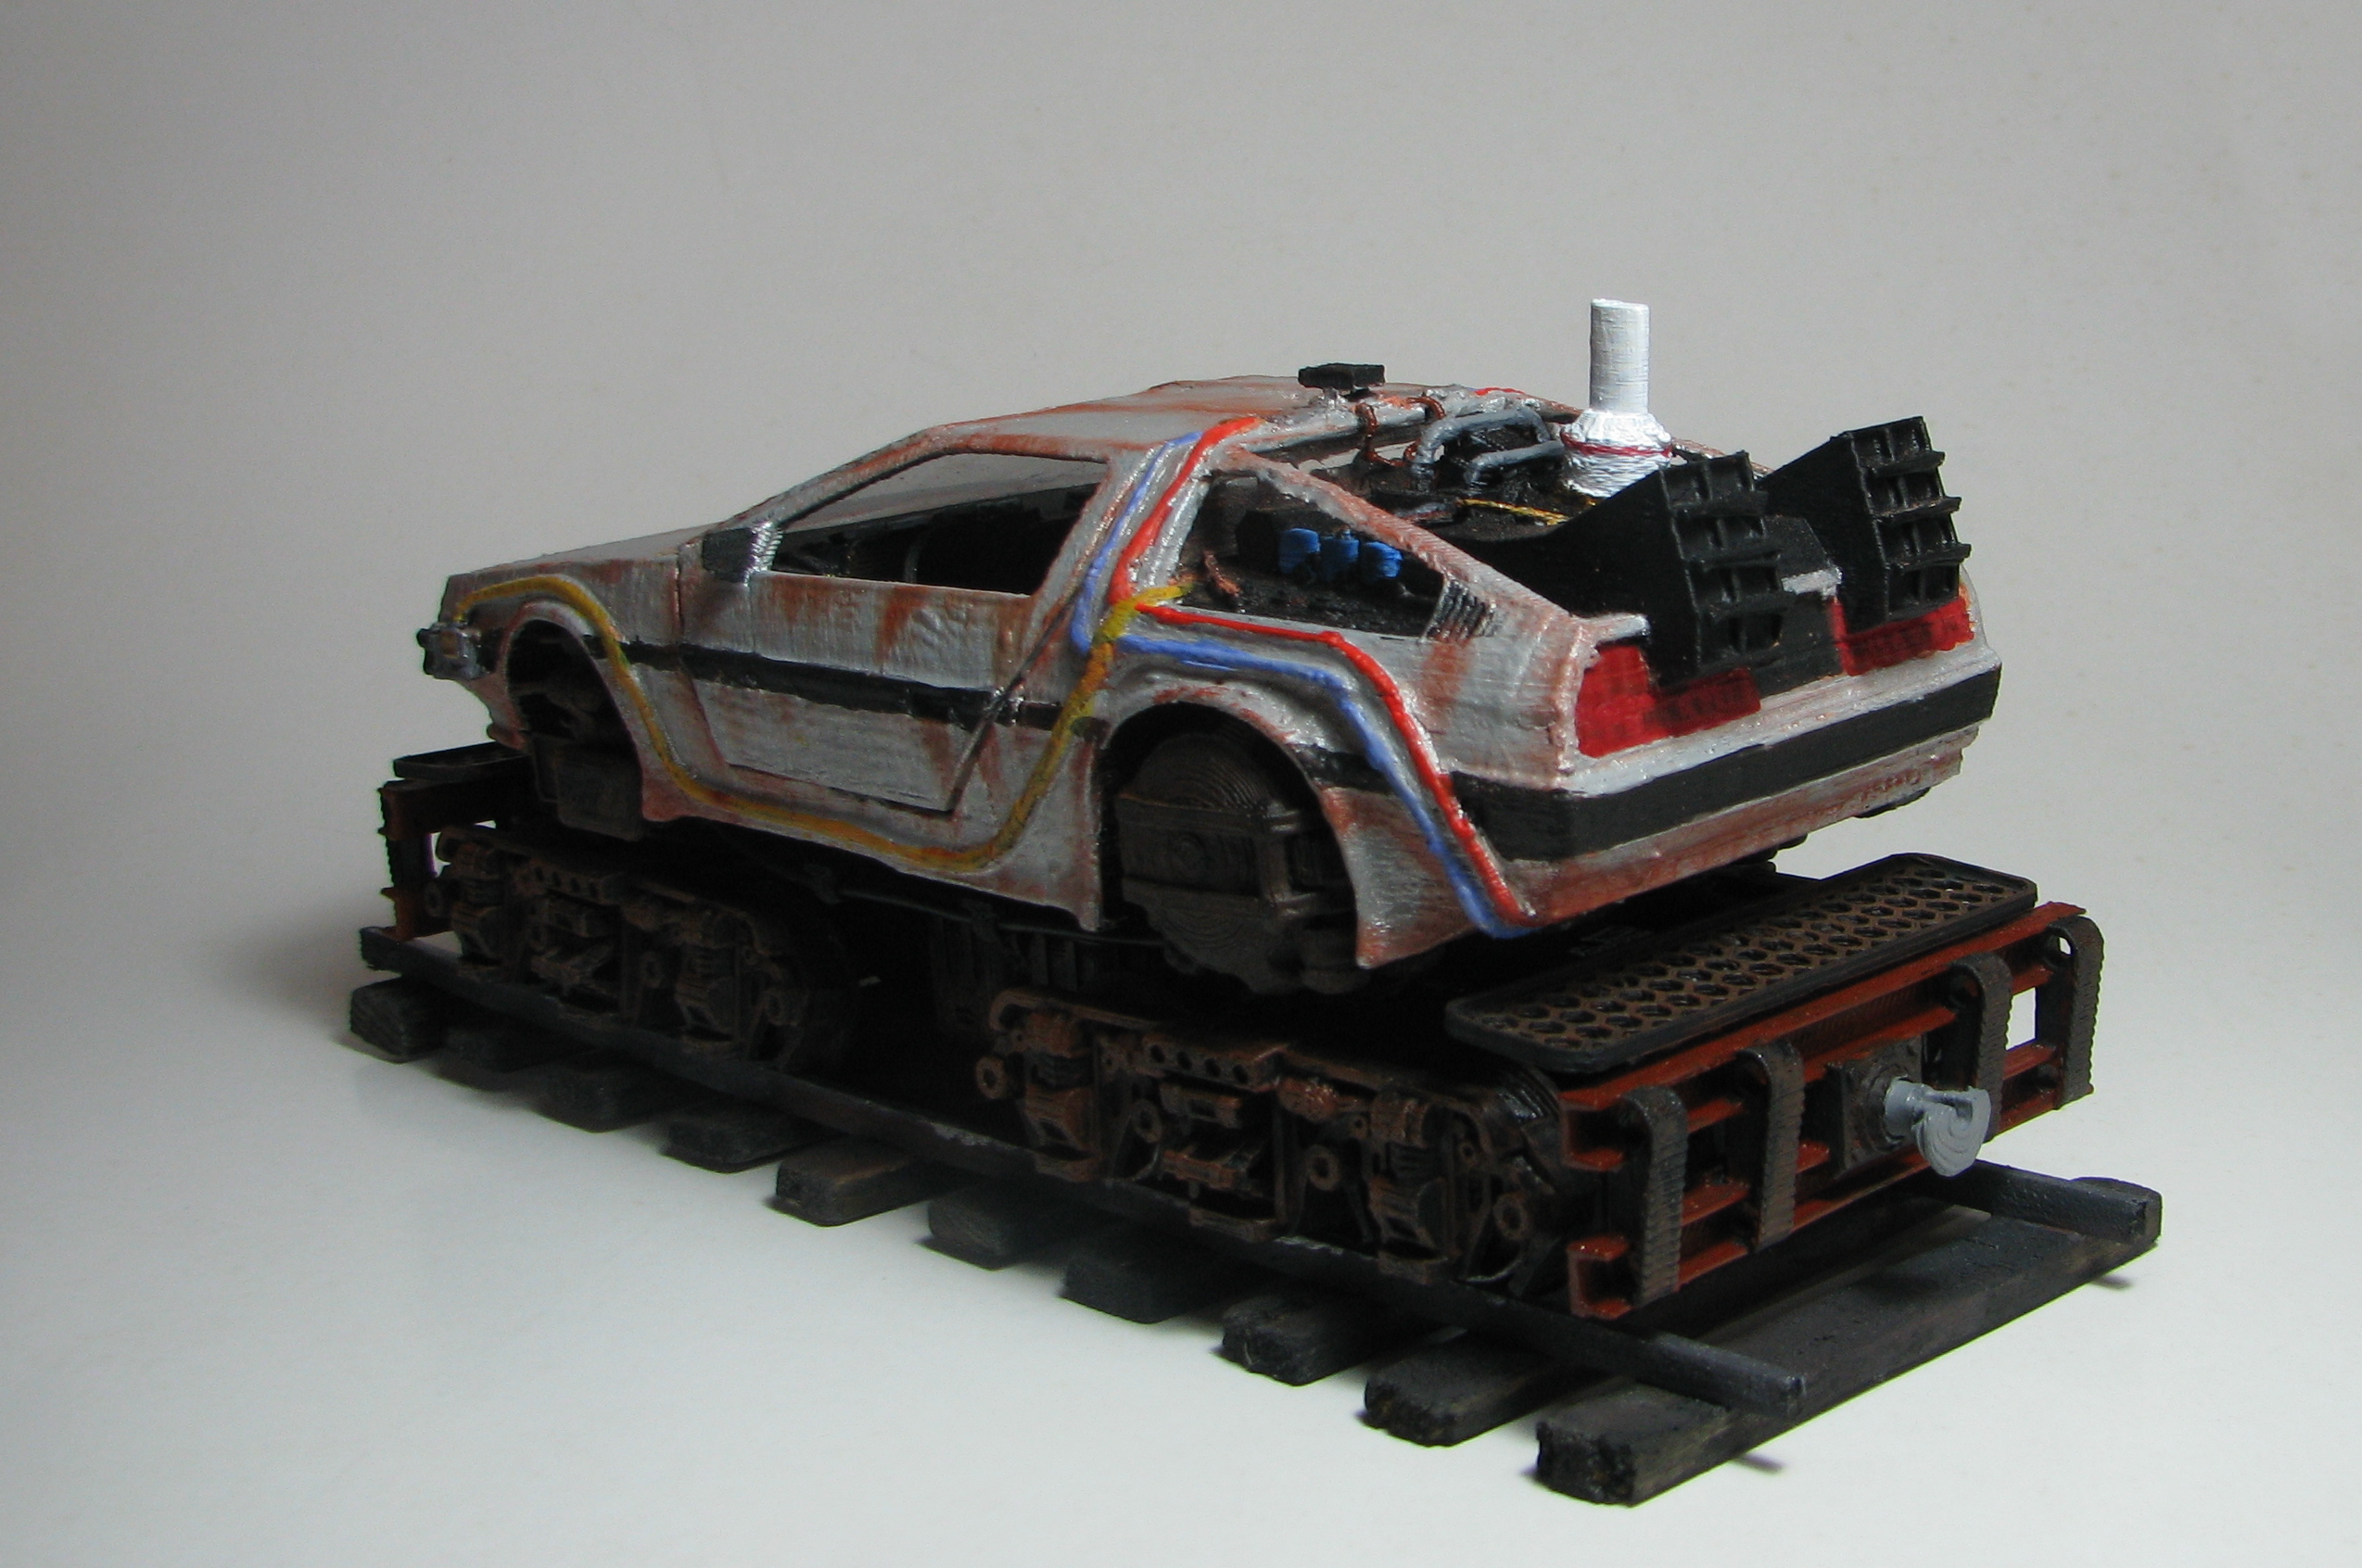
Various Vehicle bodies at various stages of hybridisation process
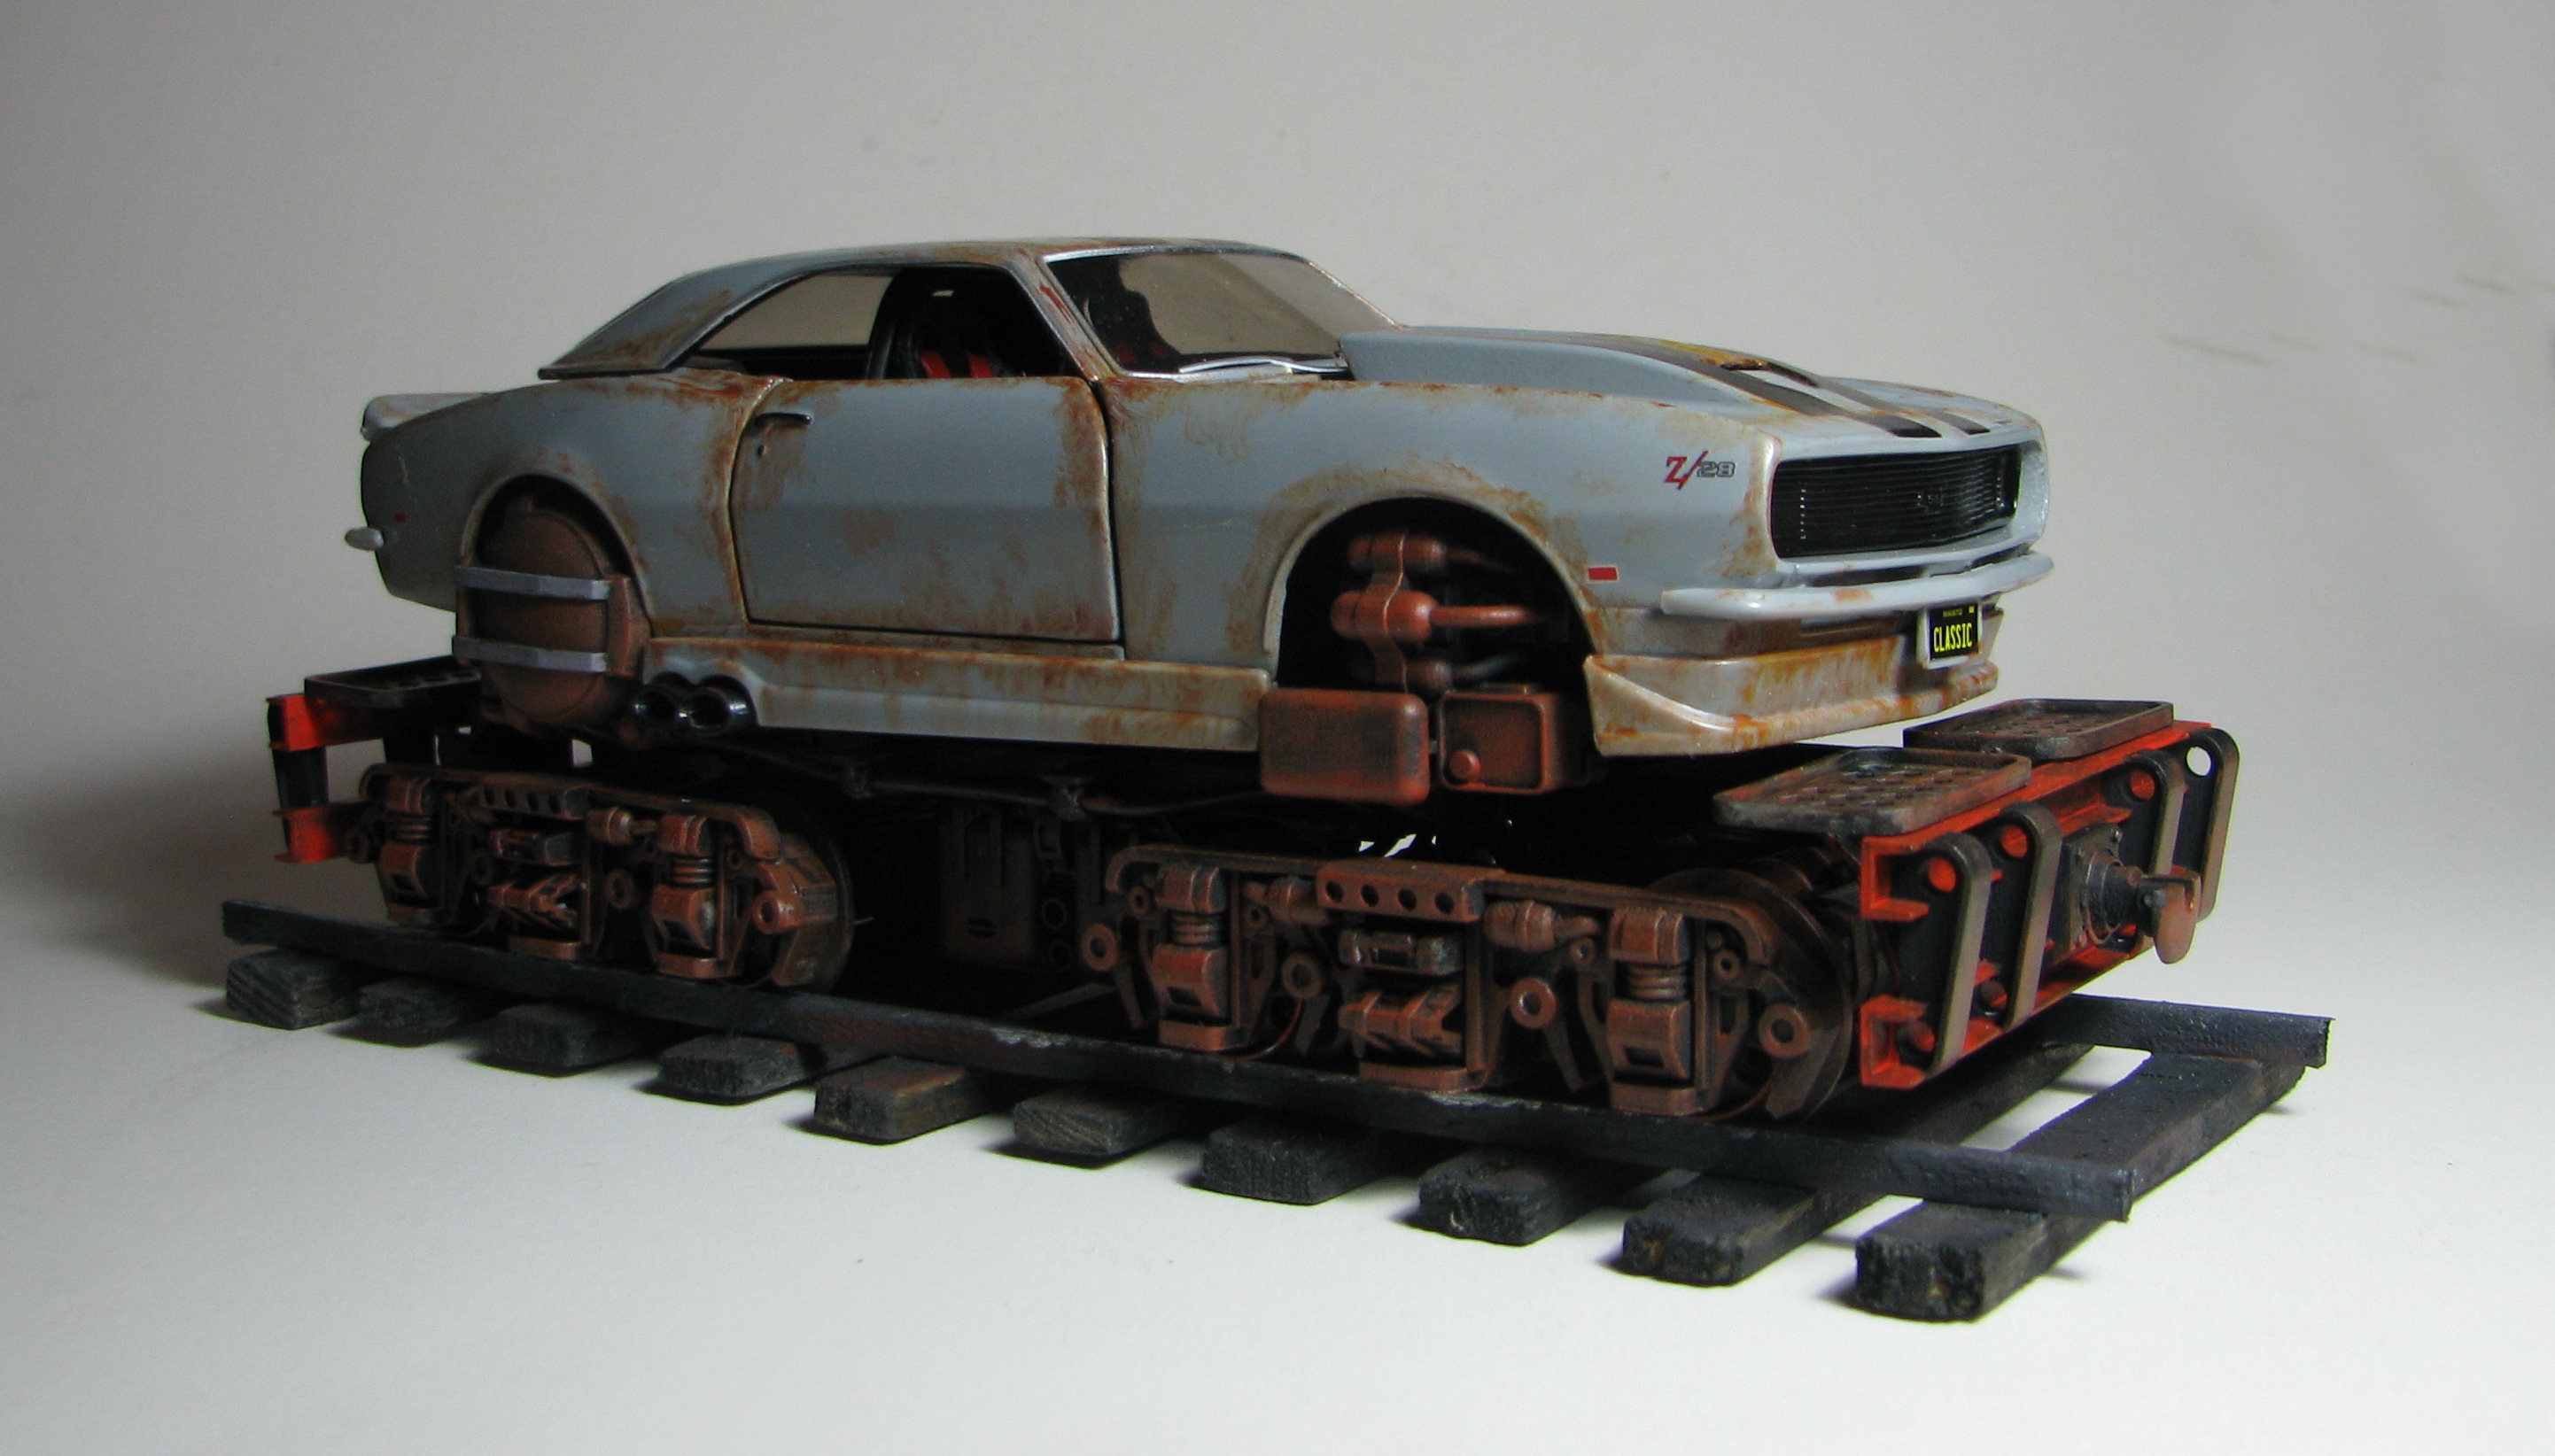
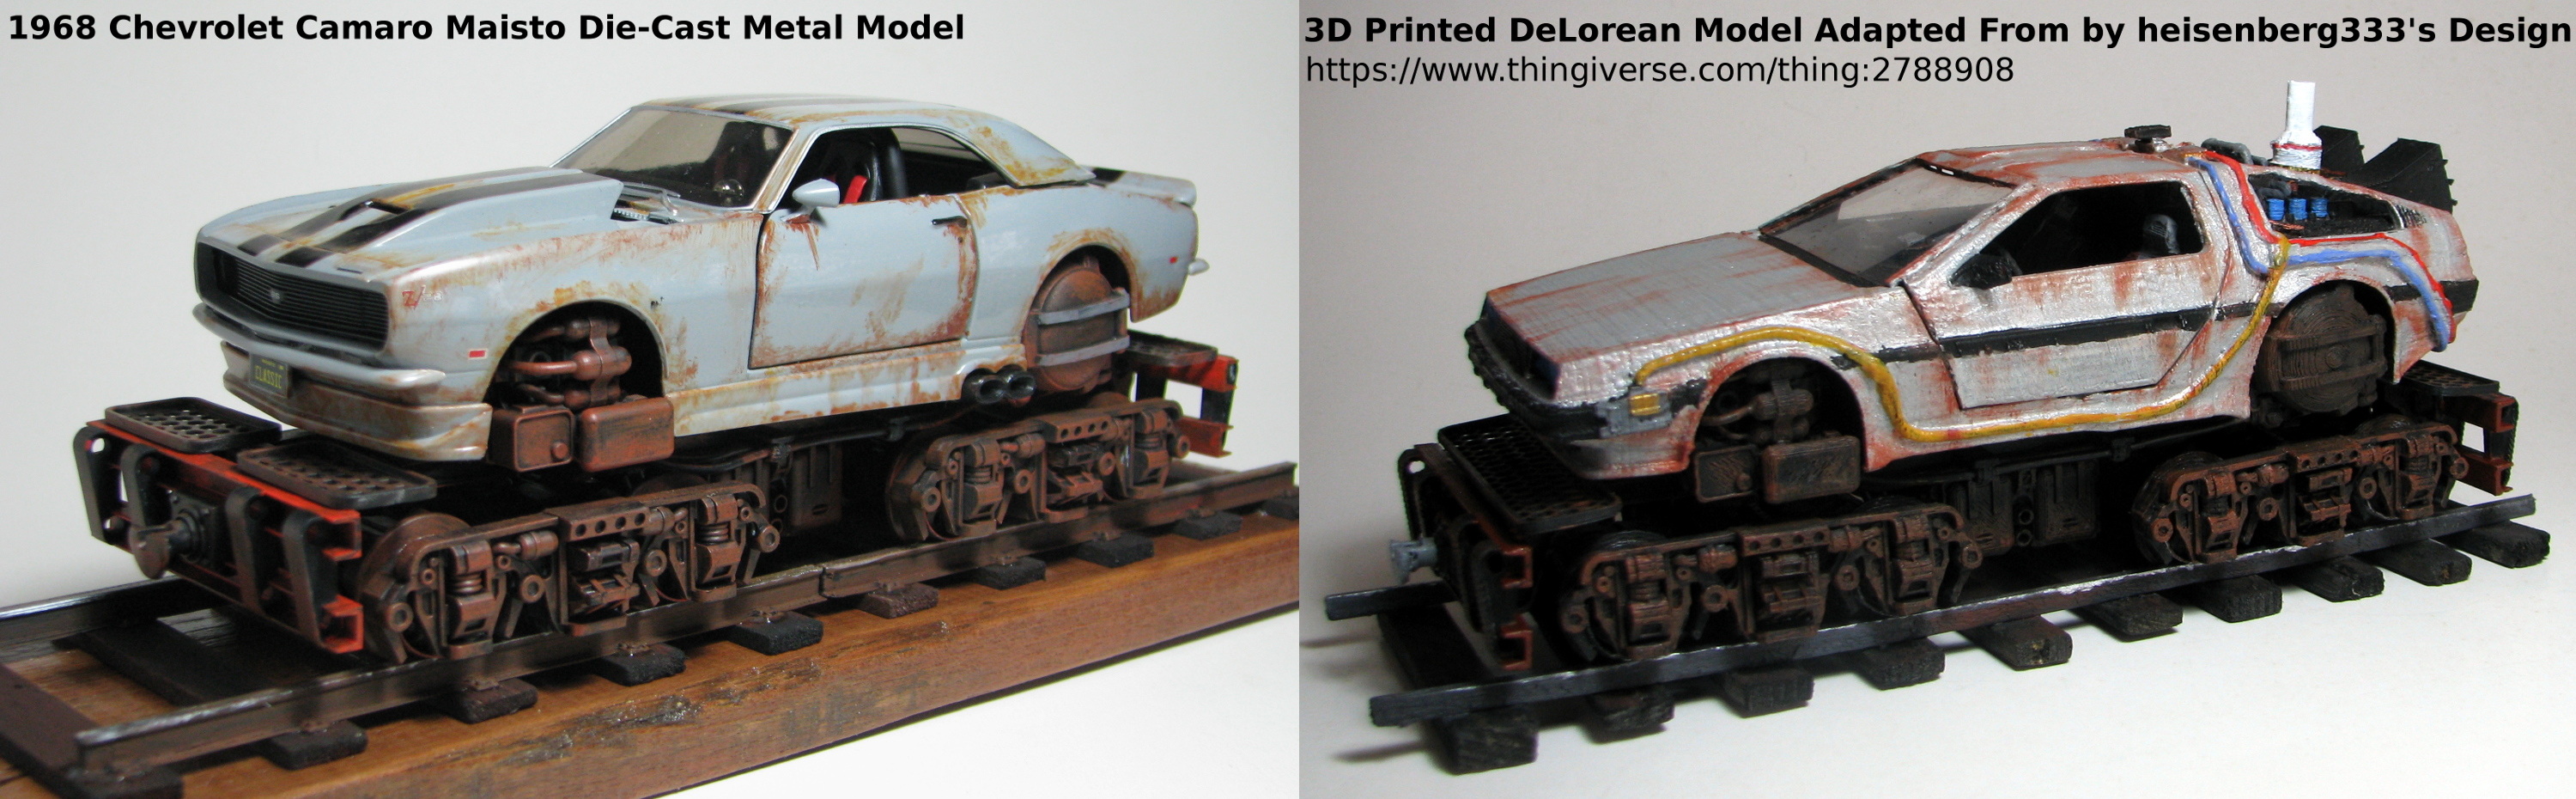
Maisto 1:24 Scale 1968 Chevrolet Camaro Z/28 Rail car hybrid printed on Multijet printer at 19μm resolution.

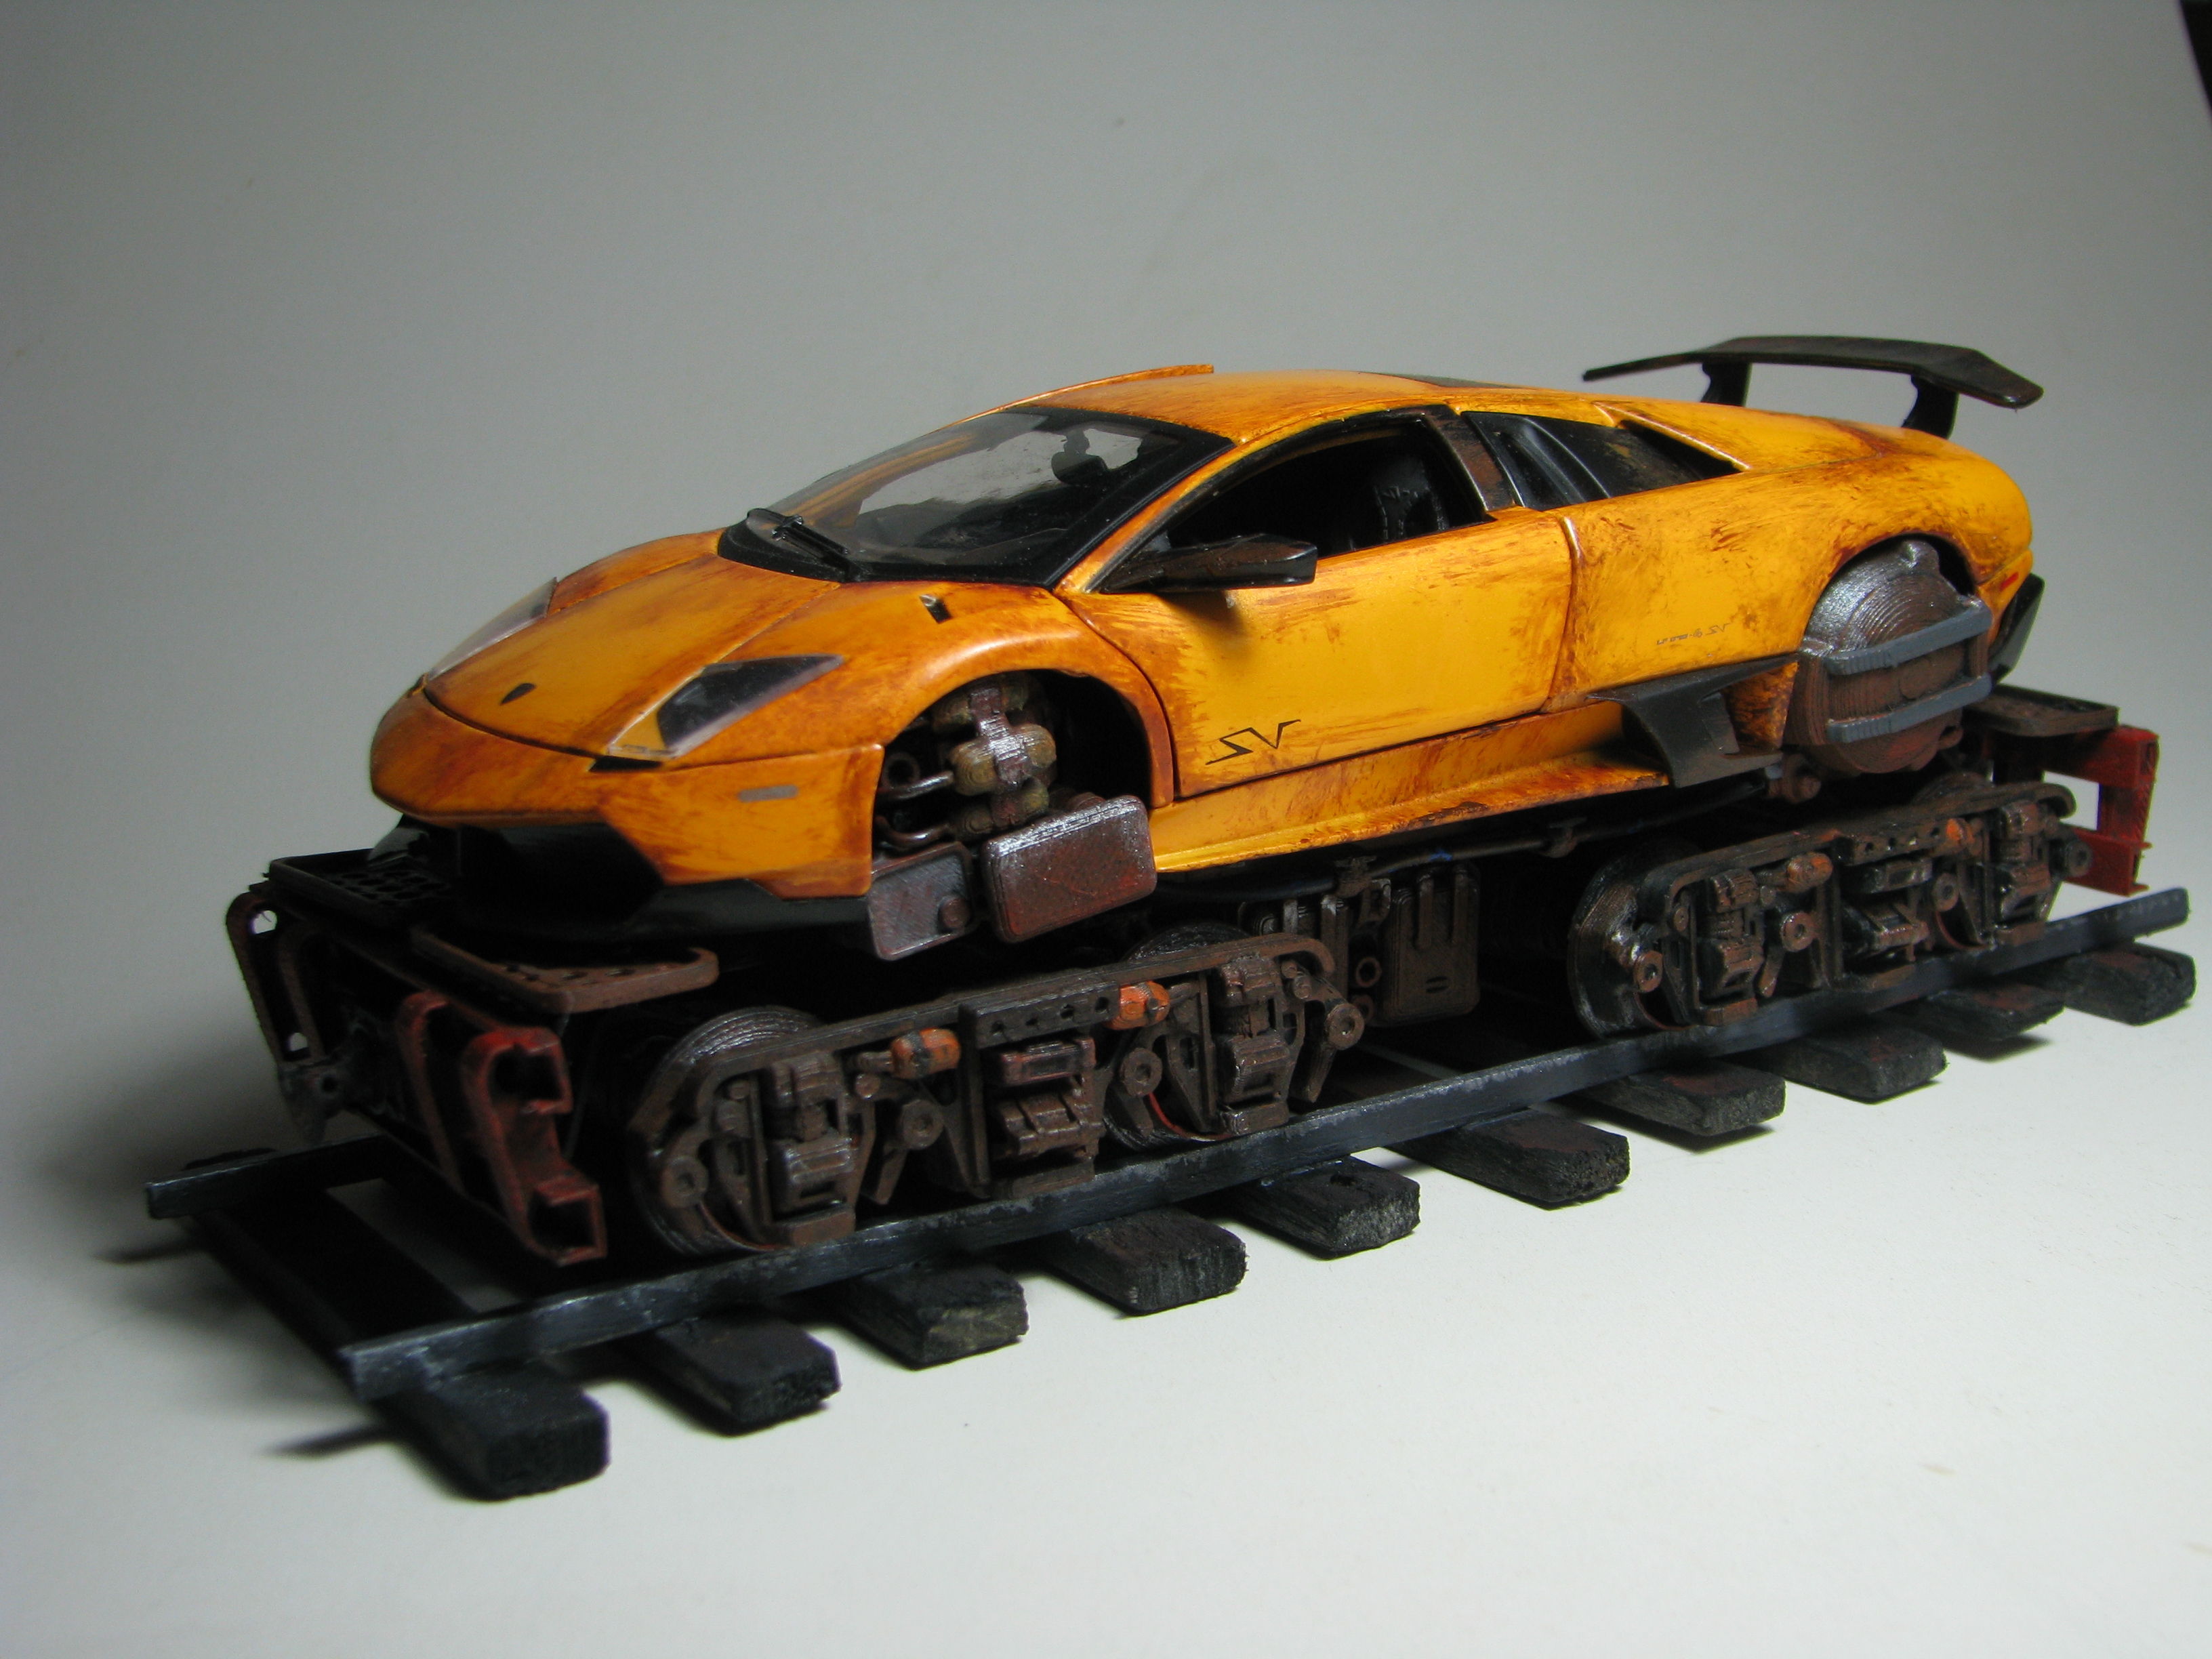
MZ 1:24 Scale Lamborghini rail-car hybrid with components printed on an Ultimaker Original at 0.2mm layer resolution
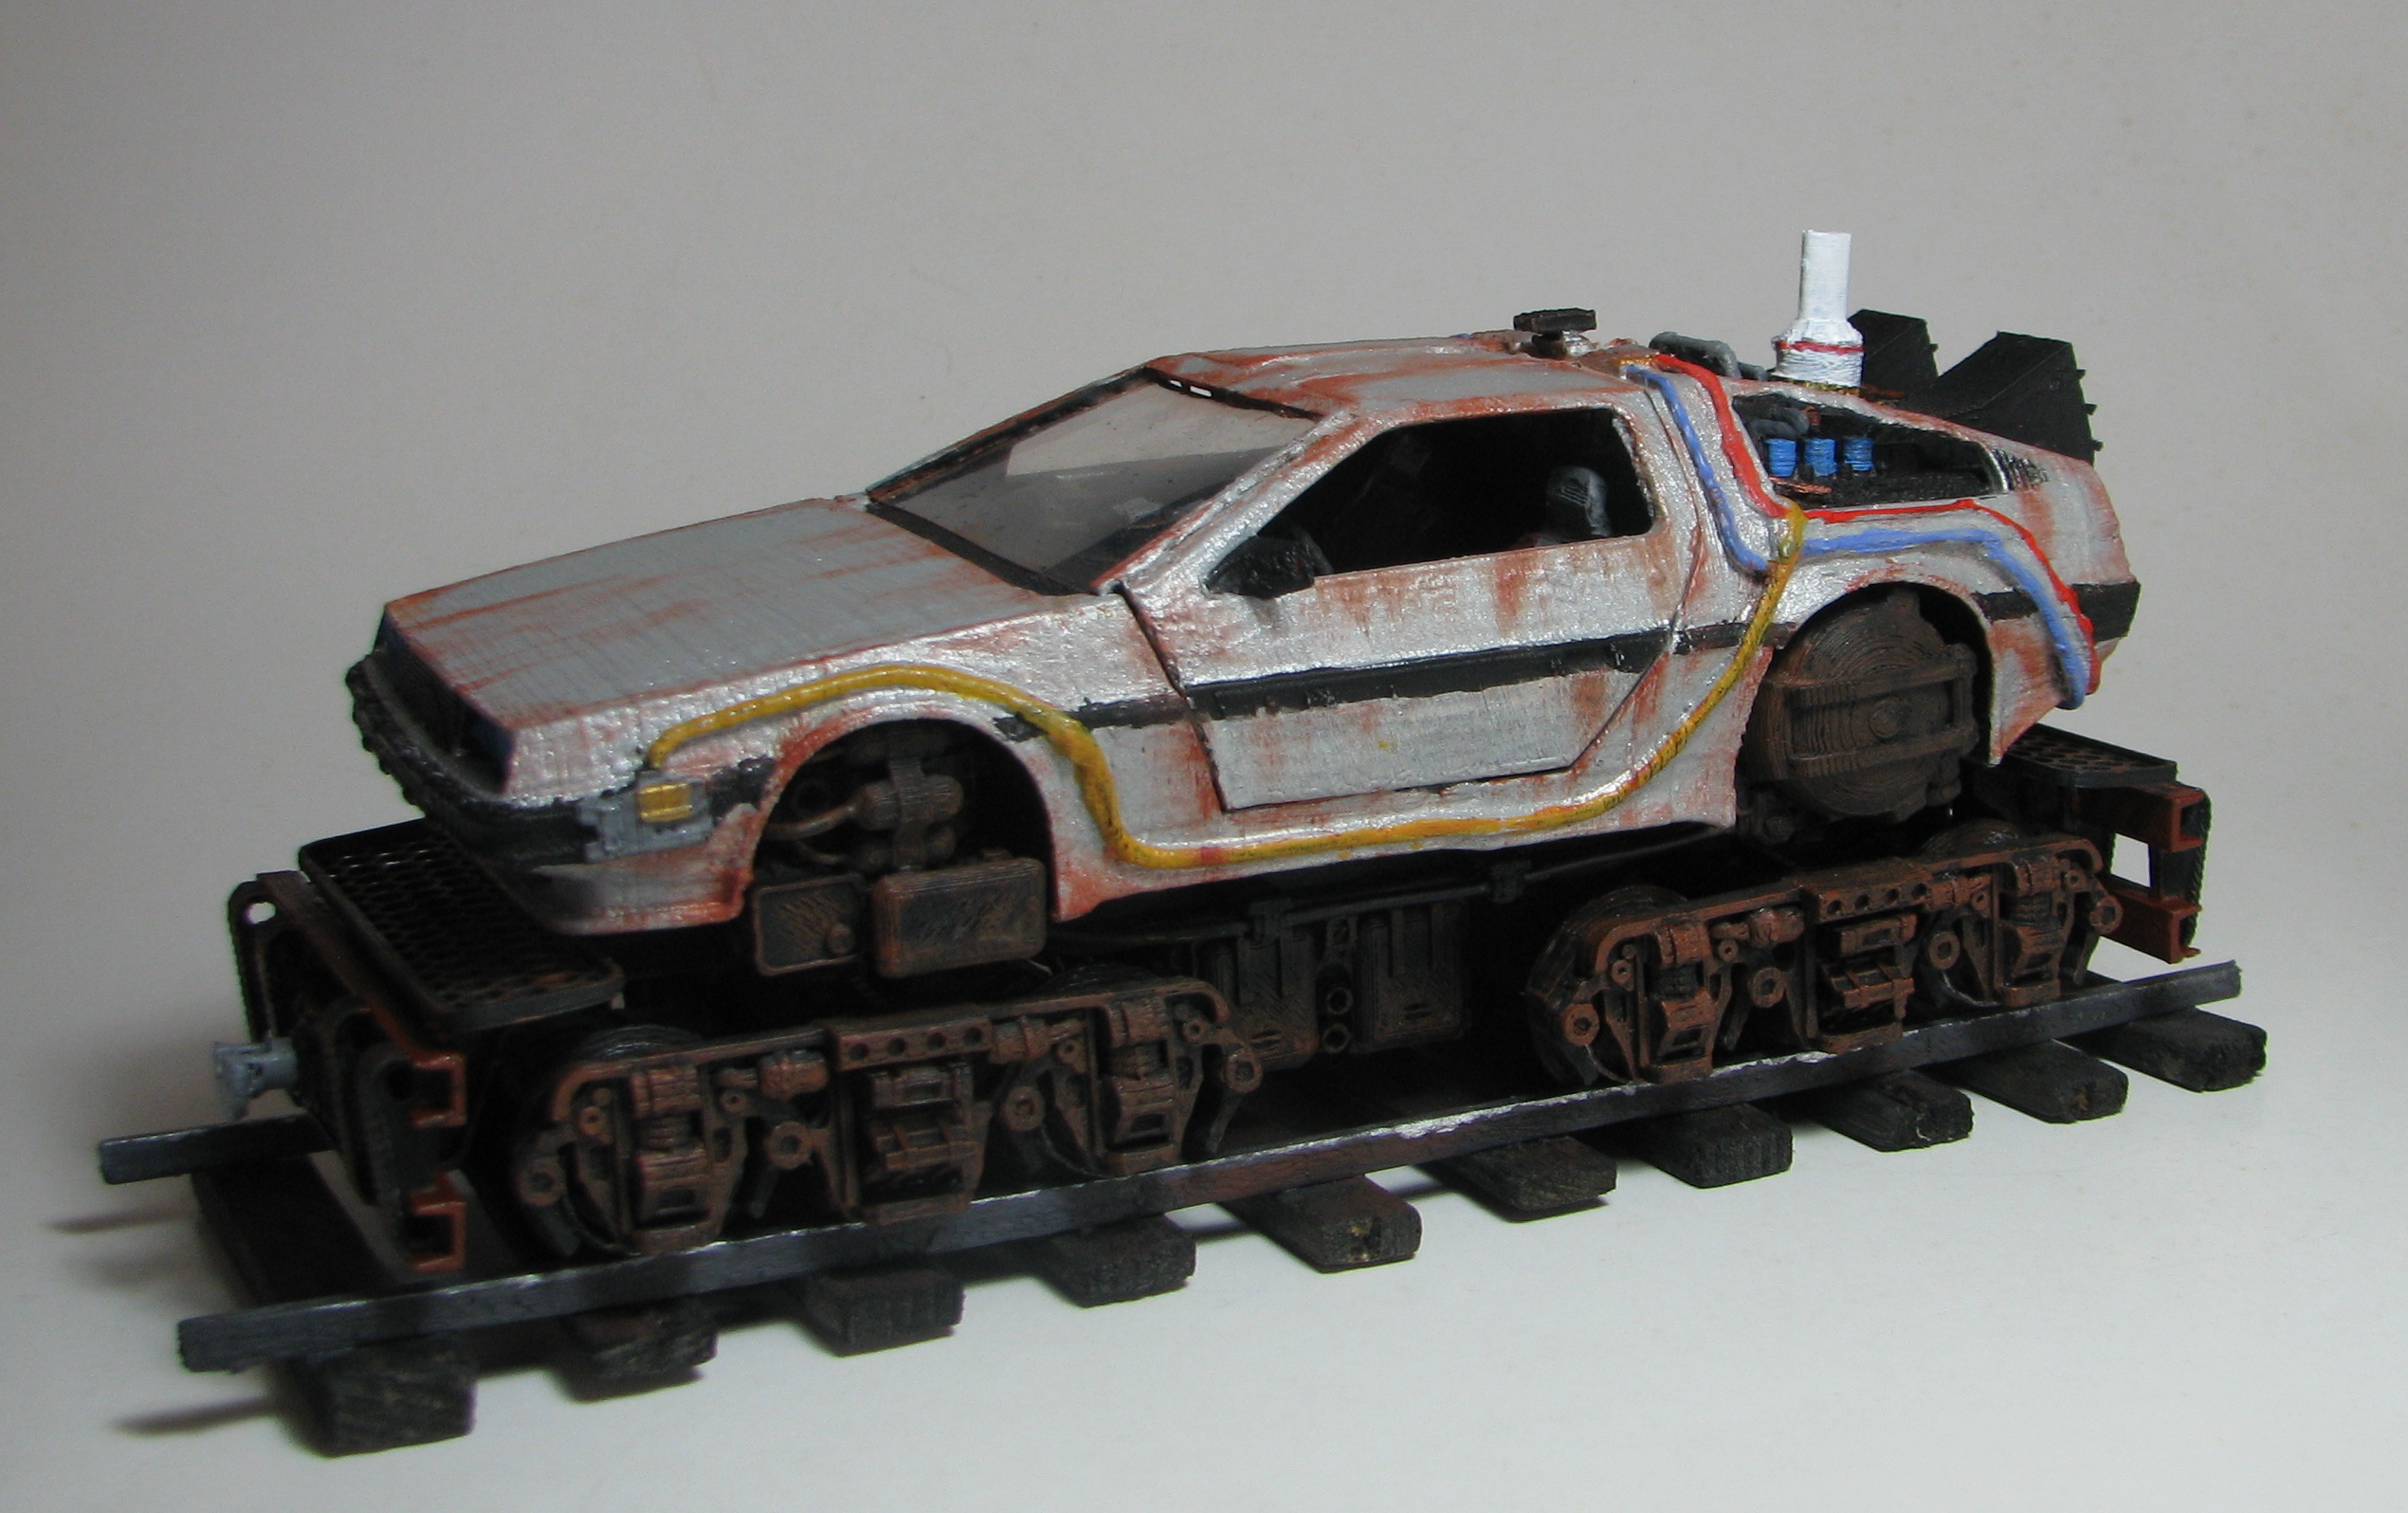
Back to the Future DeLorean Model by heisenberg333 scaled down to 1:24 and mounted on a rail chassis. project printed on a Wanhao Duplicator i3 Plus


This design by Hamish Trolove is licensed under a Creative Commons Attribution-NonCommercial-ShareAlike 4.0 International License.