3D Printed Vintage Railcar
My Dad is a keen and highly skilled woodworker. His current side project is a relatively large scale model vintage Rolls Royce car. With all the detailing he is doing it is looking fantastic. Although the family never had a vintage car, there have always been vintage car images and a couple of small-scale models around when I was growing up (Some might say that I have yet to attain the status of grown up). Anyway all this inspired me to design and build this model for Dad.
As my parents were visiting within a fortnight, this prompted a design and build marathon in order to get it all designed, printed, assembled, and painted before they arrived. This was achieved and they were able to take it away with them.
I gathered up a large number of images from the web featuring Vintage and Antique cars to use as a source. There were some really interesting forms in some of the really early cars which I may yet do as another project. By far the most prolific images and drawings were for the Ford Model-T and so this project made use of the Model-T as a basis. I was keen for a utilitarian look and so I used a Roadster version and chucked on a wooden crate.
For Model T enthusiasts I’m afraid this model is not exact and not to any particular scale.
This model is about 150mm long and is designed to fit a track with 36mm between the inside surfaces of the two rails. In other words it is compatible with most of my other rail-mounted models such as the trucks, the railbike, the Go-motion mine trolley, and the Stop-motion mine trolley.
There are a few non-printed things you will need to complete it. These are;
- Some fine wire for the two stays from the front of the canopy to the headlight supports.
- Some ice-block sticks for the wooden crate on the back.
- Some Ø4mm dowel for the axles and locater pins.
- Some Ø3mm dowel (or kebab stick) for the steering wheel column. Seeing as it is a train and does not need a steering wheel you may choose to ignore this bit.
- Some thin clear plastic sheet for the windscreen.
- Some relatively thick wire for the canopy frame (if you are making the canopy). I used TIG welding wire which is about Ø1mm diameter.
- Some tissue paper – not fancy tissue paper either. This is for the canopy.
- Some heavy(ish) insulated wire to model some pipes running from the front to the back.
You will find the model files are all of the format “Vintage_RailCarv6-Blahblahblahx2.stl” where the last bit is the number of that item you will need to print. You can expect a good size pile of pieces by the end of your printing session. None of the pieces require support, although some may benefit from a bit of work with a craft knife or file where some of the overhangs may droop for the first layer.
Some Files
You can download the assembly instructions from here: VintageRailcar_Assembly_Instructions.pdf
You can download the STL models from here: VintageRailcar_STLs.zip
You can download the Blender model from here: Vintage_RailCarv6-Blender.zip
You can also swoosh over to Thingiverse and find all the files there: Thingiverse - Thing 3106584
If you are looking for tracks to display your model on, then have a look at these parametric track models. You will just need to set the track gauge to 36mm and sleeper length to 58mm to be compatible with this model.
Assembly
Click on the images to get a high res version.
Step 1
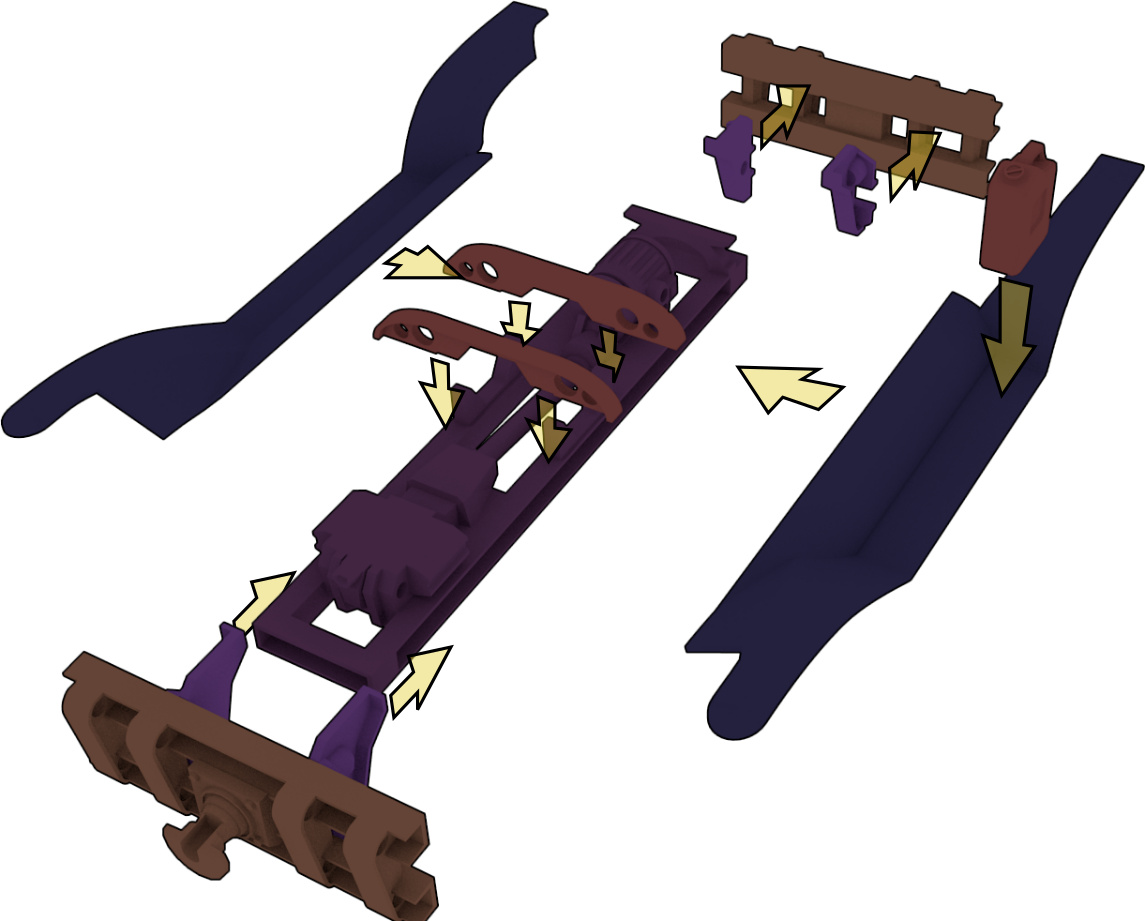
In reality this a bunch of separate steps and you will want the glue on the side panels to dry before trying to mount them. The central bit uses a series of small Ø4mm dowel pegs to locate the parts. These are not necessary but they speed up assembly. The LowerCrossBar components clip into the underside of the central Vintage_RailCarv6-MotorDetailRx1.stl.
The axle lengths are shown above.
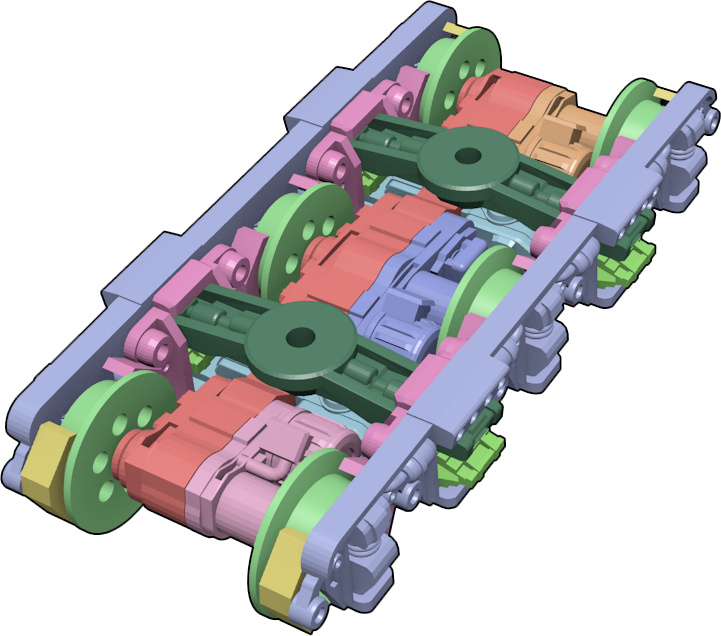
In the end you should end up with a construction that looks like the image shown below. The two Vintage_RailCarv6-UpperCrossBarx2.stl parts (shown dark gray green) pass through the openings in the side panels. You will need to install them before adding the final side panel.
Step 2
Assemble the buffers and their webs but use the Vintage_RailCarv6-Underframex1.stl as a guide to ensure the spacing between the two web parts is correct. The two guard holders; Vintage_RailCarv6-GuardSpanBackx1.stl and Vintage_RailCarv6-GuardSpanFrontx1.stl should seat against the upstands in the middle of the underframe. The RunningGuards can then be glued to the GuardSpans using the small lugs underneath to locate them.
Once it is all assembled and firm, you can drop this assembly on top of the chassis. There are some holes that will take some short Ø4mm dowel pegs to help locate the two parts. Before you secure it all down you may wish to install the wire that represents a pipe running from the front to the “generator” at the back. There is nothing exact about the route.

Step 3
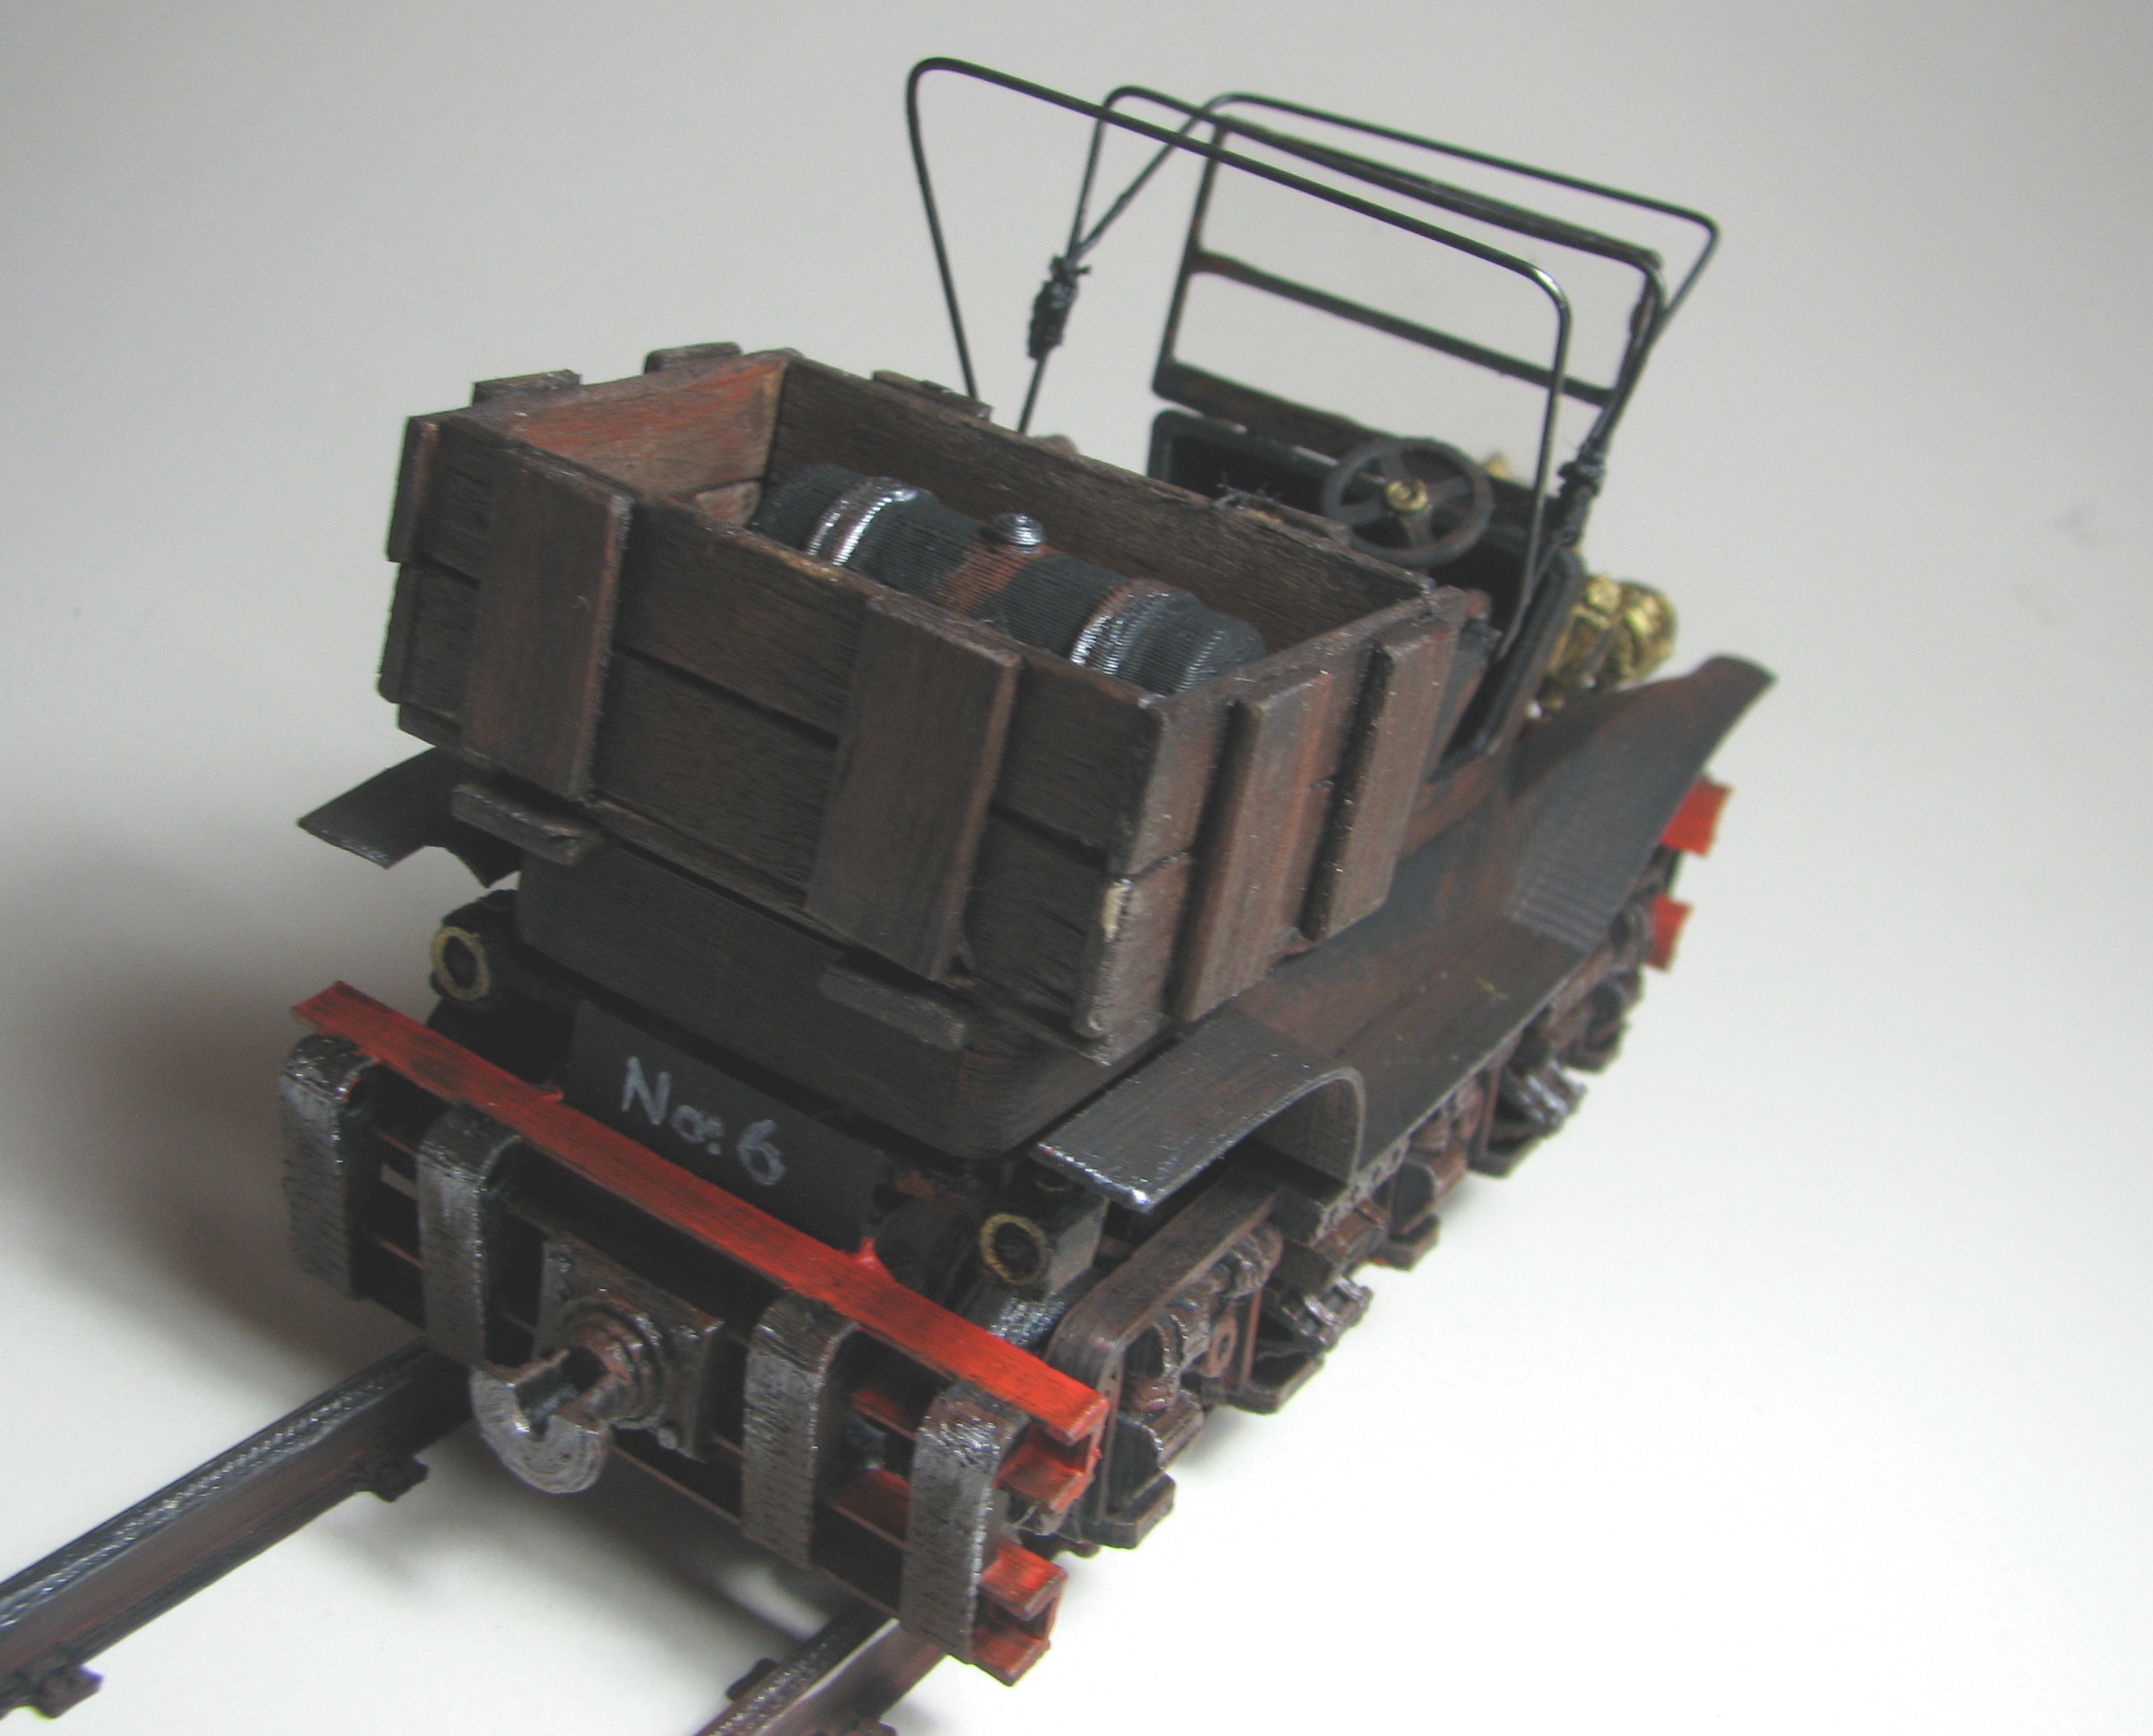
The crate is made from ice-block sticks and has overall dimensions approximately 58mm wide, 45mm deep and 22mm tall. When installing the number plate and tail-light component, the number plate face should be more or less inline with the back of the vehicle’s main body.
I will admit the recess for the window glazing is a little small so you will need to cut the plastic sheet quite precisely to get it to fit.
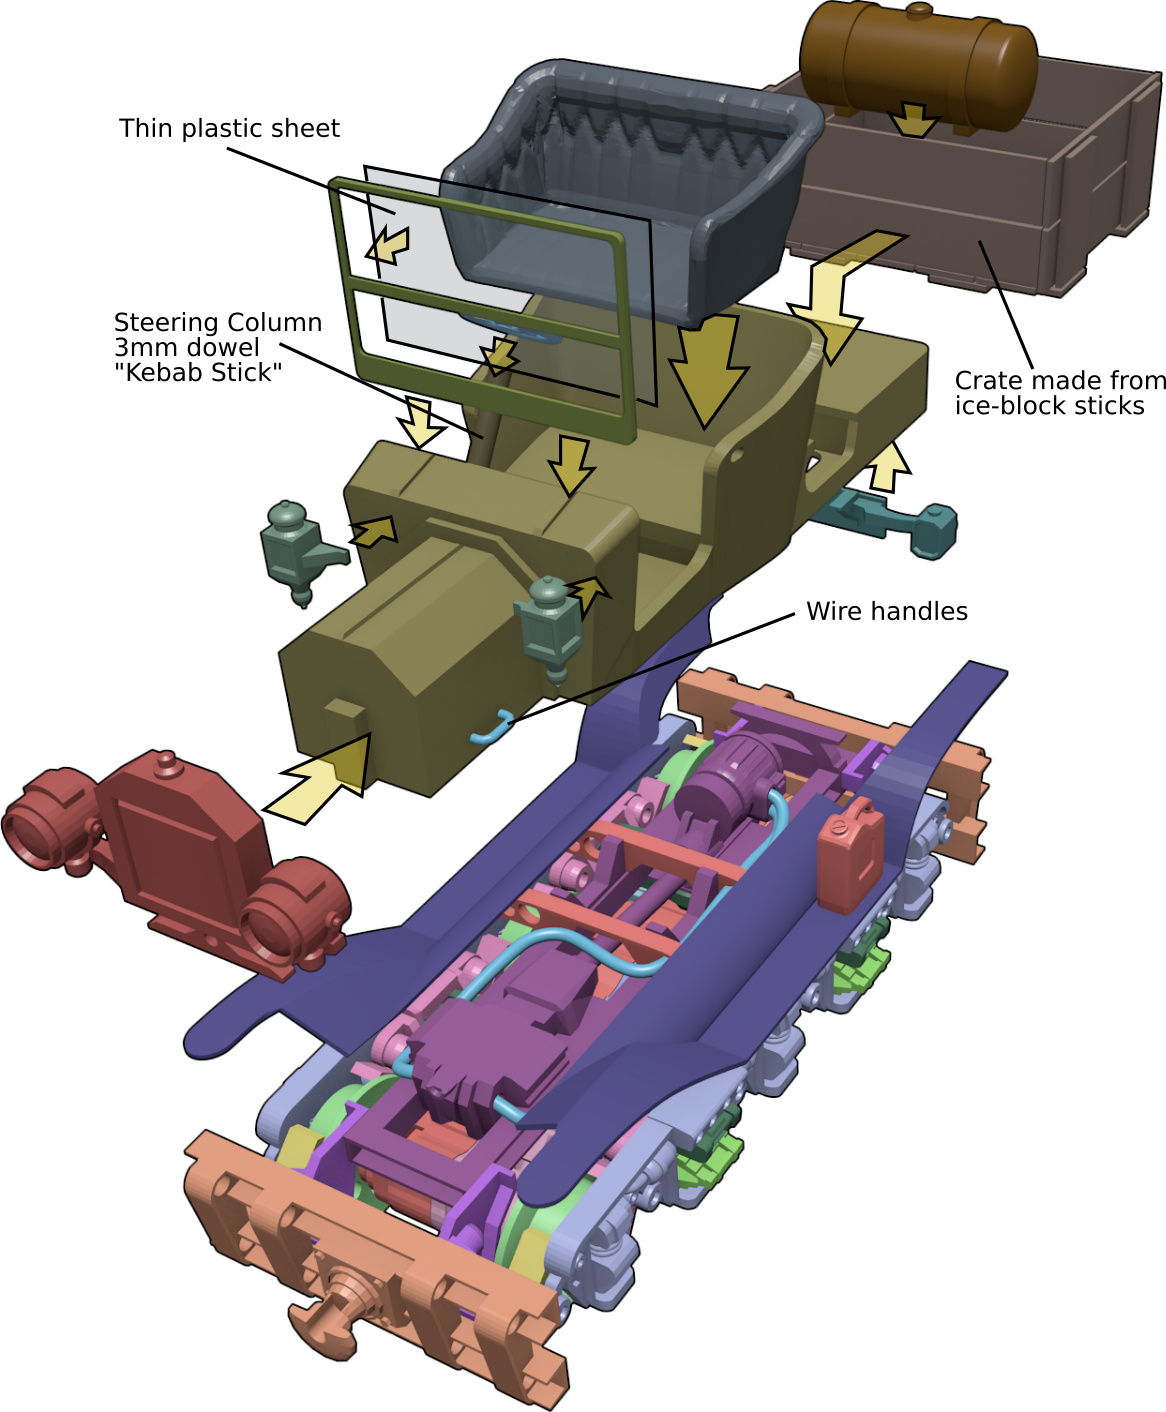
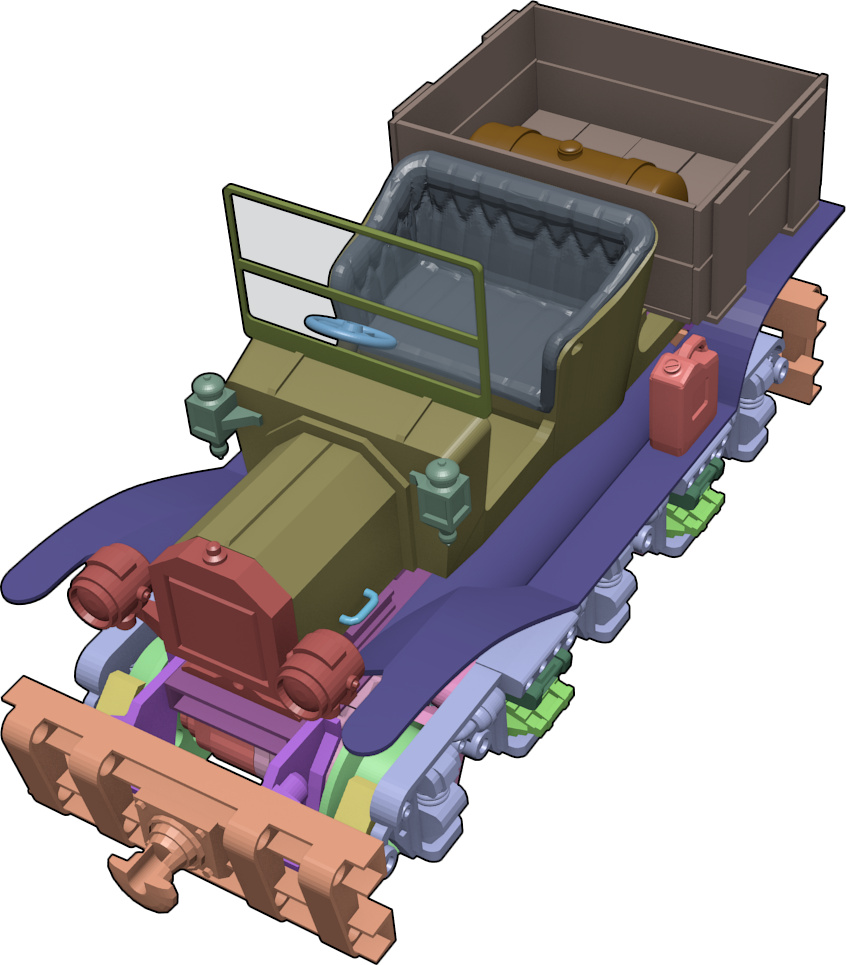
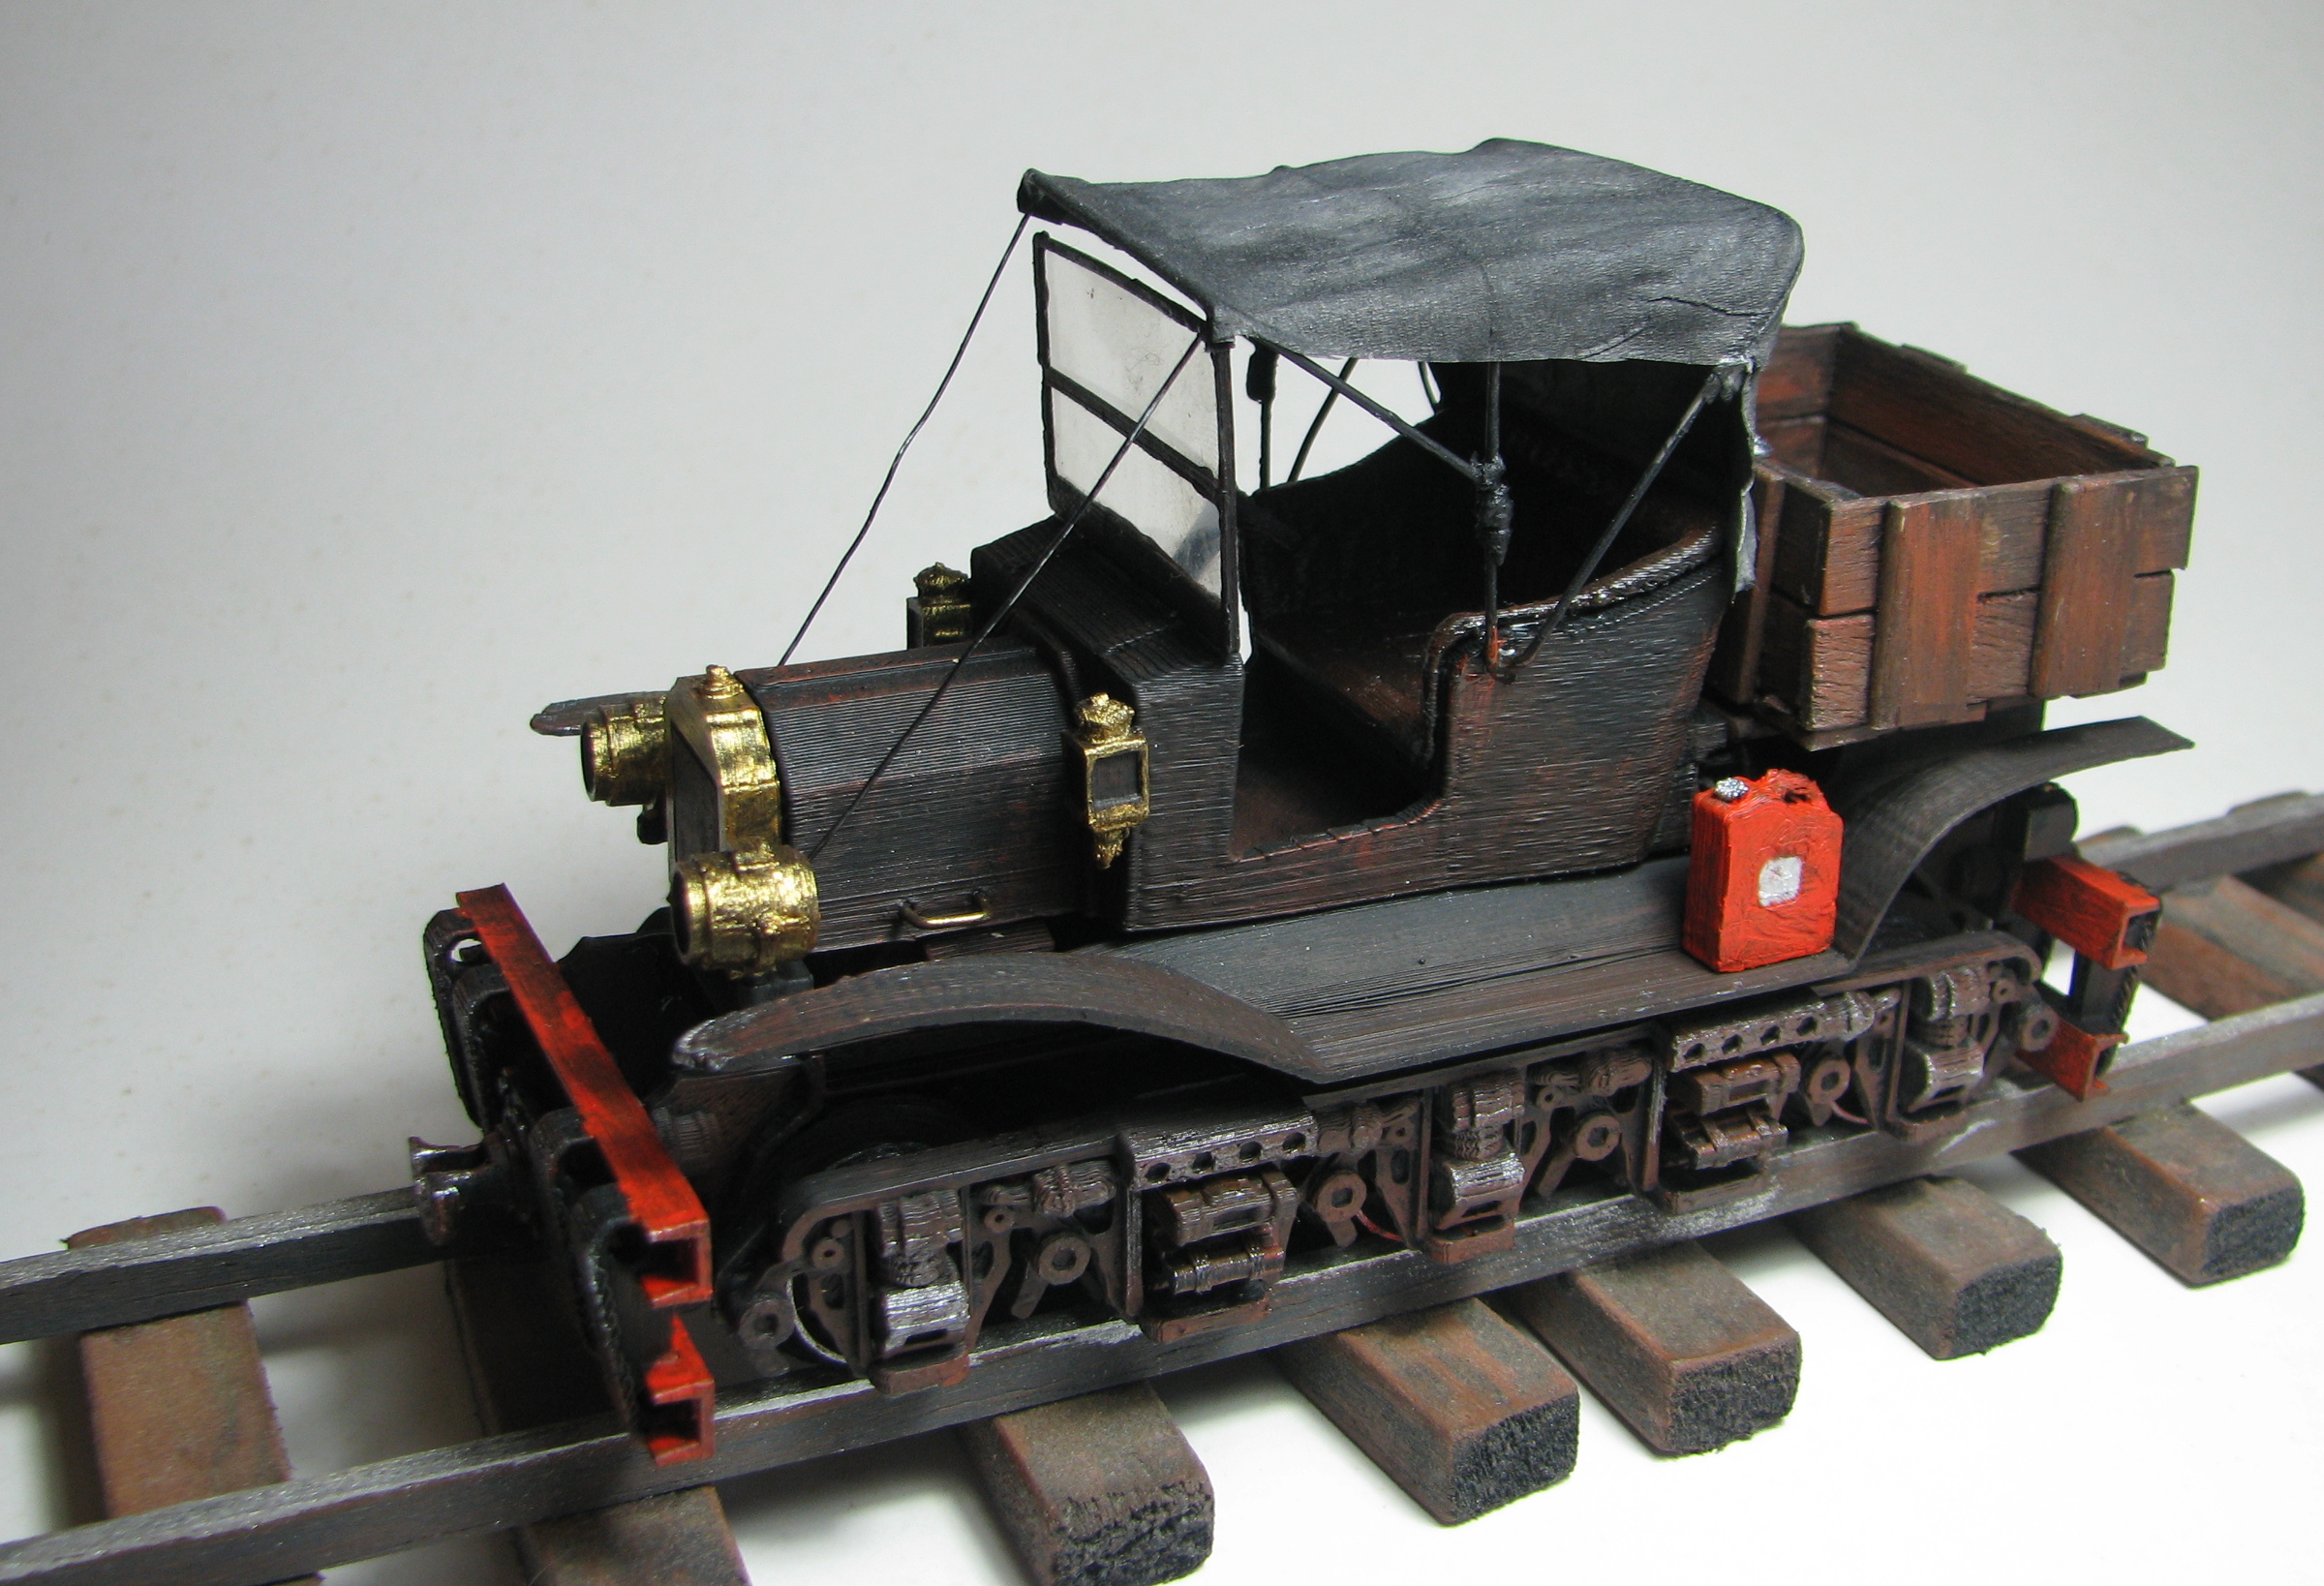
When the body is assembled you can drop that down on the chassis. The “generator” pokes through the opening in the floor at the back.
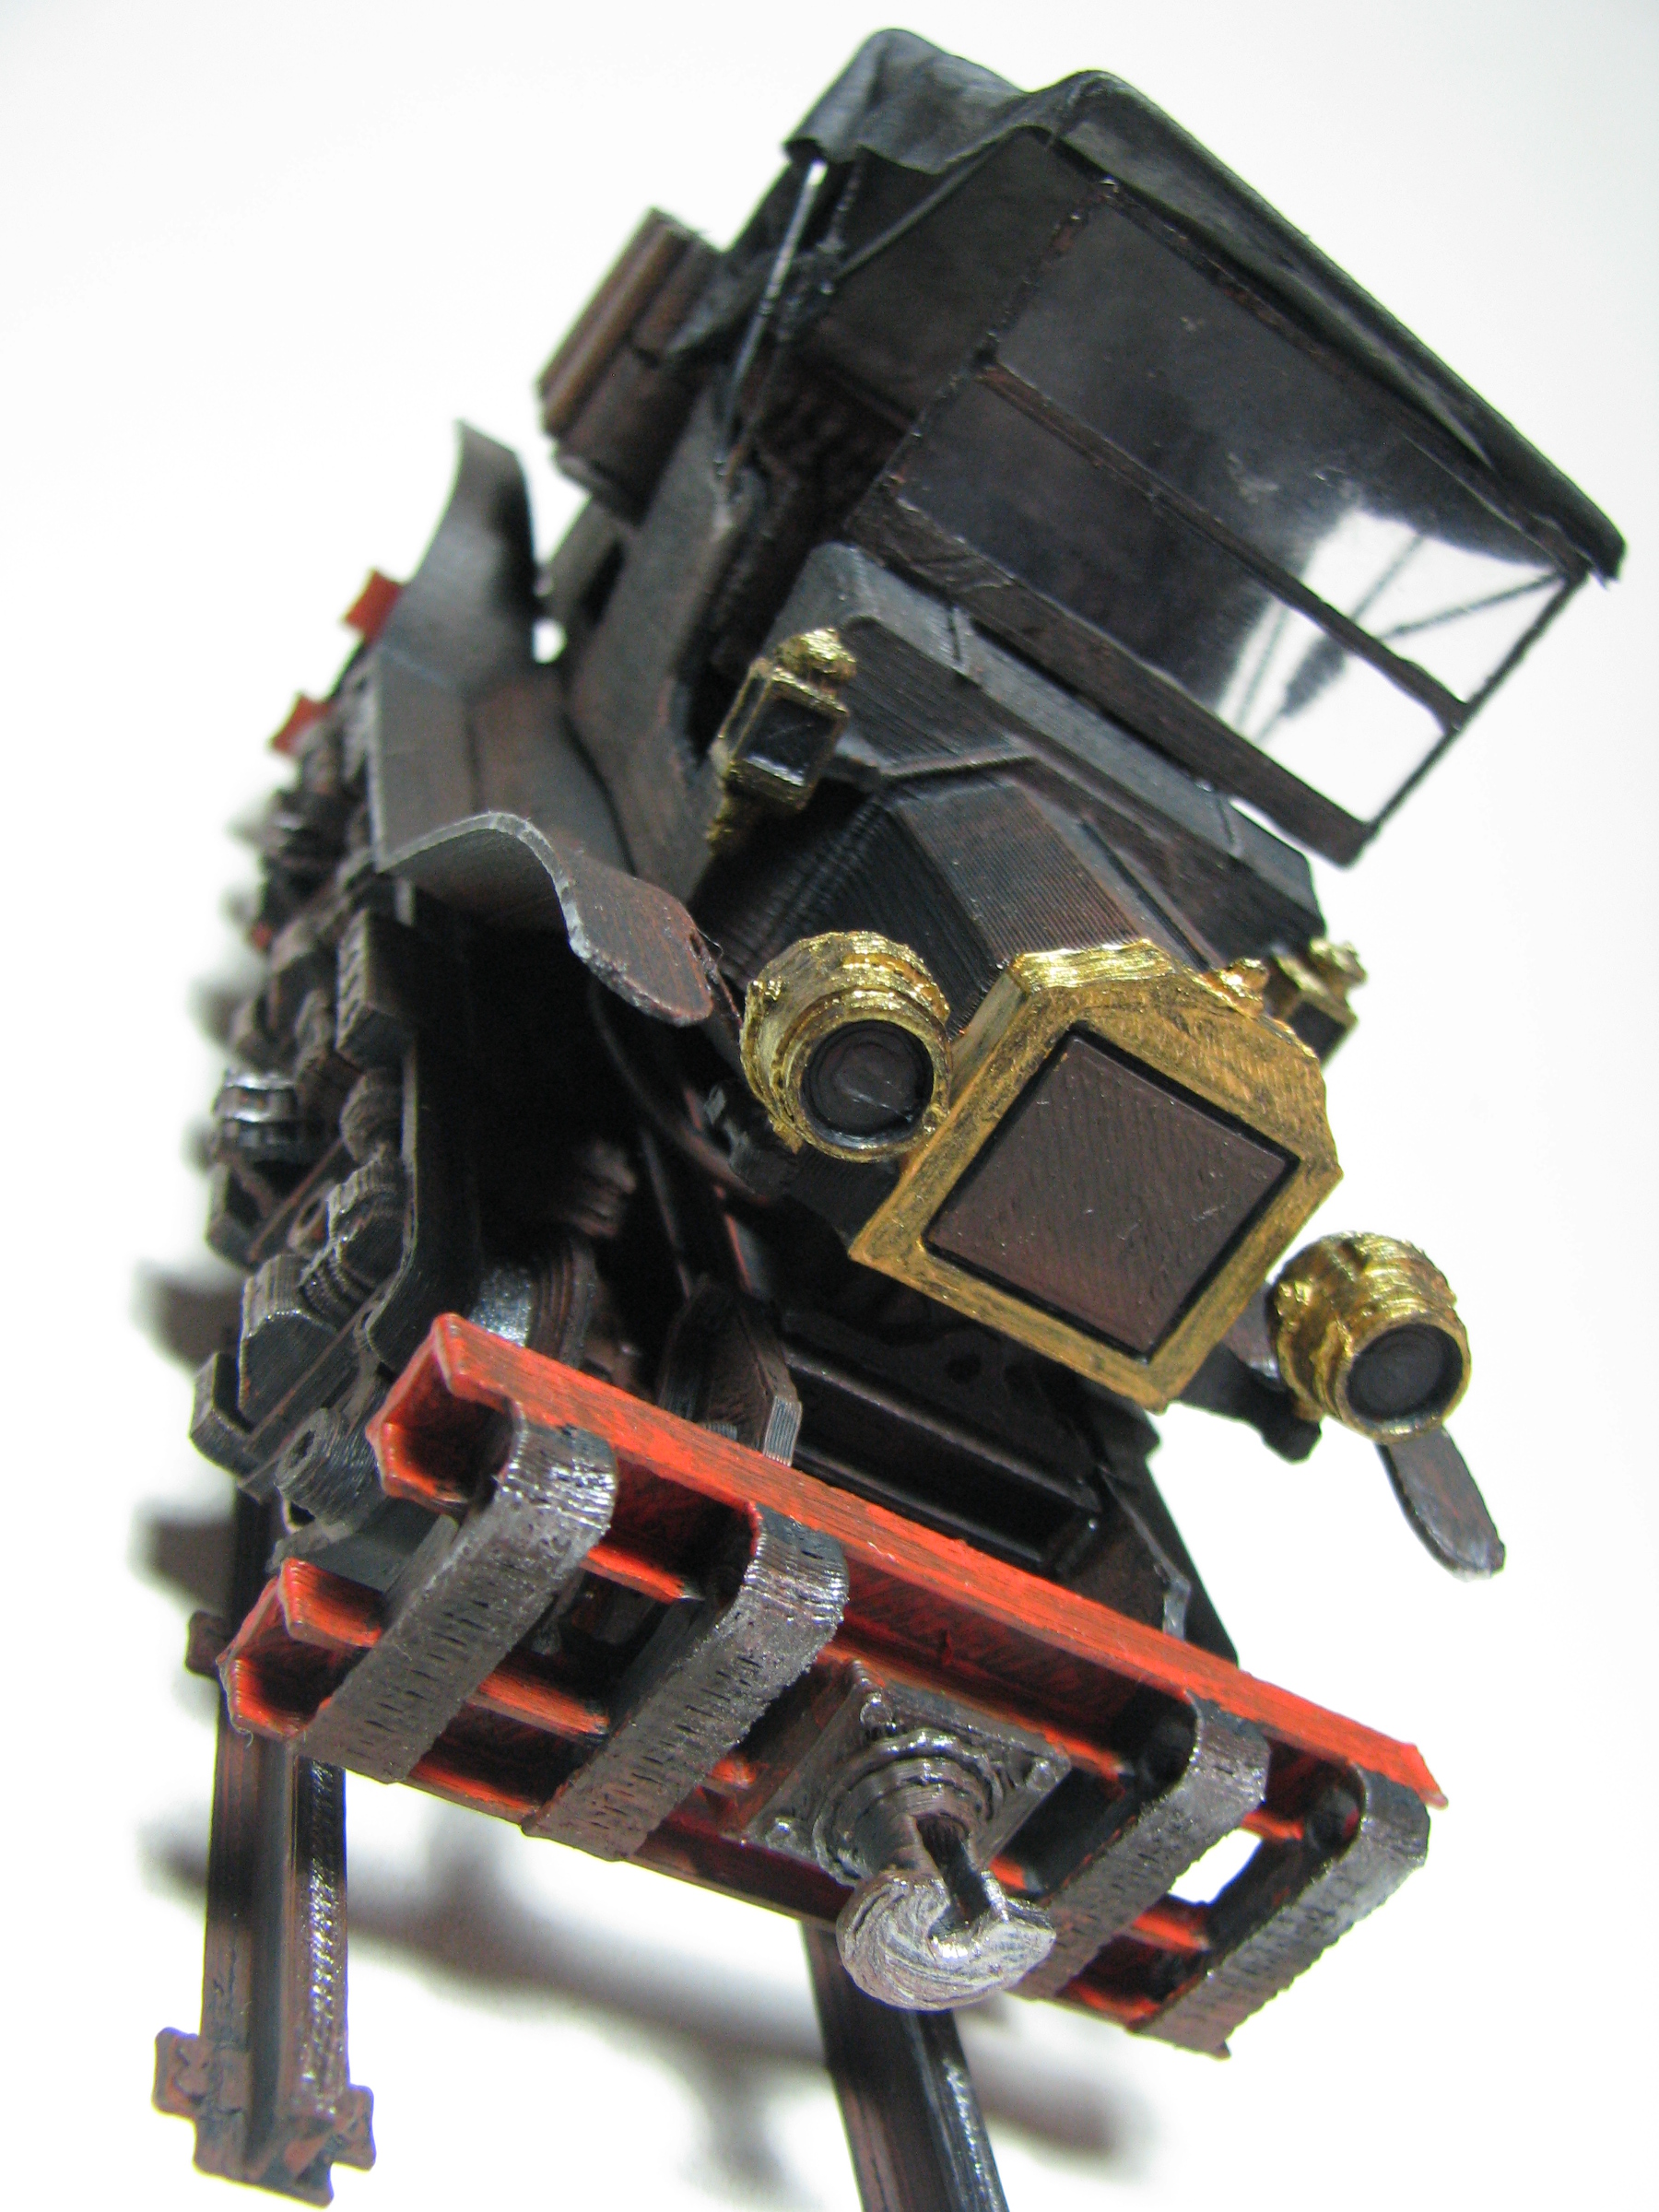
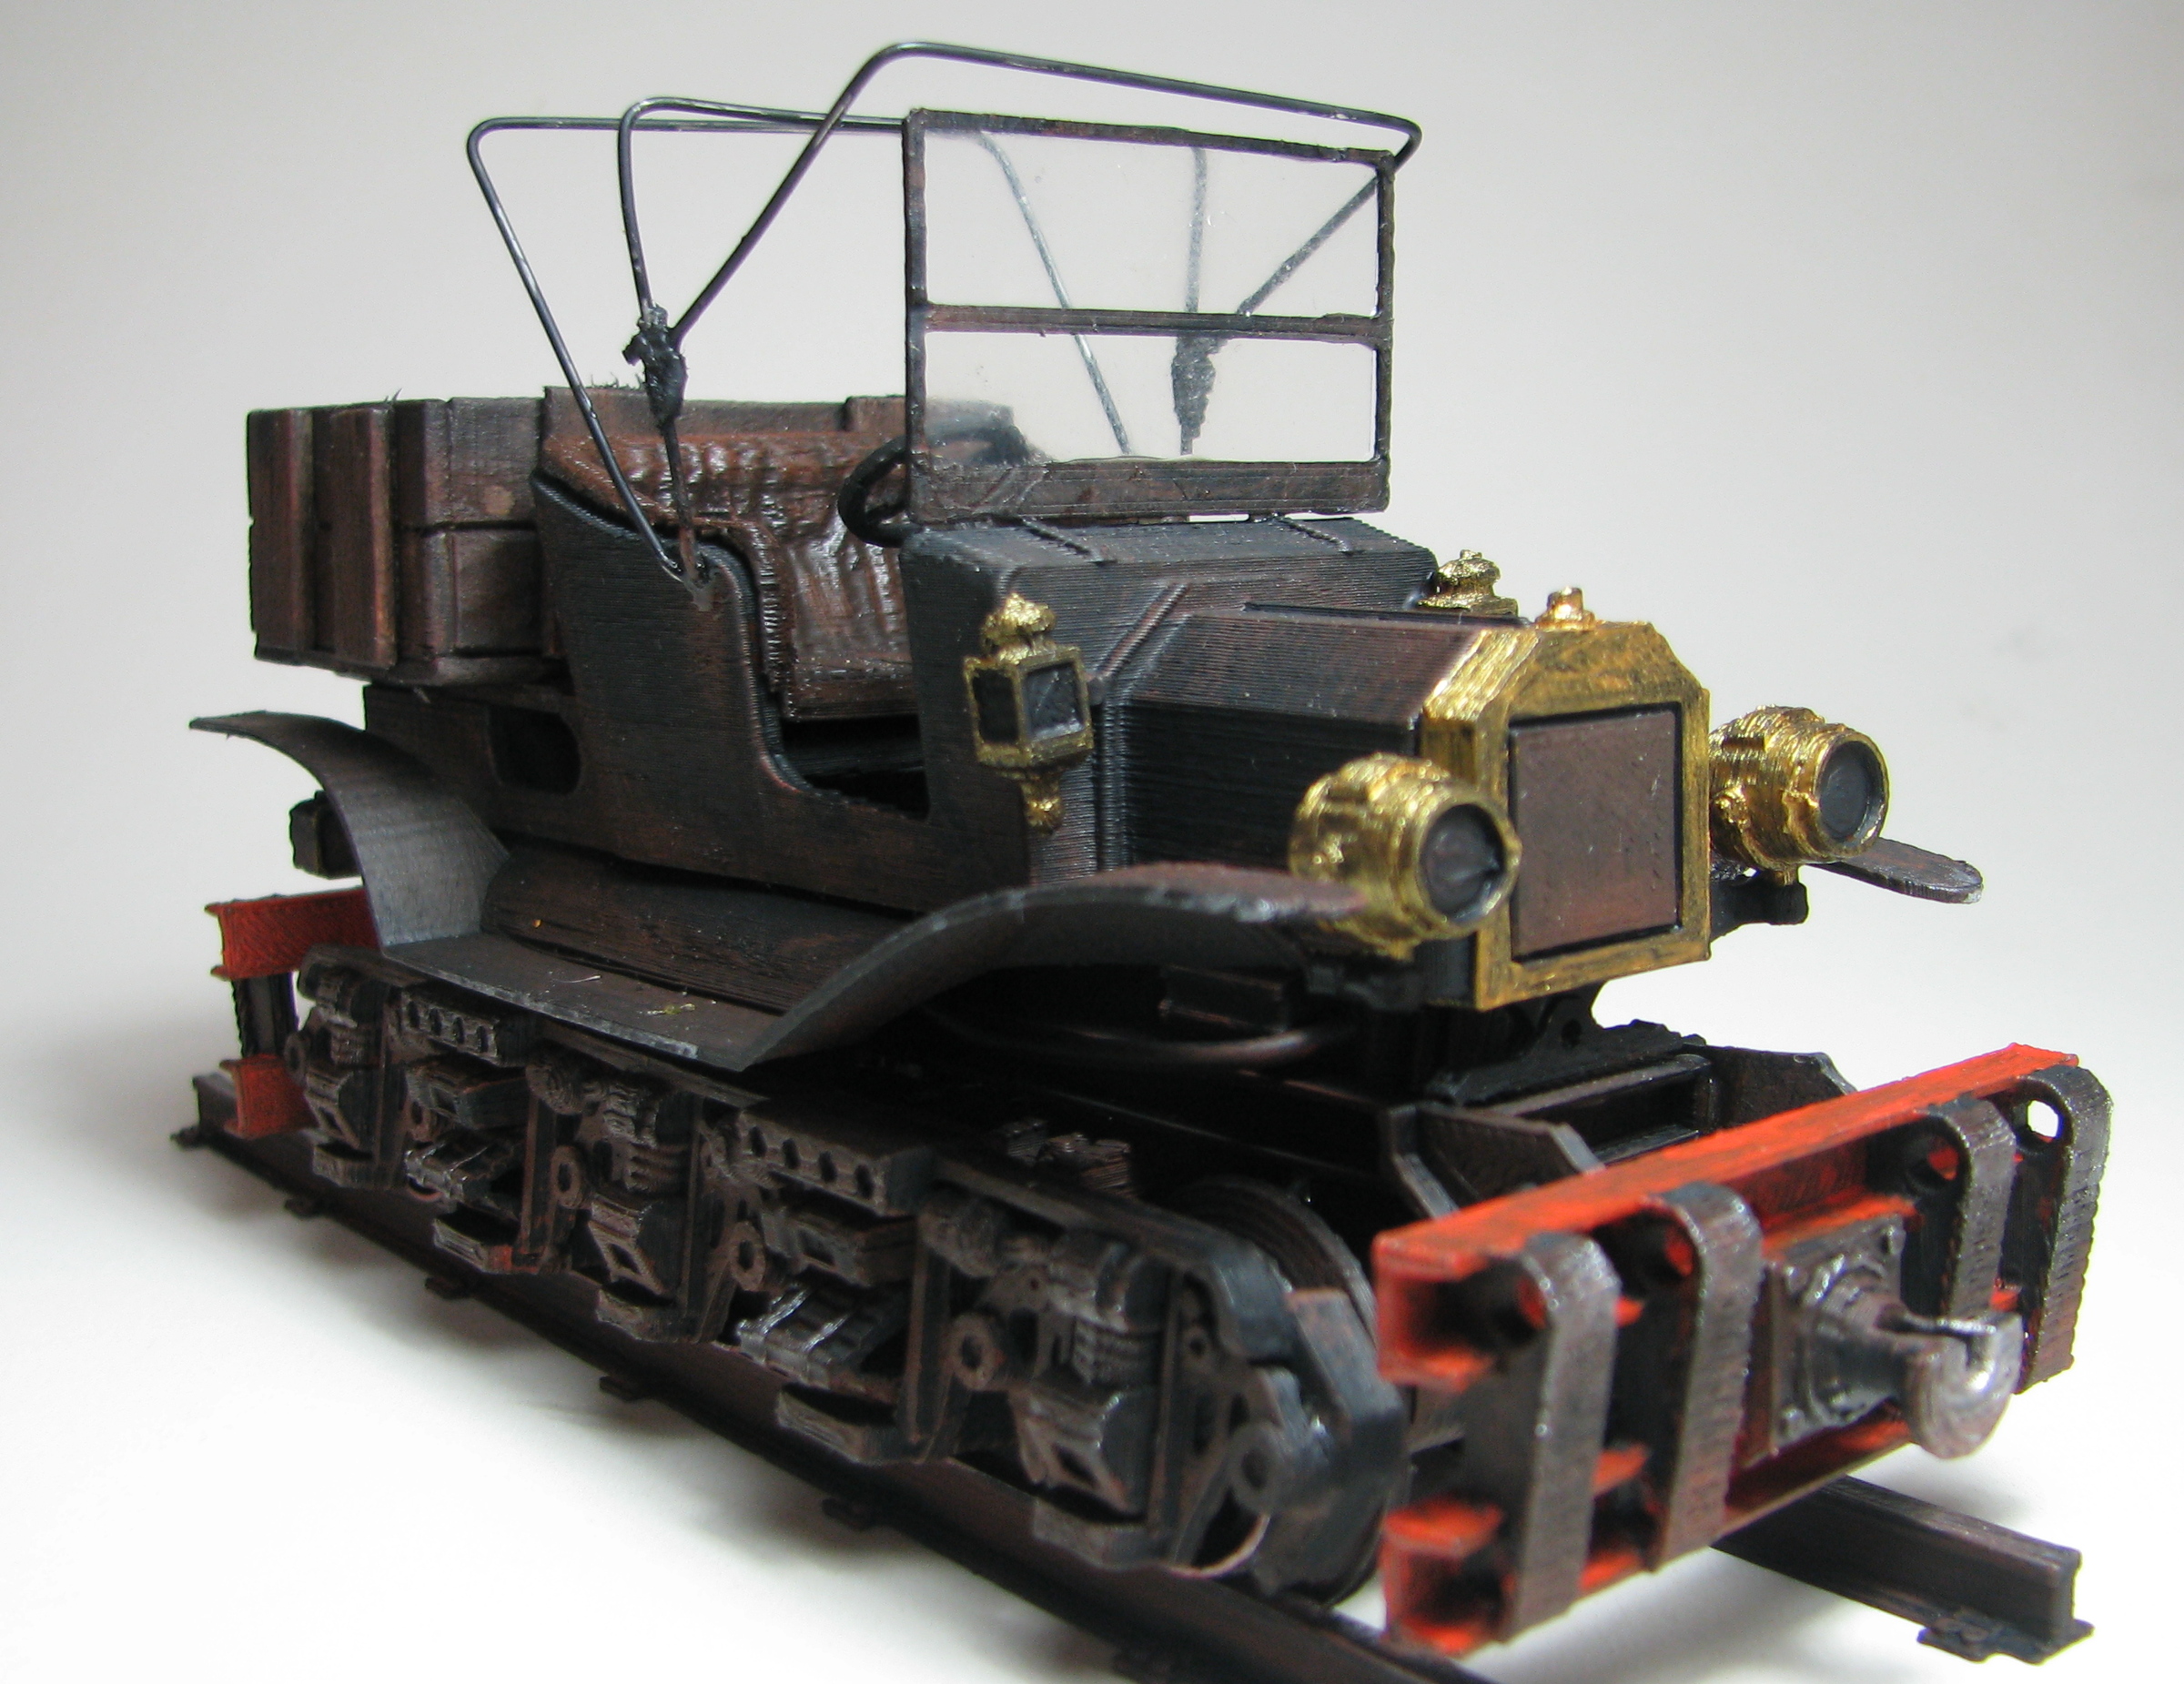
It will end up looking something like the image below. It was tempting to leave it at this stage and not make the canopy.
Step 4
The last stage is to add the canopy should you wish to go that far. None of this is printed. It is quite straightforward though.

First cut and bend some of your Ø1mm wire. The diagram below gives some indicative measurements, but you will probably find you need to try several bends to get the look you are after.
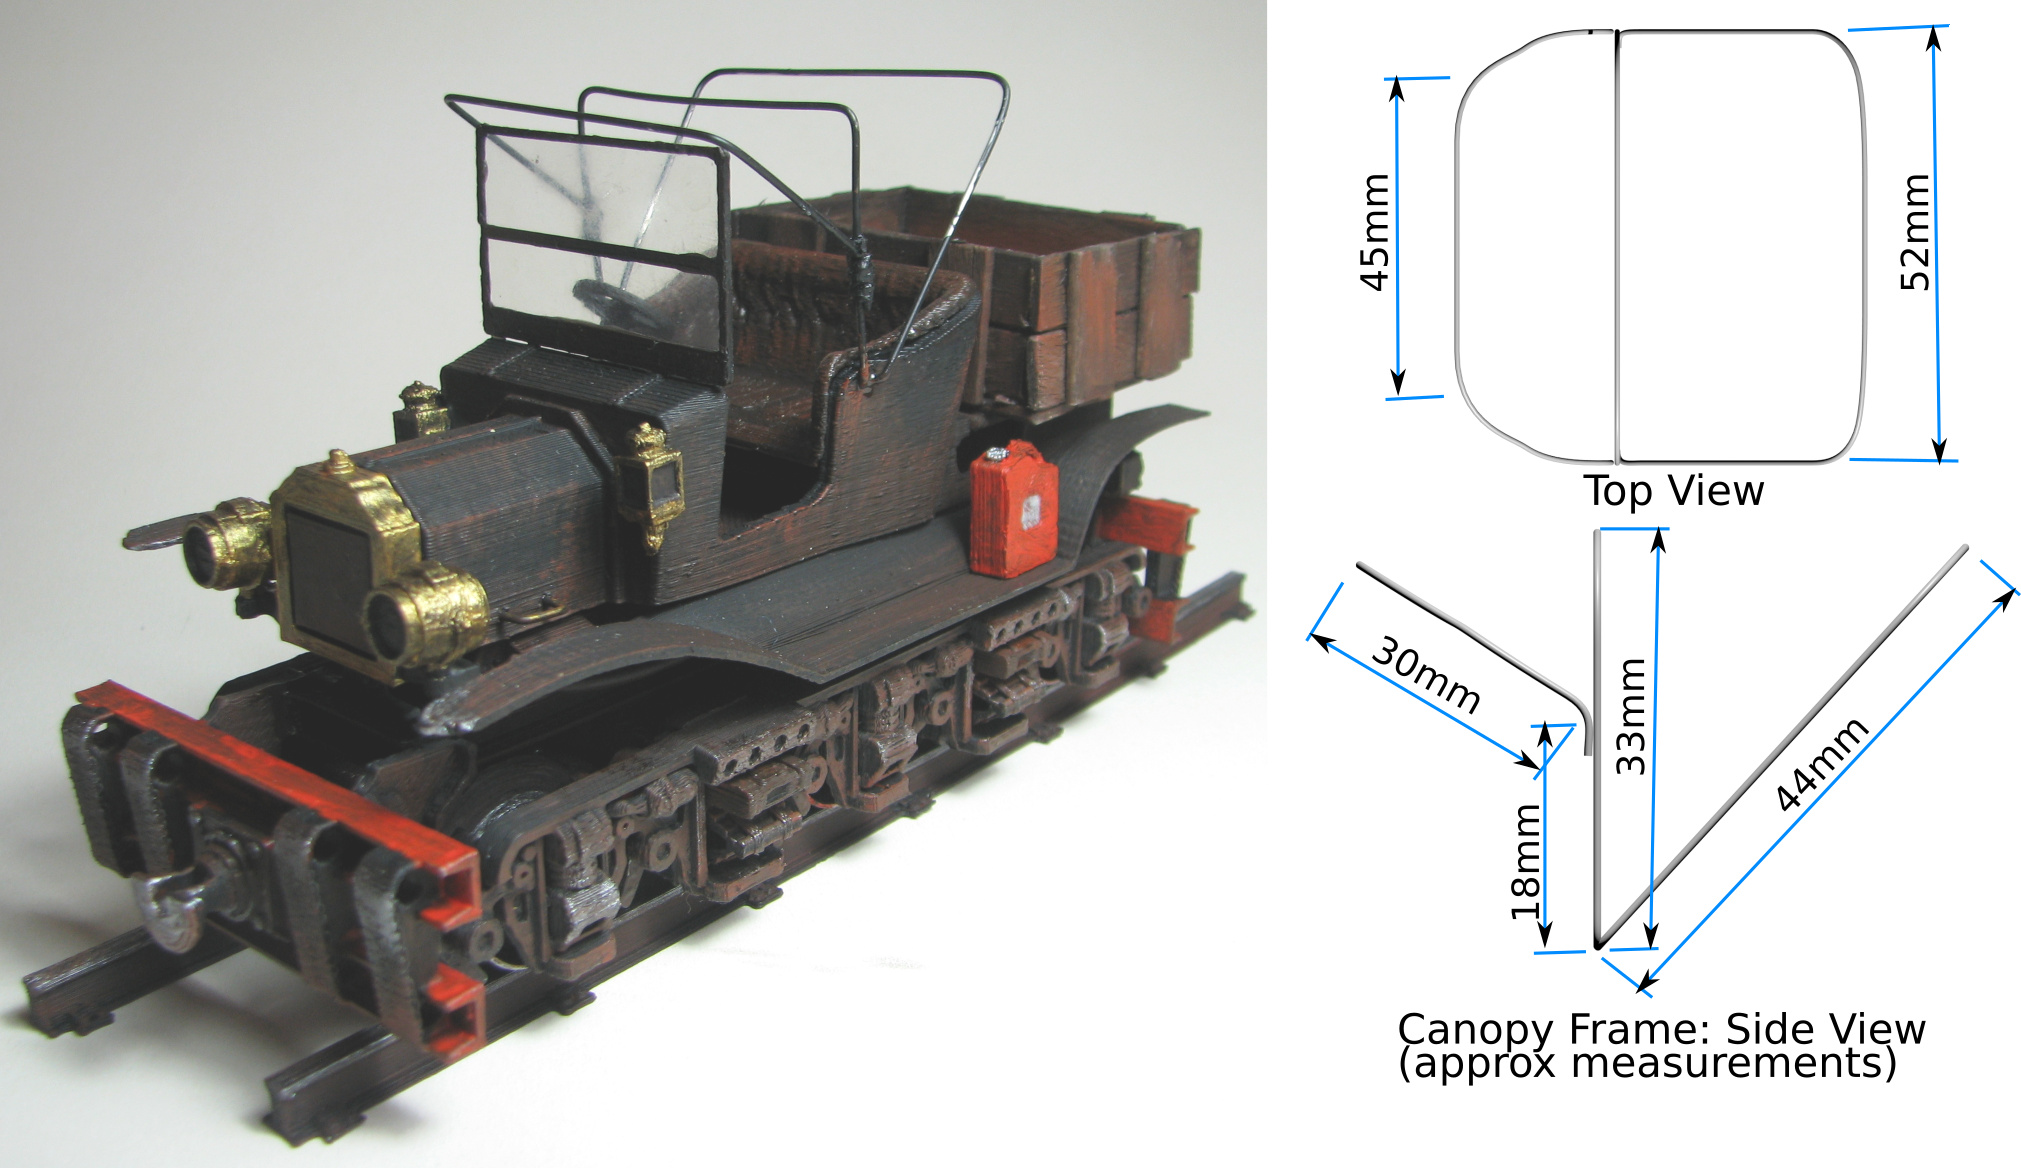
The two longer loops fit into the opening in the car body while the shorter loop has a short length which attaches to the vertical loop. I found using some cotton to tie the shorter loop to the vertical loop worked well. I smeared epoxy glue into the cotton to ensure it would not let go over time.
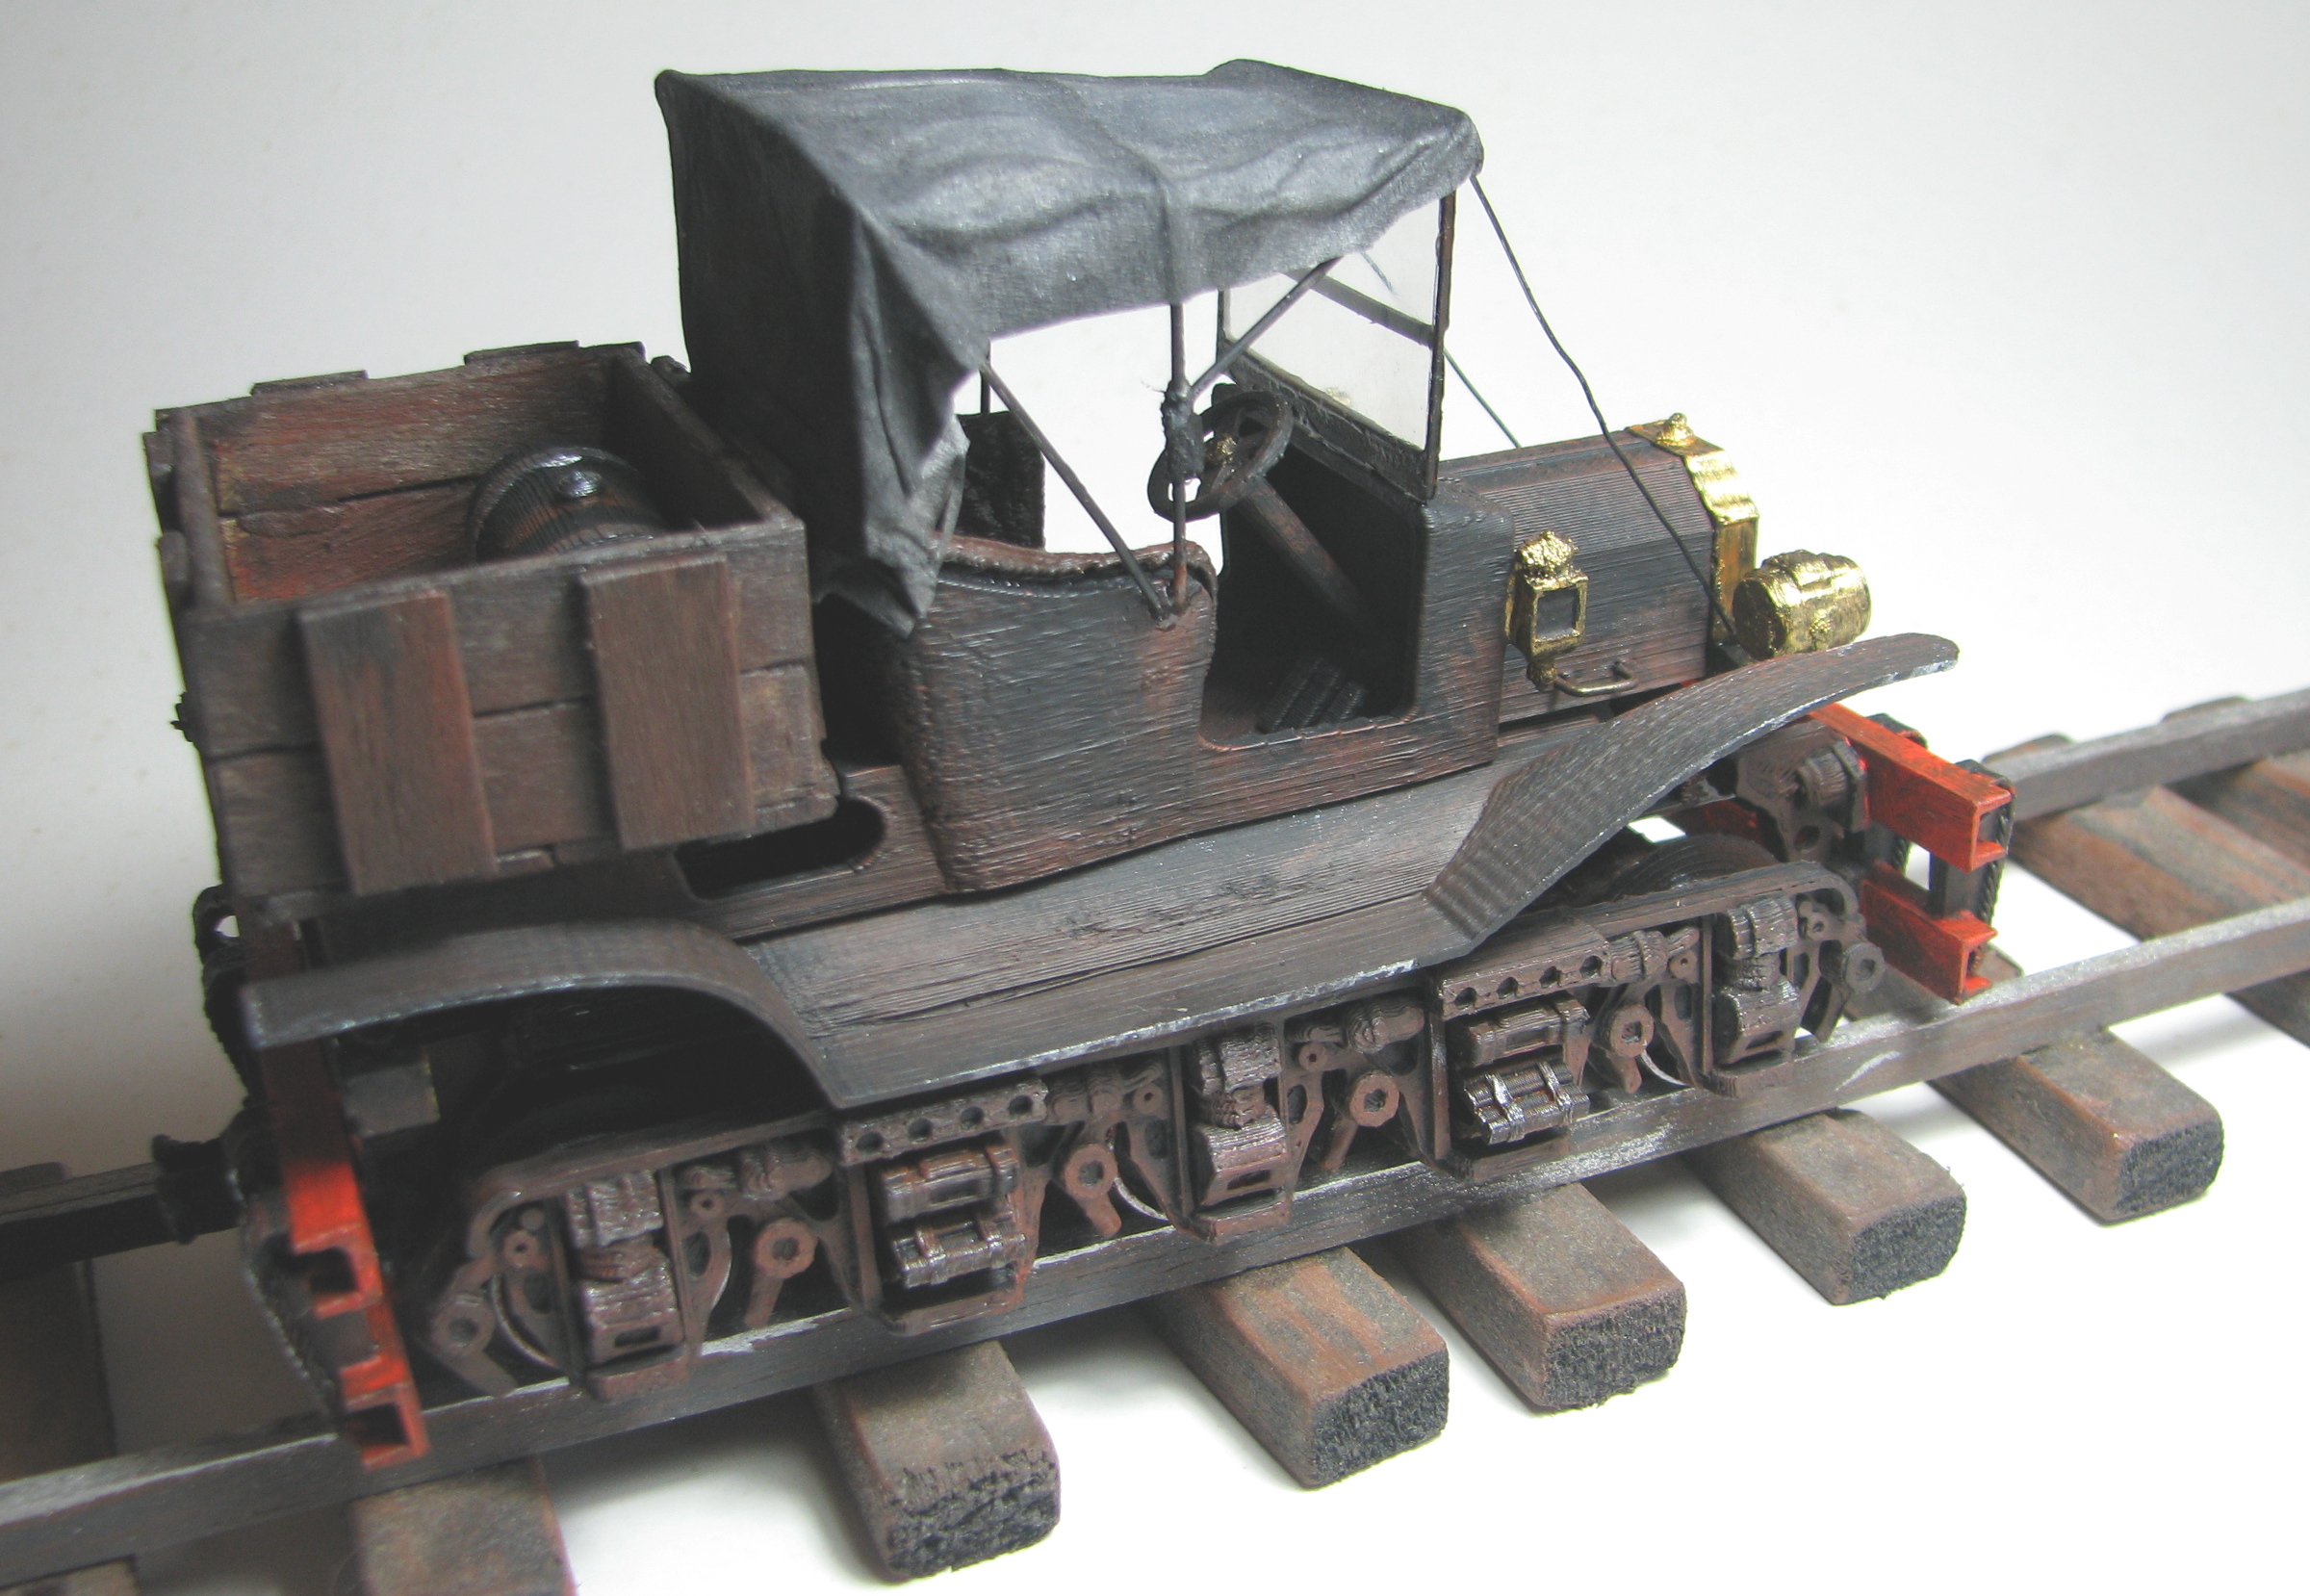
Once that is all firm, protect your paintwork with some lunchwrap or similar. Cut a rectangle of tissue that is long enough to extend 5mm beyond the front of the canopy frame and down to the back of the seat. Cut it wide enough to go slightly over the sides of the canopy frame.
With a solution of PVA glue, water, and gray/black paint thoroughly wet the tissue and drape it onto the frame. Push the extra length around the front canopy frame hoop so that it can bind to itself underneath. The wet tissue will form folds and ridges as if it were fabric. If you are worried about it not forming quite the right shape, you can force it to dry with a hair dryer and give it a push here and there as it firms up to achieve the look you are after. Trim it up with some scissors.
And that’s it.
Gallery


The 3D printed Vintage Railcar model and design by Hamish Trolove is licensed under a Creative Commons Attribution-NonCommercial-ShareAlike 4.0 International License.