Robotics 1c - Programming a Guided mBot
To go back to the Overview page click here.
To go to The Next Session - Robotics1d - mBot Sensors
To download this as a .pdf:

Task for this Session
Building on what we have learned in the last session, we are going to design a program to guide our mBots through a pre-set route.
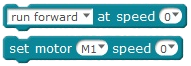
For our programme we will only use the code blocks we experimented with last time. These are the motor control blocks; “run forward at speed …” and “set motor M1 speed …” and the wait block.
Your program is basically the same sort of instructions you might give to someone who has a blindfold on who you are guiding through a maze. Obviously you are not so mean as to deliberately crash them into a wall … right?
The Maze
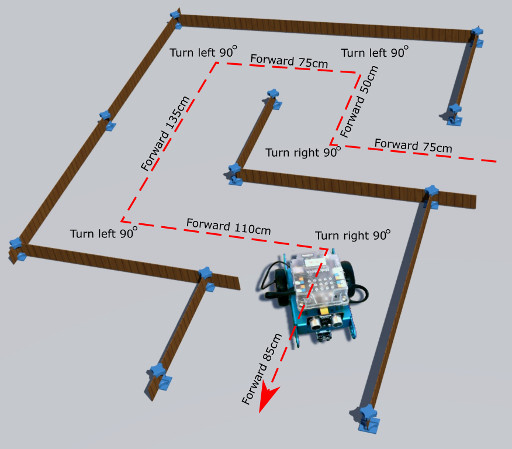
Use strips of cardboard, old boxes, and anything else that will make a good barrier to create a “maze” through which we will guide our robots.
Once the maze is set up, use a ruler or measuring tape to map out the directions and distances you will need your mBot to follow in order to get through the maze. If it helps to visualise it, walk through the maze yourself and take note of which way you turn at each corner.
Write your list of instructions down.

Translating Your Instructions
You instructions are good for you but you need to translate them into numbers that are meaningful for the mBot. Here is where the numbers you worked out last time become useful.
You will have mBot speed and time measurements for particular distances and speed and time measurements for executing a turn. Let’s use them to translate your instructions into something we can use for our program.
From last time:
- At a speed setting of …. the mBot moved …. cm in …. seconds.
- At a speed setting of …. the mBot turned …. degrees in …. seconds.
Using the example above let us say our measurements from last week were:
- At a speed setting of 100 the mBot moved 60cm in 3 seconds.
- At a speed setting of 100 the mBot turned 120 degrees in 2.5 seconds.
If we want to stick with our speed setting of 100, to make the mBot run forward 75cm we would need to work out a time for the wait block. Our calculation will look something like:


The code block for running forward 75 cm would look like this:

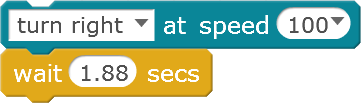
Similarly the turn can be calculated the same way but this time we have a thing called Angular Velocity which is how fast something turns.


The code block for doing a right angle turn to the right would look like this:
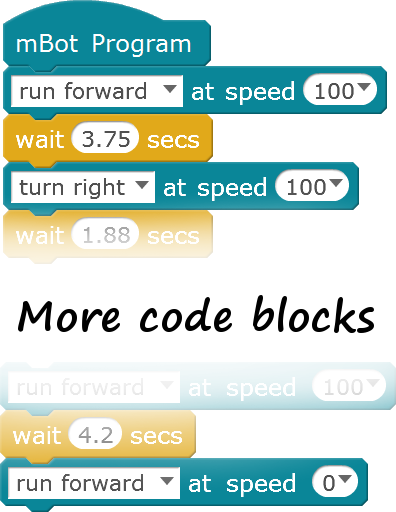
To make our mBot travel forward 75cm and then do a 90° turn to the right we just stack the two series of blocks together.
Use a spreadsheet to calculate the times for each block for your route through the maze then set up your program with all of the blocks stacked together. Remember to add a speed 0 block at the end to stop the mBot running away.
Try out your programmed mBot in the maze.
If you really don’t want to go through all the calculations, you can always use trial and error.
What have We Observed?
Our guided mBot is interacting with the real world based on the instructions you have given it. But the real world is not perfect. How did the real world affect the mbot’s ability to get through the maze.
- What happens if the mBot’s path is disturbed along the way?
- What effect would deep carpet have? What effect would lino have?
- What happens to errors as more instructions are added?
- What happens if the maze changes?
Conclusions
So we have looked at how to issue a sequence of directional instructions to our mBot and had it follow those instructions. Because the mBot was operating in the real world it would have had to contend with things like a surface that wasn’t perfectly even, and it may have struggled with getting caught on corners and pulled off course. Because the mBot was not programmed to detect and react to the world around it, it was unable to handle any changes or oddities of the terrain.
Is this a good way of getting a robot to carry out a task?
For some situations, sure. If accuracy is not an issue and we know our robot well and the route can be planned to great detail it is a fast solution. But it only works for one route. Even though it operates with high accuracy a 3D printer is a robot that works this way. It can do this because its slides, motors, and material are known and have no variability. At the start of a print job it uses some touch switches to find it’s home position, but once it is printing it does not check again. The directions are given to it in a continuous sequence that do not change if the printer gets knocked off course or the filament jams or one of the motor drives starts slipping.
A better solution is for the robot to be given the ability to sense its surroundings and make decisions based on what it can detect. This will allow the robot to respond to variability.
Well Done
We have looked at making another simple program and seen how the real world can affect the success of an otherwise perfect program.
Next time we will look at how to make the mBot perceive and respond to the real world.


This document “Robotics 1c - Programming a Guided mBot” by Hamish Trolove is provided under a creative commons license - Attribution, Share Alike.