A More Refined Wire Sealing Technique

I was very aware that my method for making epoxy resin seals around wire bundles was pretty ugly, and so with the actual ROV wire bundles I refined the technique somewhat. Sure it is still pretty ugly, but it is a bit easier and tidier than the first attempts. The following sequence of photos show the process and hopefully describe the steps sufficiently for anyone else to reproduce. I apologise in advance for the lack of continuity in the picture quality between the images.
The seals produced with this method were also tested to 5 bar pressure difference across them to ensure they would be able to seal against a pressure at 50m depth. The test method is described on the “Pressure Testing Rig for ROV Seals” page.
Each bundle consists of 6 wires capable of handling 7.5A, and three light wires. The light wires were added to allow extra sensors to be externally mounted at a later date without having to redo the seals.
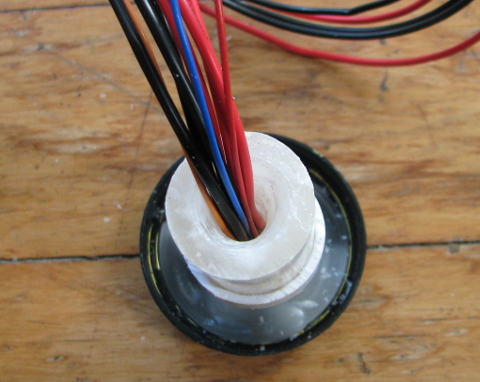
Although I was able to get a good seal around an object of the same diameter as the tether, I was nervous about using the cable glands directly on the tether because of the flexibility of the CAT5 cable’s outer sheath. It is fairly loose and I could see it being compressed sufficiently far that the cable glands would not be able to close around it enough when subjected to high pressure. Additionally the looseness of the sheath meant that any damage to the tether than allowed water access would immediately flood into the ROV through the tether. Based on this, I also made an epoxy resin plug around and between the CAT5 wires, and also enclosed the end of the CAT5 outer sheath in an epoxy block. That should do the trick now.
To Begin
Prepare some wax rods. I had some 25mm diameter PVC tube left over from the ROV frame so I used that as a mold for the wax rods. Typically a couple of pours are required because the wax shrinkage is so high that the rods almost end up hollow. Once it is set, use a piece of dowel or a broom handle to knock the wax out of the pipe.

You will be left with a nice cylindrical stub of wax with a sunken end. Use a hack saw to square the end. The length of the stub need not be more than about 60mm. Two stubs are required; one for the free end of the wire that will be within the ROV electronics pod, and the other to provide the shape of the epoxy resin plug.
Prepare the molds
Run a 10mm diameter drill down both wax stubs. Leaving about 25mm length with a 10mm diameter hole, use a 12 – 15mm drill bit to widen the hole on the wax stub that will be the mold for the resin plug. This will become the reservoir and also form a wider collar for the epoxy resin plug. I have found that scoring some small grooves in the outside surface of this wax stub provides an escape route for air when pouring in the epoxy resin.
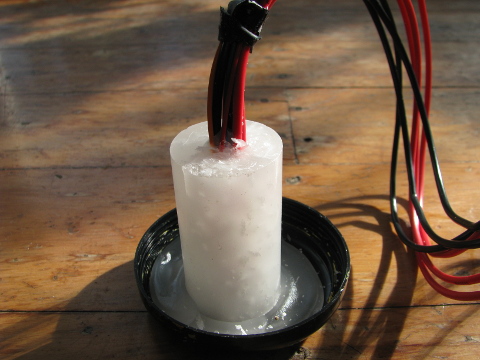
Setting the wires
Taking the ends of the wires that will be inside the ROV electronics pod, Set them into the 10mm hole of the wax stub. Carefully pour some molten wax into the hole to fill it. Once that has set, remove any wax that may have got in amongst the wires sticking out of the wax block. An old tooth brush can be handy for this.
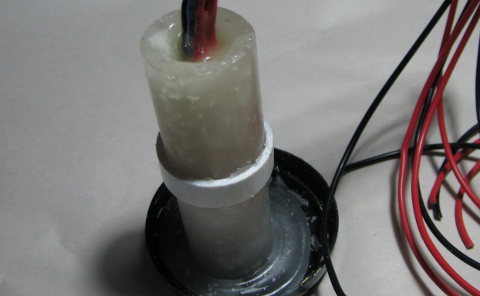
Find a small bit of waste PVC piping of the size used to manufacture the wax stub. Slip this onto the base wax stub. Slide the top wax mold along the wires and butt it up against the base wax stub. Slip the small collar of PVC up to cover the gap between the two stubs.
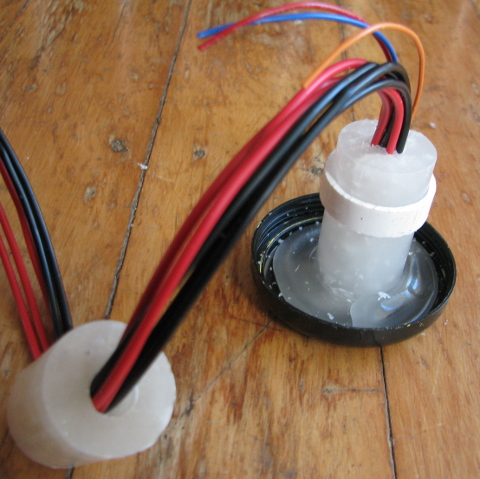
PVC Collar in place
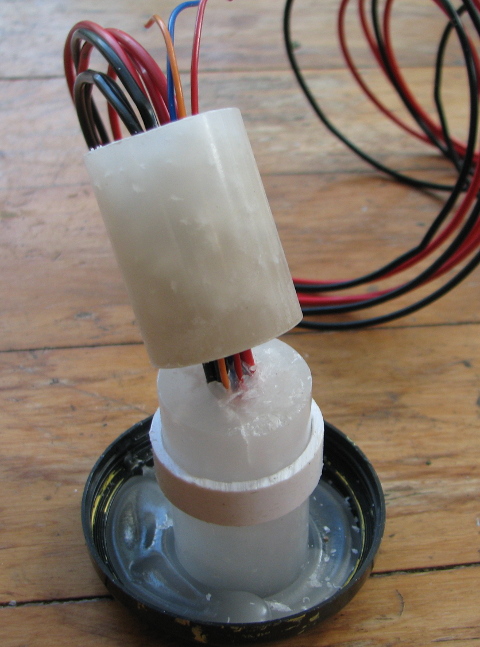
Sliding on the wax epoxy plug mould section
PVC Collar used to hold the two wax mold sections in place
That sees the wax and wires ready to receive the epoxy resin.
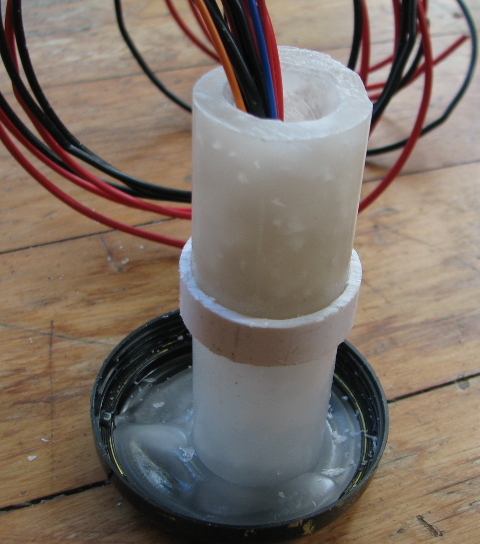
View into the reservoir of the wax mould
Pour in the Epoxy
The epoxy resin that I have to hand is fairly thick and so it needs to be coaxed into the depths of the mold with a small stick of toothpick. The reservoir section of the mold helps this process. Move the wires around a bit to ensure the epoxy gets in between all of them. Take care when using sticks and toothpicks in the mold to avoid scratching the wax mold walls.
Remove the Wax
A couple of days later, the epoxy should have set, and the wire seal plug can be removed from the wax molds. I have found that a combination of a hot knife and screwdriver used to gently cut and pry the wax mold off tends to work pretty well.
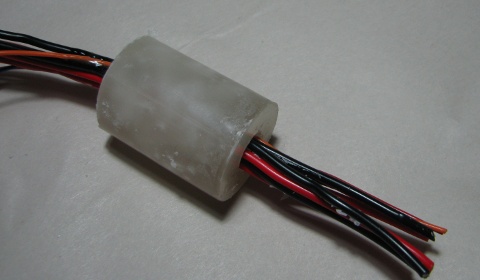
I tend to remove the base section first because this gives me the chance to pour in more resin from the bottom if need be.
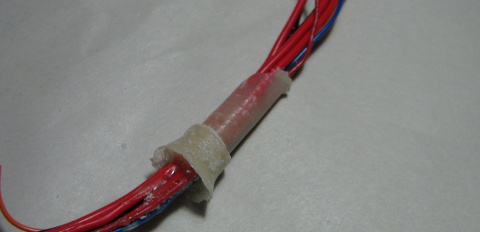
The completed resin plug ready for testing and use in the ROV. Yeah I know. It’s still ugly, but at least it works.

 This page outlining a method for sealing wires by Hamish Trolove is licensed under a Creative Commons Attribution-NonCommercial-ShareAlike 4.0 International License.