Vacuum Formed Thin Plastic Domes
One of the projects I am working on is a 3D printed flying saucer for a stop motion animation with the design inspired by the particularly gratuitous “Petey and Jaycee” series. Being the style of flying saucer it is, it needs a nice big clear plastic dome.
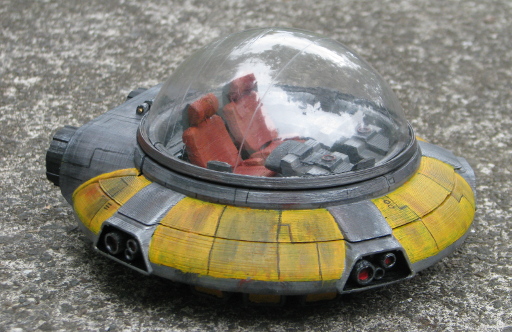
Before I could start printing out the flying saucer body, I needed the dome. Once I had a dome I could use it to scale the flying saucer.
I will admit, that the illustrations for this article are not the actual dome used in the flying saucer. This was a series of photos taken as I repeated the process for this article.
Incidentally, here is a link to the article on the Flying Saucer model: A 3D Printed Flying Saucer
The Original Hemisphere Form
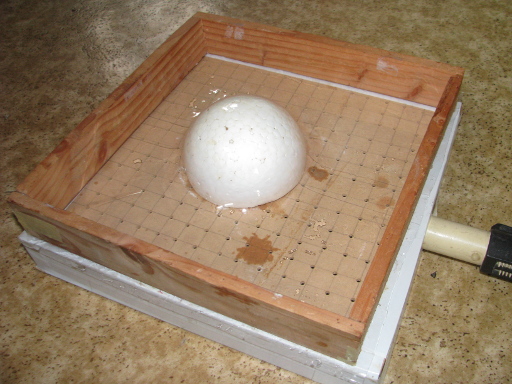
For this I searched high and low for a cheap sphere shape that would be about 100 – 150mm in diameter. Eventually I found a place selling polystyrene spheres. I bought a 125mm one with the intention of truncating the vacuum formed hemispherical shell to produce a dome with a diameter of 110mm on its open edge.
This was a good cheap form, but had some draw backs that became evident when I tried to repeat the vacuum forming process. The downside of the polystyrene sphere is that after the first mould is taken, the additional heat from subsequent moulds makes the polystyrene cells begin to puff up and you lose your nice smooth spherical surface. A better form could be created by using a harder, more heat resistant material such as a cast plaster hemisphere.
It worked well once and that was all that I really needed.
The Vacuum Former
I had made a vacuum former quite some time ago for creating lightweight shapes for my radio control aircraft. The original “it’s not that hard” push for making a vacuum former came from reading an old Make Magazine which described very nicely how to make a very simple vacuum forming system with a few bits of wood and about an hour’s worth of effort (Make Magazine 11 page 106).
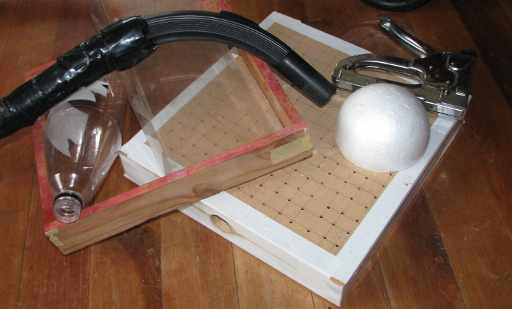
My vacuum former is more or less the same as the one described in the magazine. It is just a hollow square box with a perforated MDF panel on one side and a closed MDF panel on the other. On one end there is a hole of the right diameter for the vacuum cleaner nozzle to fit snuggly into it. All the edges are taped to prevent any air leakage. A matching open frame was also made. This frame takes the plastic to be moulded.
I had not realised how much suction the vacuum cleaner would give until I tried it for the first time. The Make Magazine’s article advised putting some props into the vacuum box’s cavity before closing it up – advice I completely ignored. I figured out my mistake pretty quickly as the MDF panels bowed in alarmingly when the plastic sheet sucked down and closed off the perforations in the panel. The panels came off and the props went in immediately after that.
The Process for Creating a Hemisphere
Selecting a plastic sheet
The plastic sheet I used was packaging from some large blinds. According to the label it was PET, which is the same plastic used in most soft-drink bottles. It was not perfectly clear and a little scuffed in places, but it suited the project perfectly. The flying saucer itself was going to be painted to look a bit worn out too.
I have tried No 2 plastic (HDPE – High Density Polyethylene) from some plastic milk bottles for a completely different project. This worked quite well too.
Fitting the sheet to the frame
Make sure the staples are flush with the frame surface. You will not get a good seal if they are proud (as shown in the photo below – this was shortly before I was reminded that I needed to tap them down first)

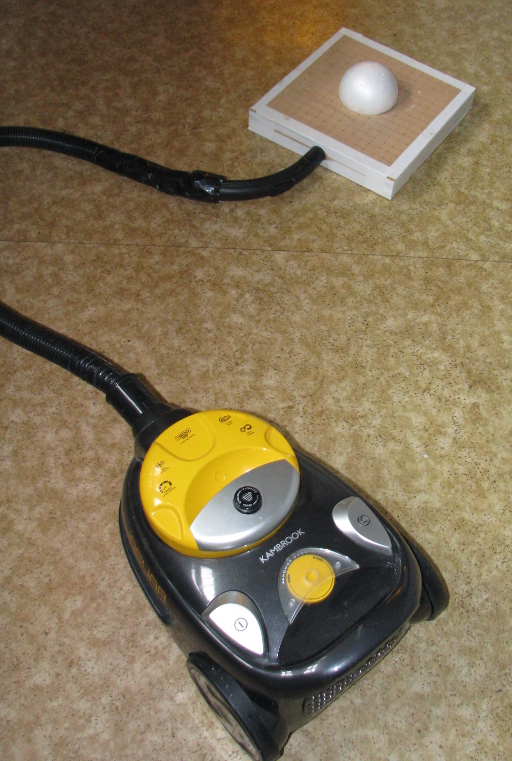
Placing the Form
Place the form in the middle of the perforated surface of the vacuum box.
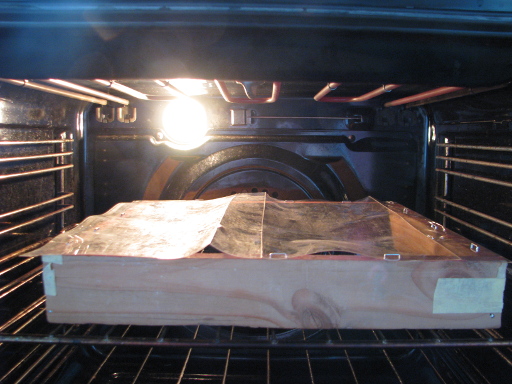
Heating the sheet
The best way of heating the plastic is to put it under the grill. If you leave a bit of space between the grill and the top of the plastic you will be able to watch it go through the various stages and also ensure the heating is relatively even and does not happen too fast.
As the plastic heats you will see it go through various stages. First it will rise up and then it will relax. When it is getting close to ready you will send wobbles across the surface if you bump it. With the PET you need to make sure you don’t leave it in there too long otherwise it begins to get an opaque whiteness to it.
Don’t worry about fumes, there aren’t any given off. This is because we are not melting or burning the plastic. If you have it smoking and dripping onto the racks, you have it too hot and you can look forward to a fun evening cleaning charred plastic off your oven surfaces (once the toxic fumes have dissipated that is).
Vacuum forming
When the plastic is getting close to the right temperature and softness, turn on the vacuum cleaner. You want it already running when you take the plastic from the oven.
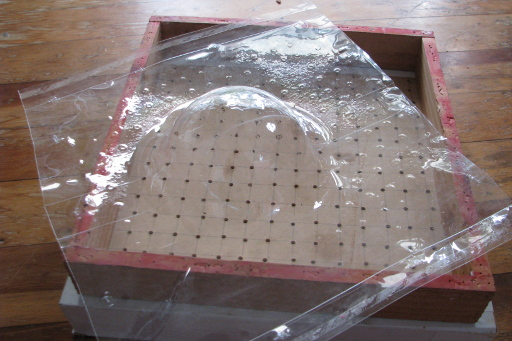
Quickly press the frame and plastic down over the form so the frame is tight against the vacuum box.
Things will happen fast. The softened plastic will be sucked down over the form and onto the perforated panel. Turn off the vacuum cleaner as soon as the plastic is against the perforations.
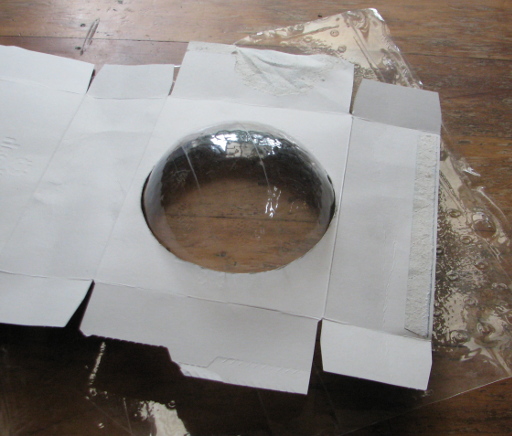
Removing the shape
Just remove all your staples.
Cutting the size
For a truncated sphere, measure the diameter you are looking to achieve onto a stiff piece of cardboard. Carefully cut this circular hole out as accurately as possible.
Drop the cardboard gauge you have just created over the vacuum formed hemisphere and mark off where the circle sits. This is your cutting line.
Done
That’s it. It’s all pretty simple.
After having done this I found reference to another way to manufacture plastic domes from thin plastic sheets without using a form. This alternate Blow Forming process made use of a board with a hole in it to accept a pipe from a pressurised air reservoir. The sheet of plastic to be heated is mounted in a clamping ring which is a circular frame of the diameter of the desired dome. Once heated this frame is clamped down over the air supply and air is released to blow the plastic into a bubble of the desired height. It sounded like a good method for achieving a smooth finish. There is a good description of a simple blow forming rig on Hackaday and a few videos on Youtube.
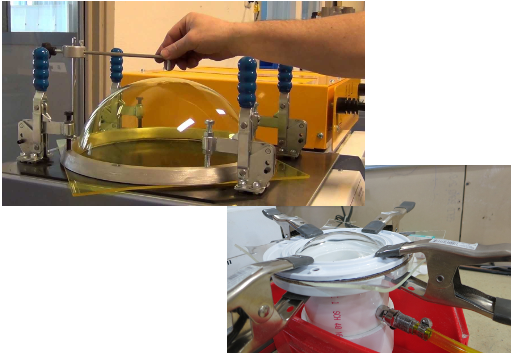
Image from Hackaday and Youtube.
I’ll have to try it some time.