Robotics2c - Lego Mindstorms EV3 Programming Interface
To go back to the Overview page click here.
To go to The Next Session - Robotics2d - Mindstorm EV3 Chassis Action
To download this as a .pdf:

What we’re going to do in this session.
- Introduce you to the Lego Mindstorm Programming Interface.
The Programming Interface
The Lego Mindstorm EV3 kit uses a proprietary interface with its own graphical programming language. Like the mBot the different sensors and actuators have their own blocks, and there are the usual programming elements like loops, maths, and logic functions. The concepts are the same as for any programming language.
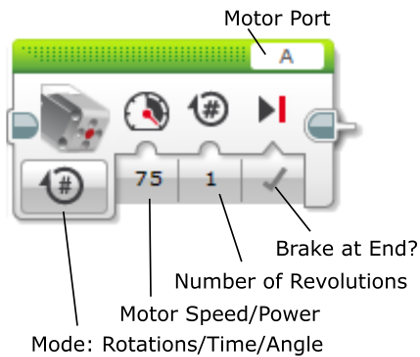
Blocks for Large Motors
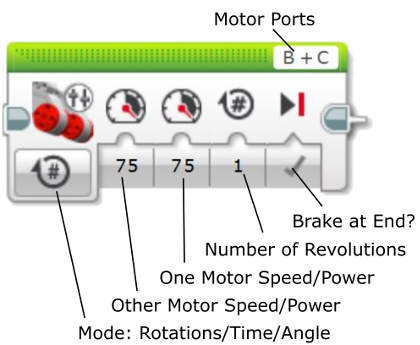
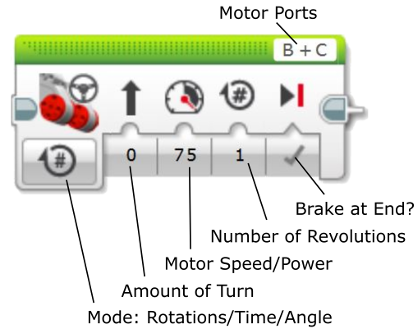
The large motors have several blocks that apply to them. They can be individually activated or activated as pairs to drive a rover forward, or carry out a turn. Three different modes are available to control how far the motor will run. You can set the motor to run for one revolution, a set time, or to turn an exact angle.
Motor Pair Control for Straight runs and wide curves.
Motor Pair control for turns and pivots.
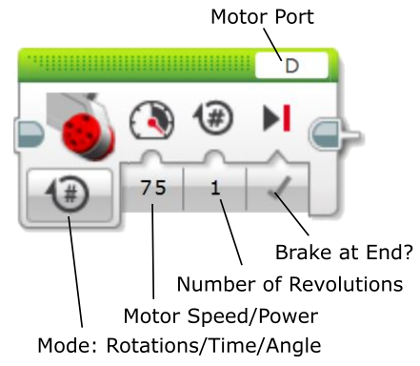
Block for Medium Motor
The controls for the medium motor are exactly the same as for the large motors. The difference is that the medium motor is not quite as strong but is much more precise.
Loops
The Mindstorm programming environment has some of the usual programming structures like loops. Some of the loops are equivalent to For/Next loops and While loops in most other programming languages.
Place any block you want repeated into the space within the loop block.
The loops block includes an output where the number of times through the loop can be transferred to other blocks.
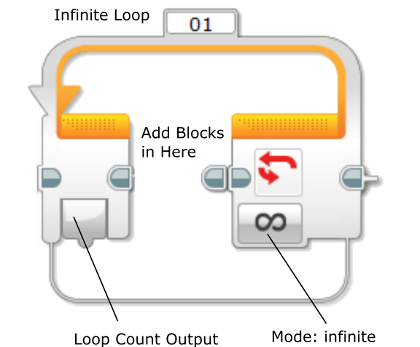
The Mode button allows the programmer to choose between many other states that can drive whether the loop operates or the program exits the loop to continue with the rest of the program.
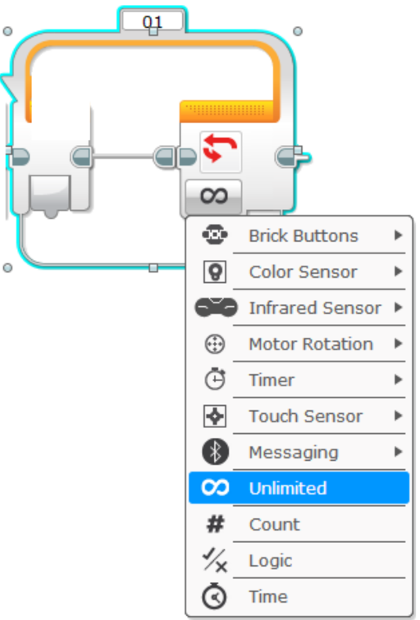
The “mode” options for controlling the loop.
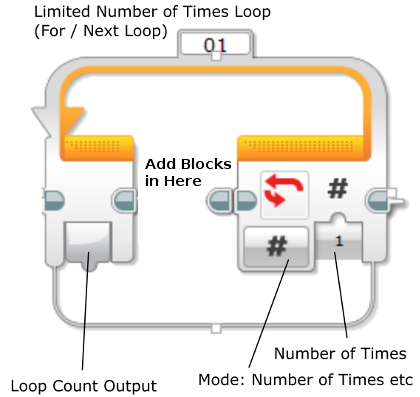
A common use of the Loop structure is to create For/Next loops where the loop is executed a particular number of times. The diagram below shows how this might run for a single time through the loop. The number of times through the loop can be connected to other variables and values in the program.
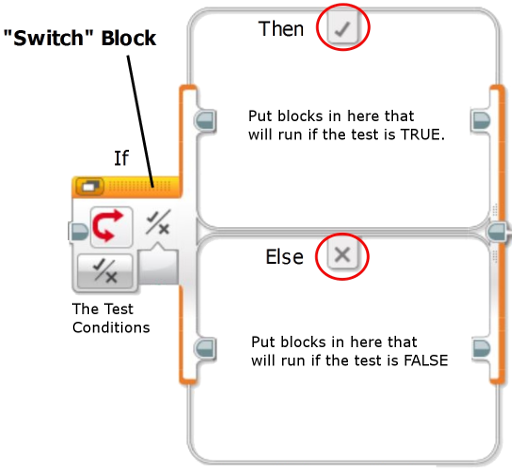
If, Then, Else
The Lego programming blocks include a “Switch” block which is the equivalent to the IF/THEN/ELSE structure in most programming languages. The block has a test which executes one set of program blocks contained within the “TRUE” side if the test returns “TRUE”. If the test is not satisfied then the program executes the blocks within the “FALSE” part of the structure.
Like most of the other blocks the mode can be changed to test other conditions such as the state of a sensor or text in a message received.
Other Blocks That Might be Useful
There are a couple of other programming blocks you may find useful to include in your program.
Variables
Variables can be written to, or read from. The name in the title bar at the top of the block is the variable’s name and the way you can reference them. The value of the variable can be connected to other blocks by dragging and dropping the value tab between them. See the example later on this page.

Read a variable block.

Write a variable block.
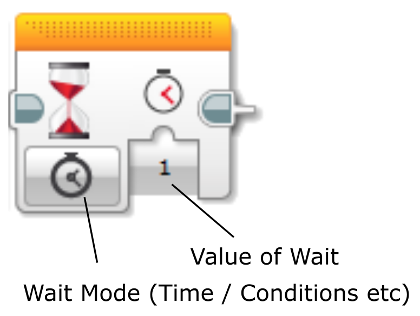
Wait
The wait block allows you to include delays in your program. These can be a time period or can be affected by other factors such as output from sensors.
An Example of a Small Program
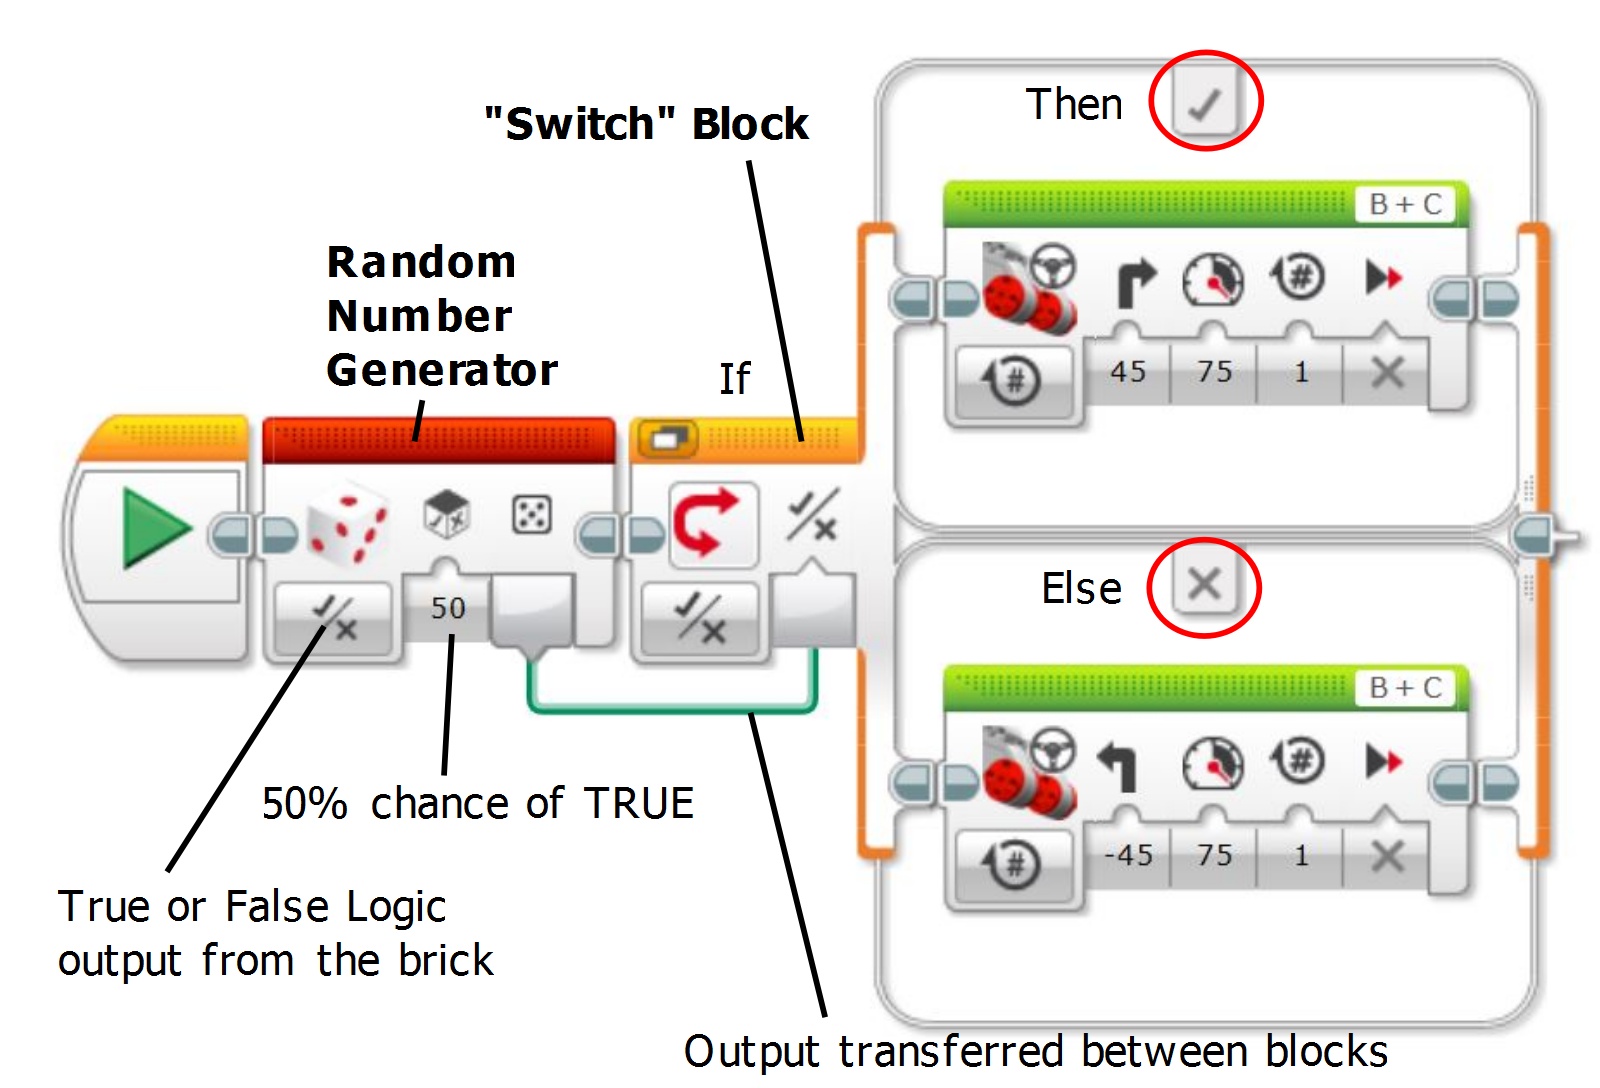
Stacking a few blocks together into a program. Click on the image for a larger view.
This diagram is an example for a simple program that will randomly cause the robot to turn left or right, once only. You can see the transfer of the random TRUE or FALSE generated by the Random Number Generator to the “Switch” block. The switch block uses the TRUE or FALSE it is supplied with to work out which option it will use. The top option will happen if it is supplied with a TRUE and the bottom option will happen for anything else.
The steering control blocks have the robot turning slightly with the motors rotating one revolution only.
Once it has completed this action it will stop because it isn’t contained within a loop and has no further instructions.
Making Our Robot Chassis Move
At this stage we just want to see how our robot chassis behaves so we’ll need to program it to travel forward and backwards and execute some turns.
Using the blocks described above make a small program to try out the Robot’s movement. We want to ensure the robot turns consistently and continues to stay together while moving. Include a number of turns of various degrees of tightness to test its ability to stay together. When you have created a program, upload it to the robot through the USB cable.
Find a space on the floor to give it a run. Observe how it behaves while it follows your programmed movements.
- Does it hold together?
- Does it turn consistently each time?
If it looks a bit shaky it may be that you need to reinforce or redesign your Robot’s structure to make it more stable and strong.
Other things to try;
- Different power settings.
- Different modes: revolutions, angle, and run.
An Intermediate Challenge
We don’t have any sensors on our robot yet and so it doesn’t know anything about the world yet. While the robot is still in the basic form try out a little challenge. Set up a simple course with some cardboard strips, boxes, and whatever else you have to hand and guide your robot through the course using programmed runs, turns, and times. Make sure you start the robot off from the same position each time you attempt the course. This way you will be able to test its ability to move and turn consistently.
Next Time
In the next session we will add some sensors and get our robots onto the main challenge.


This document “Robotics2c – Lego Mindstorm EV3 Programming Interface” by Hamish Trolove is provided under a creative commons license - Attribution, Share Alike.