Robotics2d - Lego Mindstorms EV3 Chassis in Action
To go back to the Overview page click here.
To download this as a .pdf:

What we’re going to do in this session.
- Add some sensors to our robots.
- Program the robot chassis to respond to the sensor.
- Program the robot to meet the challenge.
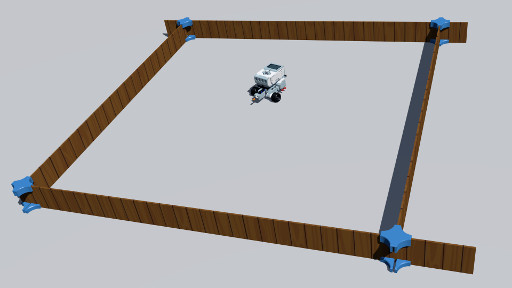
What Was That Challenge Again?
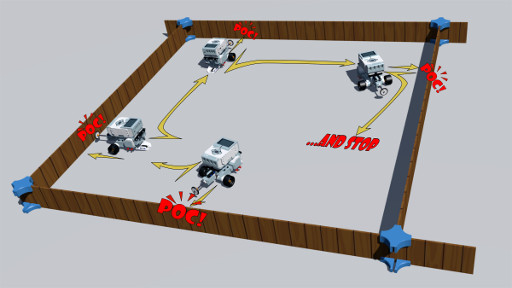
You will recall we were going to put our robot into a square(ish) fenced off area and wanted it to tag each wall once.
Adding Sensors
We have two sensors to choose from that will allow us to detect the walls;
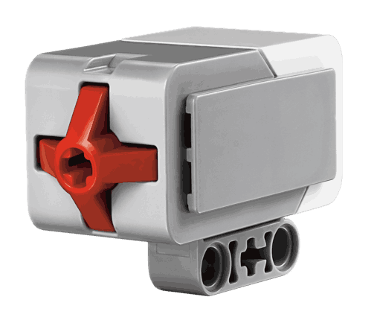
Touch Sensor
Makes your robot respond to touch, recognizes three conditions: touched, bumped and released.
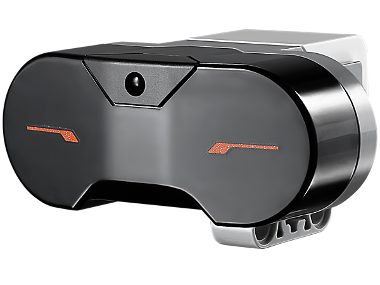
InfraRed Proximity Sensor
Detects objects around the robot and also recognises the infrared beacons.
Based on the concept you developed earlier, select the appropriate sensor(s) and mount them on your robot chassis as you see fit.
Test the Sensor(s)
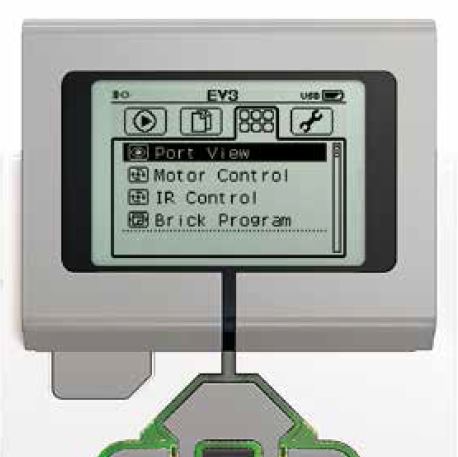
At this point we should try out the sensors and see how we can get them to influence what the robot does. A quick and easy way to check whether the sensor is working and find out what sort of sensitivity it has is to use the on-board tools. The standard on-board Lego operating system includes a utility called “Port View” which allows you to look at each port and see what is attached and what data the sensors output in response to changes in the environment.
To access Port View connect your sensor to a numbered port and switch on the Lego control brick by pressing the dark grey button on the top.
Once the brick has initialised, use the four keys around the black button to navigate through the options until you get to the on the third tab as shown. With the Port View highlighted, click on the dark grey button to enter the Port View utility.
On the new screen you will see all of the brick’s ports. Each port can be examined by navigating to it with the four direction buttons. Select the port with your sensor attached. If the sensor is connected properly it will show up as a small graphic on the screen along with data from the sensor. If it isn’t there, check the plugs are properly seated in the sensor and the brick. If it is present, interact with it and see what it is outputting. For instance if you have a touch sensor, press the sensor and see how the data changes. If you have an Infrared sensor attached, try pointing it at your hand and seeing how it responds as you move your hand to different positions.
Use the Sensors in a Program
From last week you will have seen some options for using the sensors to influence what a program does. There are a number of different blocks available where sensors can be used.
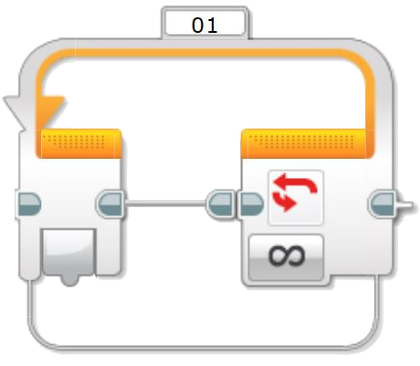
Loop:
With the loop block, we can use the dropdown on the “infinity symbol” button to select our sensors. This will cause the loop to continue running until a condition is detected by the sensor.
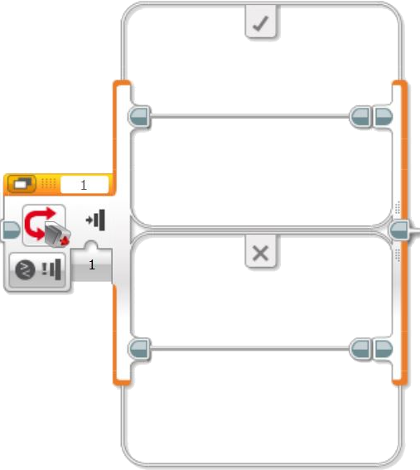
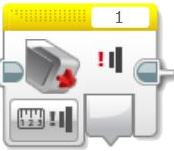
If, Then, Else:
As with the loop block we can use the drop down to select the sensor we would like this to examine when it makes an If/Then/Else decision.
For instance, as shown here the touch sensor has been set to compare the status of the touch sensor to a number. If the sensor is triggered, it will carry out the program section in the top part of the If/Then/Else block. If the touch sensor has not been triggered it will do whatever program bloacks are in the lower part of the block.
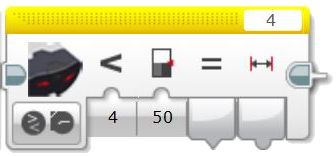
Sensor Block – Infrared Sensor:
There is a series of blocks which allow you to access the sensors directly. You might use these to load sensor values or status to a variable for use elsewhere in the program.
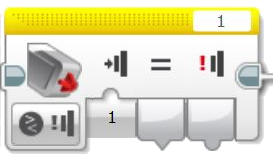
Sensor Block – Touch Sensor:
This example is for direct access to the touch sensor. This could either give a status output (Triggered or not triggered) or a value. As shown here, the block is set to output a value depending on whether the touch sensor is touched or not. “0” = not touched. “1” = touched.
Sensor Block – Touch Sensor:
In this example, the same touch sensor block has been set to provide an output that is either “Triggered” or “Not Triggered”.
In this case there are options for when it is touched. Option 1 means the signal will be sent when the button is pressed. The other options are; when the button is released, and when it has been “bumped”.
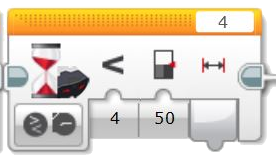
Wait Block – Infrared Sensor:
This could allow you to set a trap! The program will wait until something moves into the defined range of the robot.
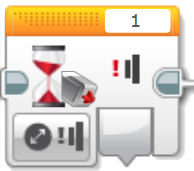
Wait Block – Touch Sensor:
Using the touch sensor in the wait block will allow the robot wait until something presses against its touch sensor or wait for something to be removed allowing the touch sensor to release.
Using the your sensor of choice, build it into a simple program that moves or turns the robot based on something being detected by the sensor.
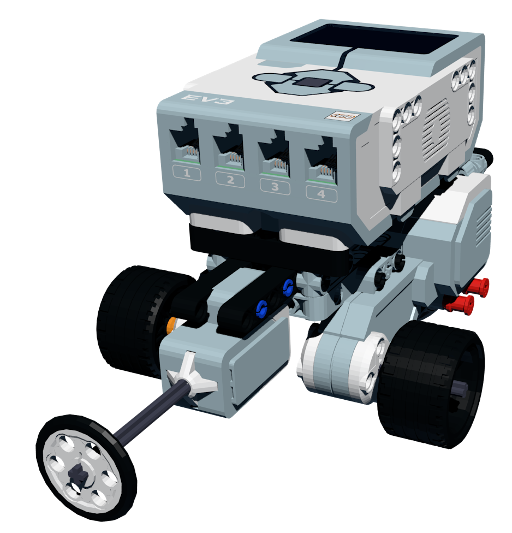
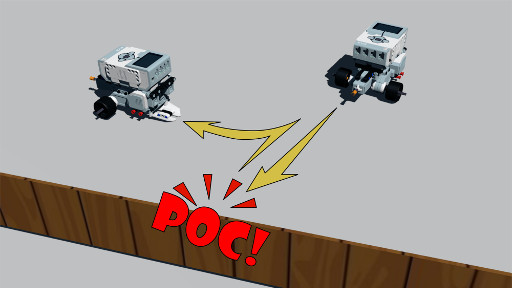
Here’s an example using the robot shown earlier in this session fitted with a touch sensor. It will run forward until it runs into something. When it detects that it has touched something it will back up and turn right.
This is what one solution to this looks like.
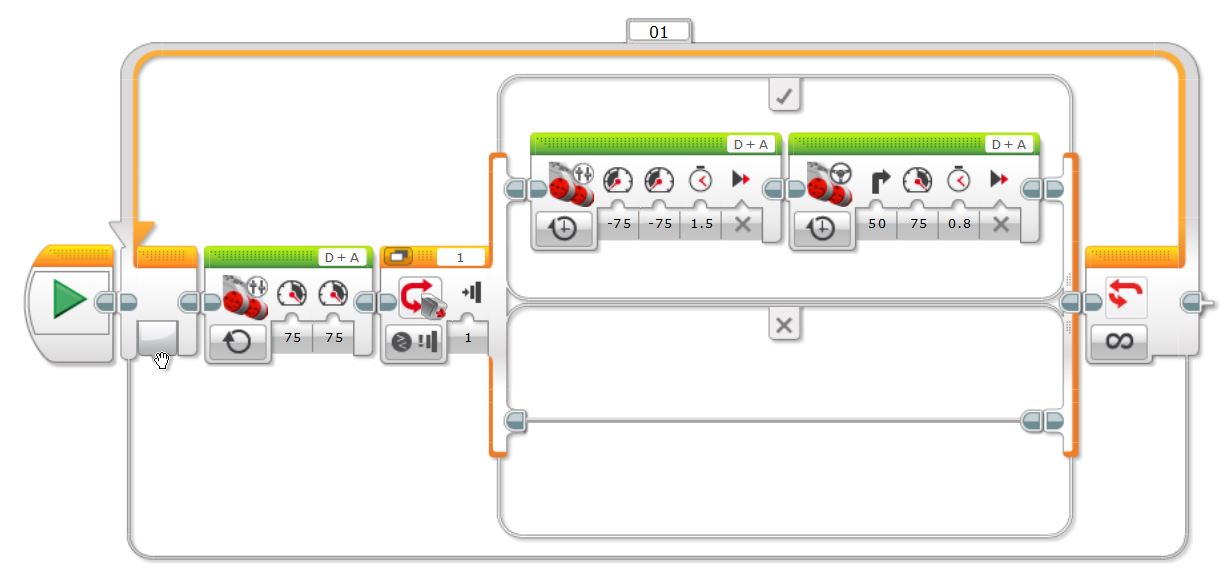
Click on the image for a larger view.
The program shown above is quite simple. It consists of a continuous loop which contains a process which it repeats once each time through the loop. The process is;
- Move forward
- Check to see if the bumper switch has been triggered.
- If it has, then run backwards for 1.5 seconds then turn right.
- Do it all again.
Try using your selected sensor in a program and see if it behaves as you expect.
Solve the Challenge
So you have successfully used your sensor in a program with your robot. Now use what you have learned to solve the challenge.
You will probably find your test program is a big step along the way to solving this challenge. See what you can use from your test code. Developing test code is a great way to build up a library of useful program blocks that you can use again in later programs. It also allows you to problem solve small parts of a challenge without getting overwhelmed or distracted by the complexity of a large challenge.
And That’s All Folks
Thank you for taking part in these robotics exercises and i hope they have been of value to you.


This document “Robotics2d - Lego Mindstorms EV3 Chassis in Action” by Hamish Trolove is provided under a creative commons license - Attribution, Share Alike.