Robotics 1a - Introduction to the mBot
To go back to the Overview page click here.
To go to The Next Session - Robotics1b - Building an mBot Programme
To download this as a .pdf:

What we’re going to do in the session.
- Introduce you to the mBot and the Programming Interface.
- Explore the capabilities of the mBot.
- IR Remote Controller
- Obstacle Avoidance
- Line Following
The mBots
mBots are fully programmable using Scratch (with some additional blocks) and the Arduino microcontroller coding language. They neatly bridge the gap between Scratch, Robotics and the huge world of the Arduino microcontroller.

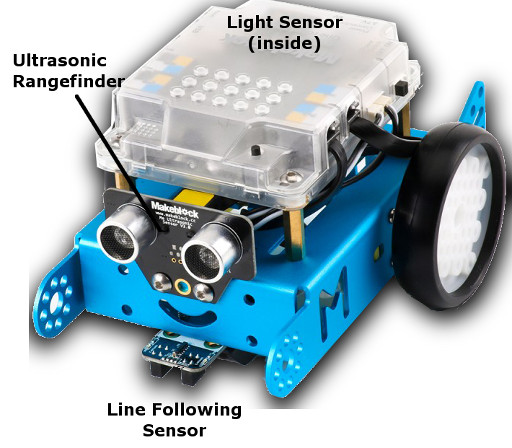
As standard they have a number of sensors:
- Ultrasonic range finder
- Line following sensor
- Light sensor
The mBots can be programmed through a wireless connection as well as using a USB cable to upload your programmes.
The mBlock Interface
The mBlock interface for programming the mBot is built on Scratch2 which you will probably have already encountered. The only differences are;
- It is offline
- It has all these neat mBot specific blocks
- It also has an Arduino microcontroller window for programming it directly in the Arduino language.
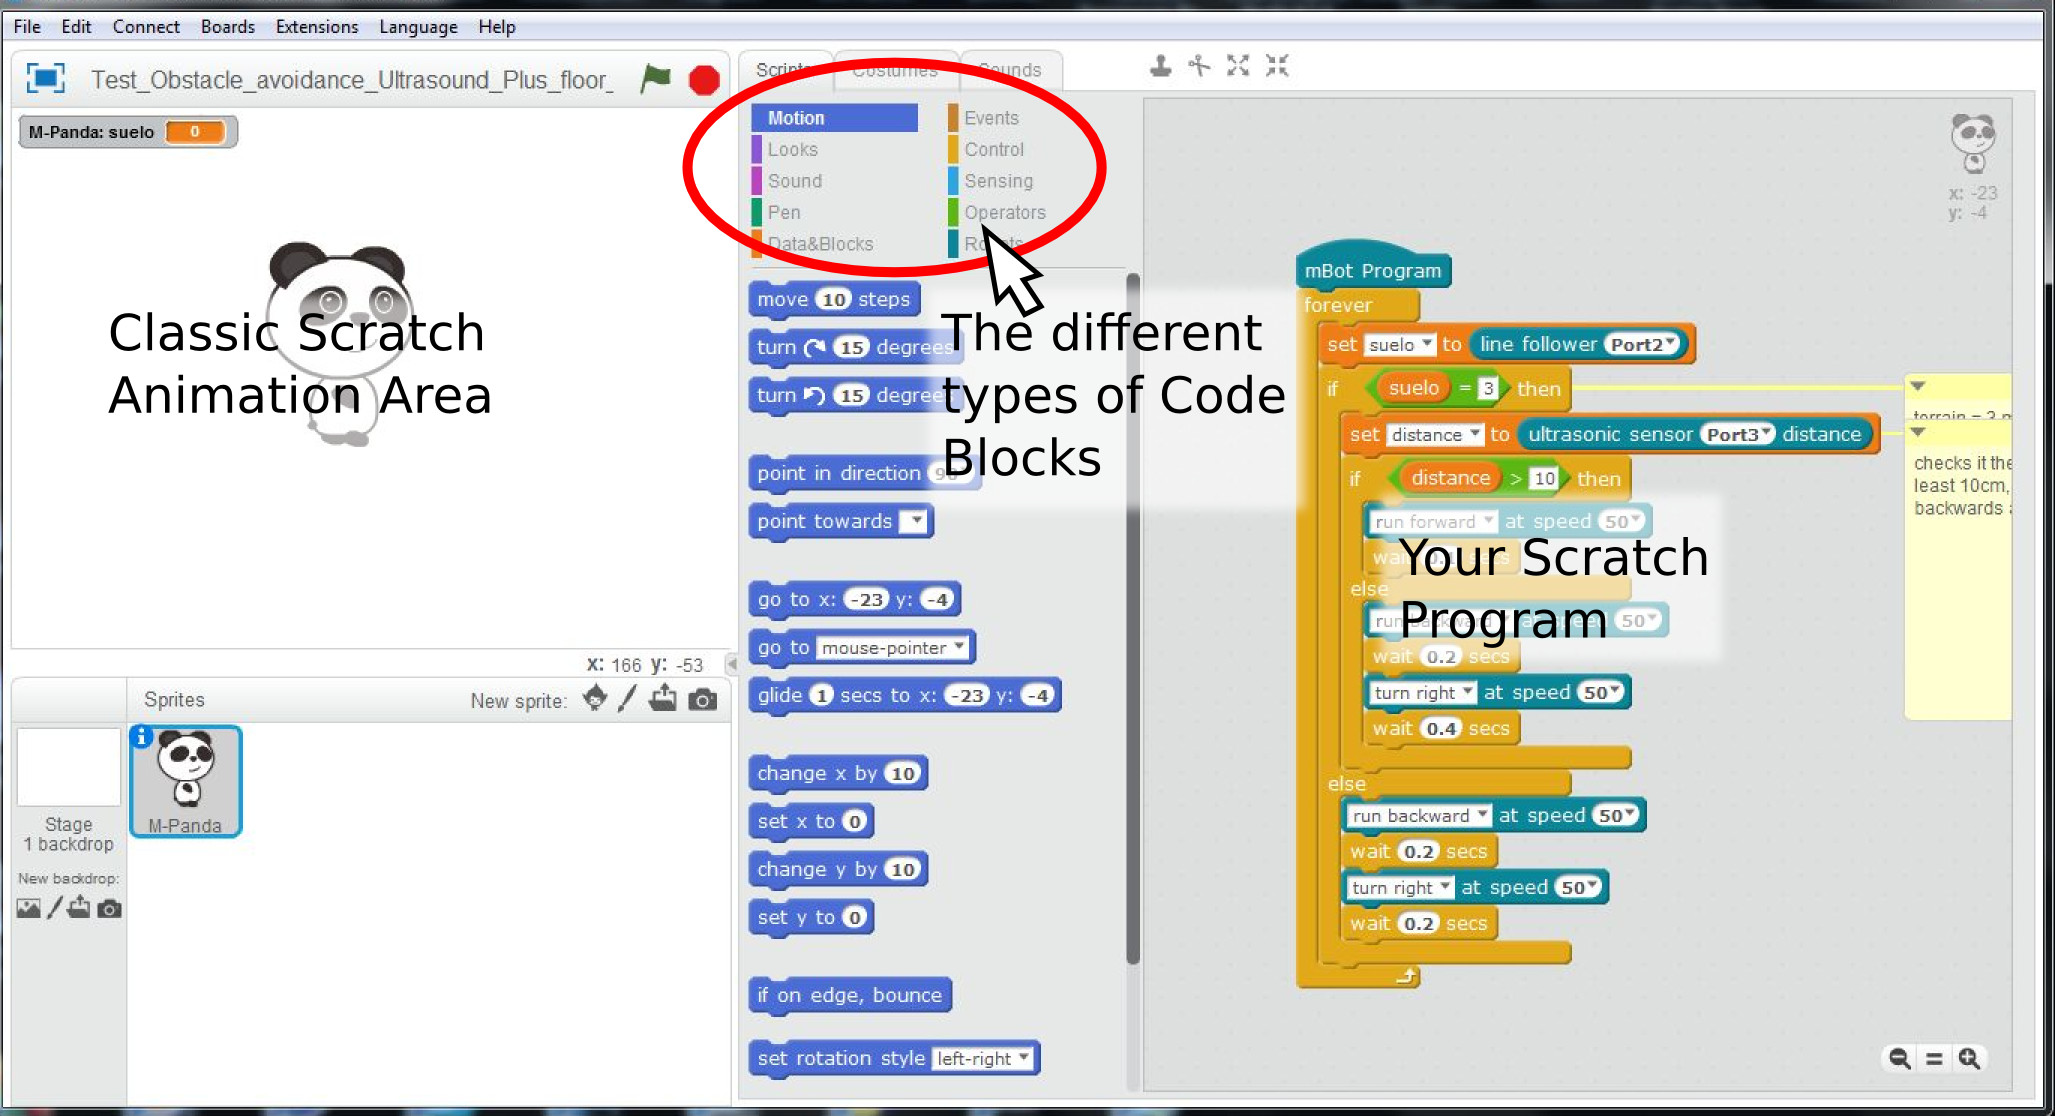
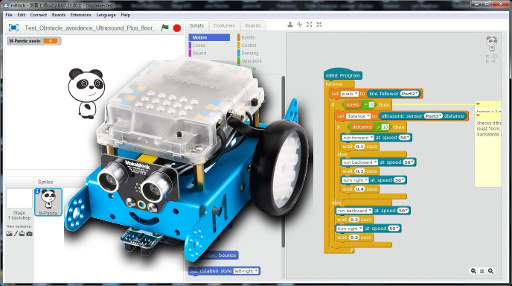
mBlock Scratch 2 Interface for mBots. Click on the image for a Hi-Res view.
You can run your Scratch graphics programs and games with this interface as well as program the mBot. If we open the Arduino View (Access that through the Edit Menu dropdown), it looks like the following view. The “Upload to Arduino” button is the magic one to send our programs through to the mBot.
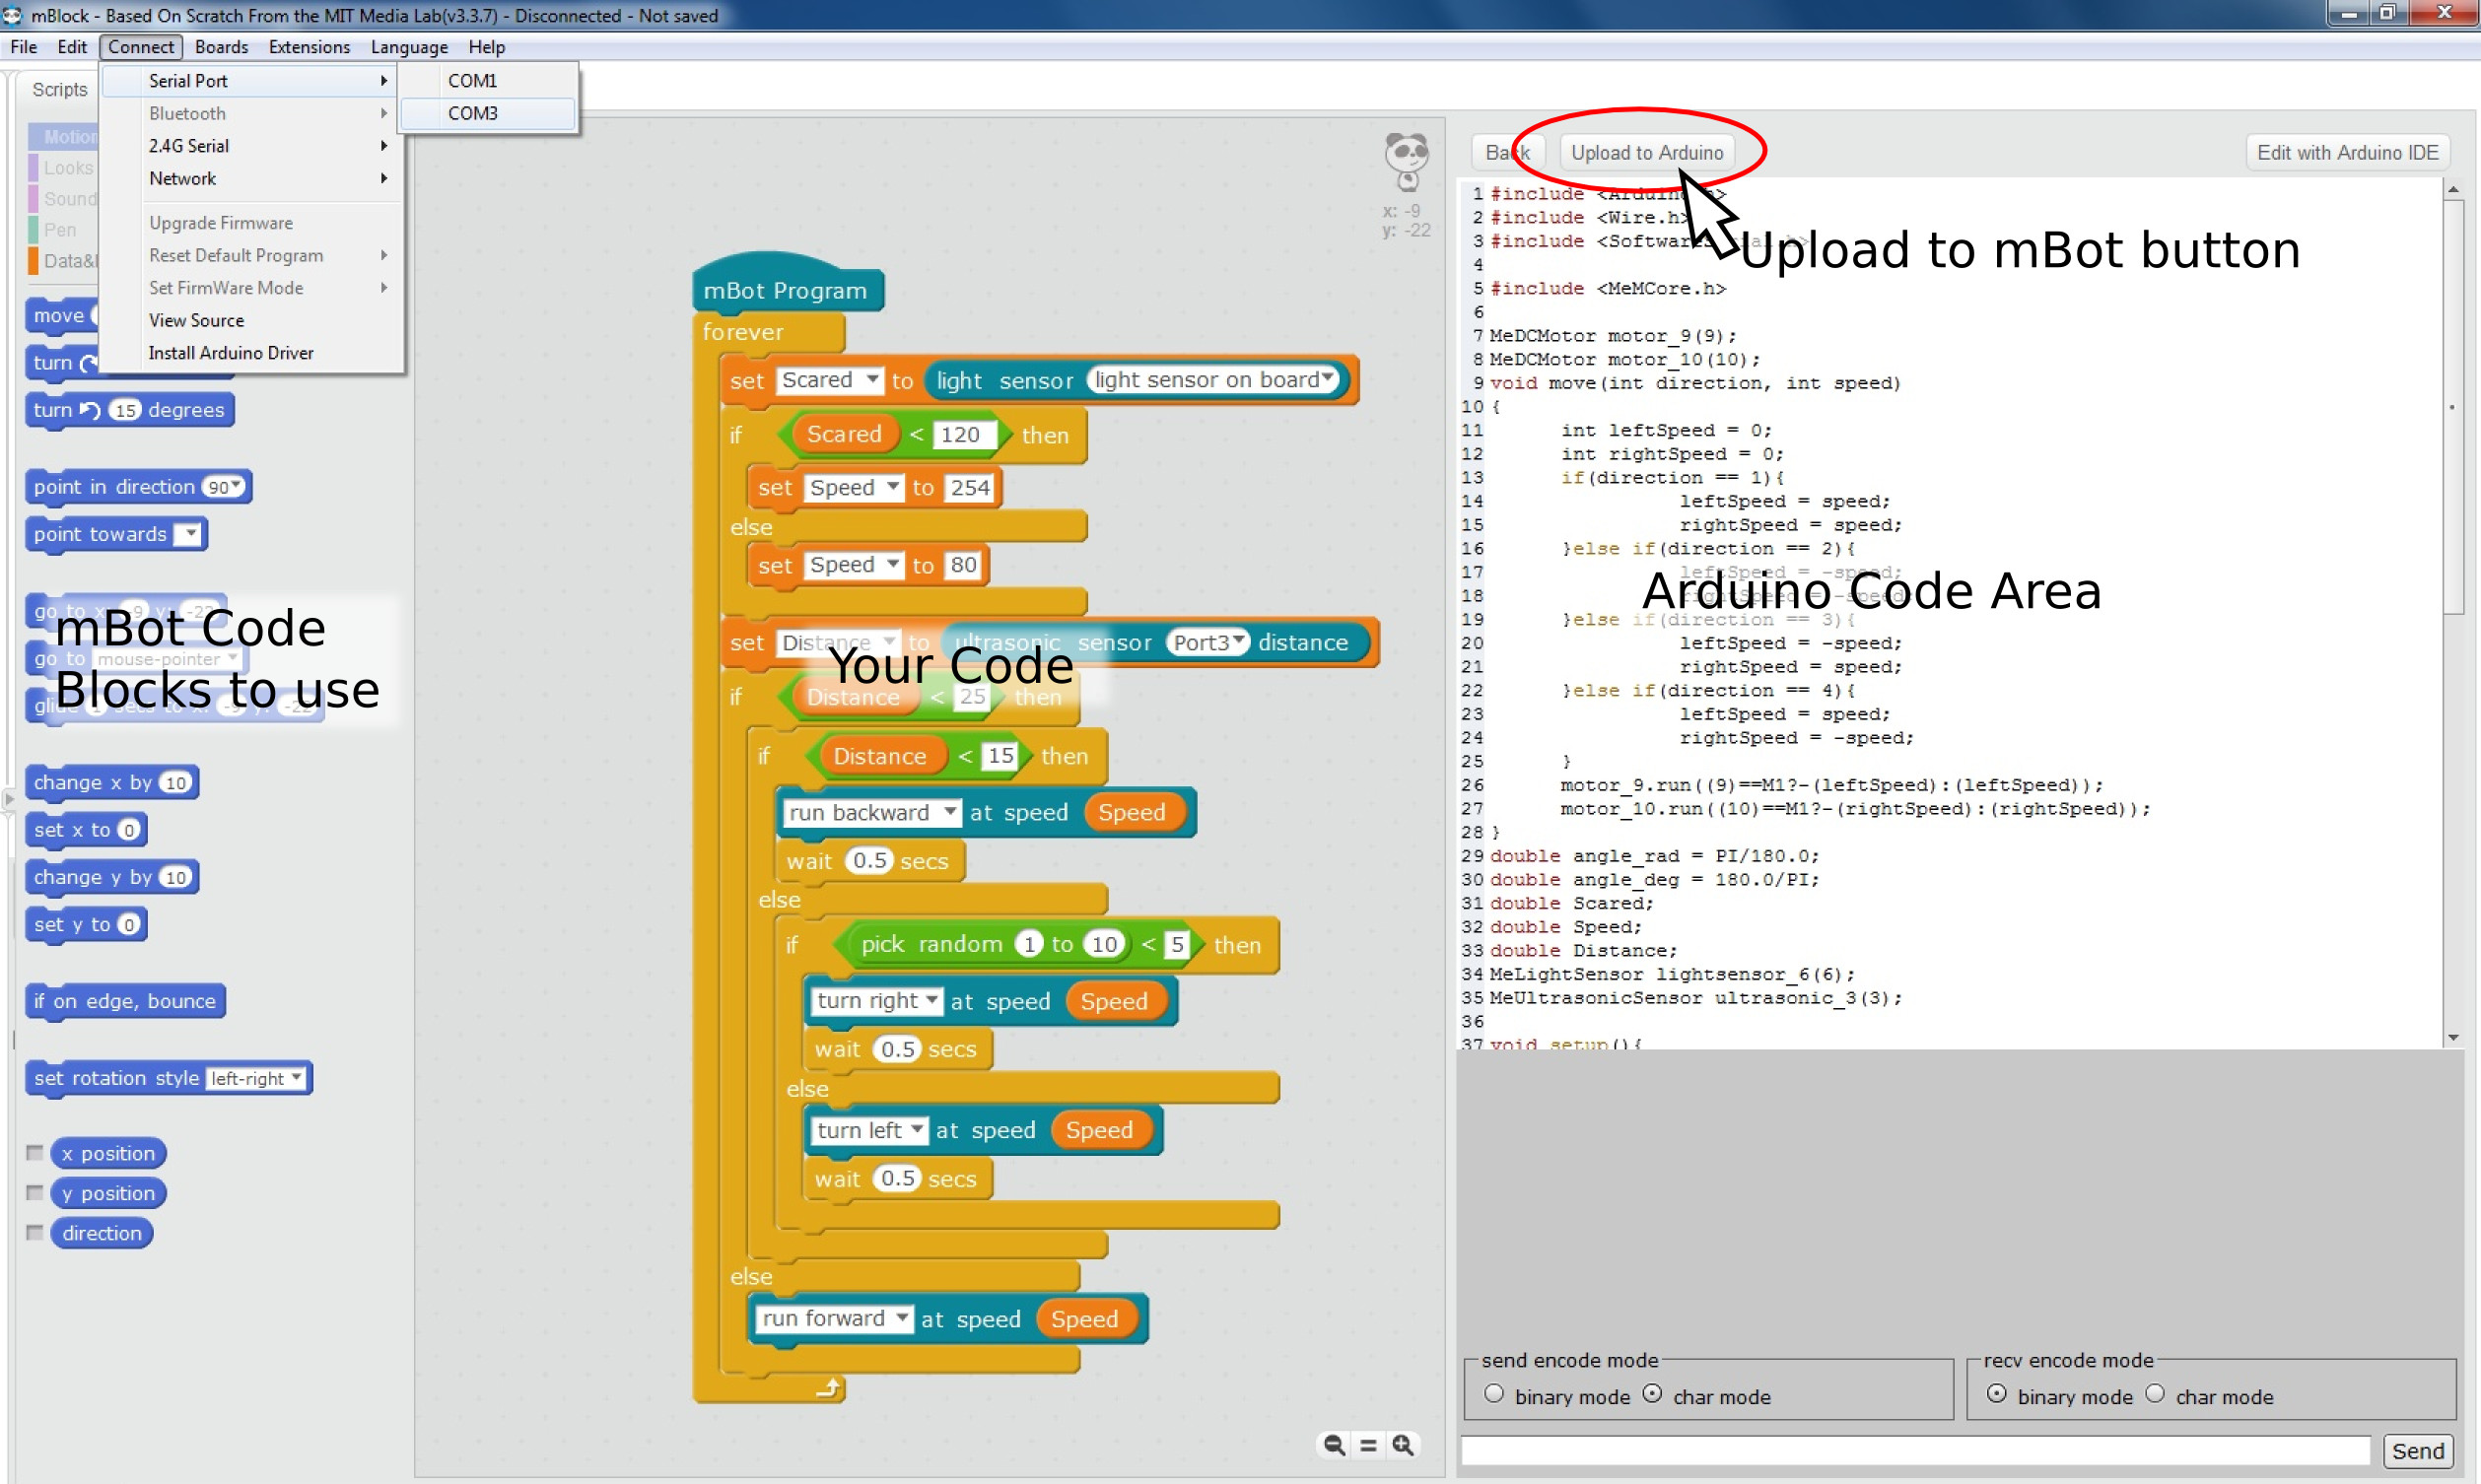
The mBlock Arduino interface. Click on the image for a Hi-Res view.
mBot Capabilities
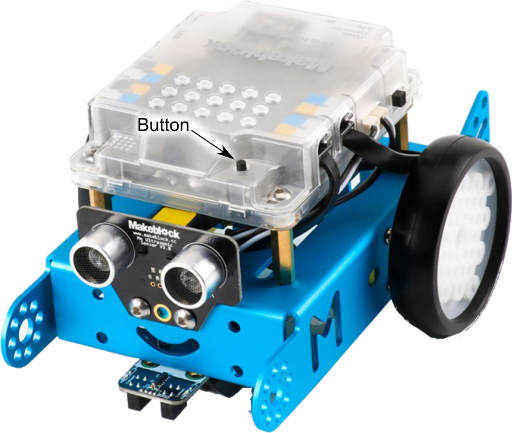
The default programme in the mBot has three modes that we can access using the black button on the top left hand side (looking from the back). Each press of the black button changes the mode to the next one.
The three modes are;
- Infrared Remote Control
- Obstacle Avoidance
- Line Following
Mode 1 – Infrared Remote Control
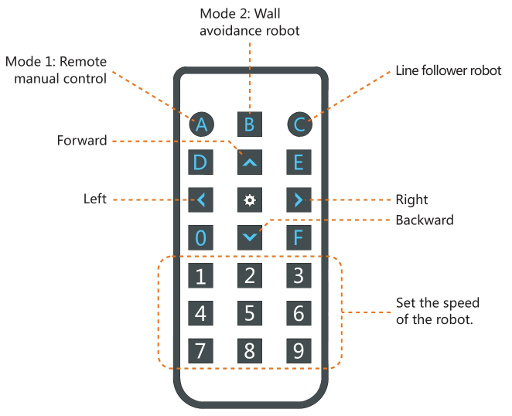
When you first turn the mBot on the robot will sit there blinking coloured lights and not doing much else. If you have the Infrared Remote, you can drive the mBot a bit like you would a remote control car. You will need to point the remote directly at the mBot to make it go. The next diagram shows the controls.
Mode 2 – Obstacle Avoidance
In this mode the mBot is acting like a true robot. It guides itself around the room using its Ultrasonic Rangefinder (the eyes) to watch out for things it could bump into. It uses the sound echo off objects to “see” a bit like a bat does.
- Test how far away your hand or some other object is before it reacts.
- Build a maze for it out of cardboard boxes, books, and anything else you can build a barrier out of. You will find you don’t need to make very tall barriers for it to successfully detect them. Can your mbot find its way through the maze?
Mode 3 – Line Follower
In this mode the mBot will follow a line you draw. The sensors on the underside of the front detect the edge of a thick line. It works by checking the difference in reflected light between the two parallel sensors. It only works with quite wide lines so if you are going to mark your own lines for it to follow, they will need to be 20 -25mm wide. Using strips of black paper is an easy way to make lines and curves for it to follow.
- How thin can you make your line?
- What happens if you have two lines that split or intersect?
- What is the sharpest turn you can get the mBot to follow?
Yayy!
That’s it for this first session. We now know what basic things the mBot can do.
Next Time: Building a program for the mBots. We will look at how you construct and upload a basic program to the mBots.


This document “Robotics1a - Introduction to the mBot” by Hamish Trolove is provided under a creative commons license - Attribution, Share Alike.