Paint Selection for 3D Printed Miniatures
I have been busy putting together ideas and material for running STEM (aka STEMM aka STEAM aka Science Technology Engineering (Art) Mathematics and Manufacturing) related workshops at the Hutt City Libraries. We have a bunch of Wanhao Duplicator i3 printers (really Prusa i3s with a good solid steel frame) which will form the core of a Makerspace embedded within the library – or they will if I manage to get it to happen. One of the largest projects we have undertaken to date was metaform3d’s amazing Discovery model.
With the Library Staff’s help we printed it out in a record time and I took it home to assemble and paint it. This happened over the course of a weekend. Below are some pictures of the model at a couple of stages. You can find the project write up here.
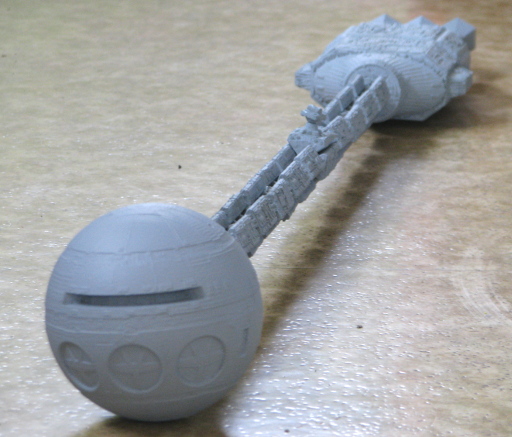
Primed and ready for detailed printing
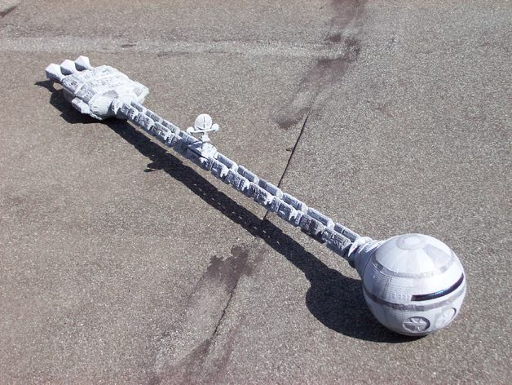
Discovery model painted
At the moment there isn’t anywhere to display the finished model, and so it sits on my desk. This was spotted by a new staff member as he was introduced around. He explained he was a fantasy war-game miniature painter. He showed me some pictures of some of his work. I was impressed with the detail and quality of the finishes he had used. This started me thinking. Over the next couple of days the seed of an idea for a new STEMM program began to take form. The idea was to run workshops for the public on painting painting 3D printed miniatures. The idea is that this would help promote the idea that detailed models could be produced by 3d printers and also demonstrate that getting colour onto a 3D printed model was easy and did not require a multi colour 3D printer. The workshop would cover the paints that could be used and also teach some basic techniques such as dry-brushing and how to develop convincing weathering effects. Incidentally, having come up with this idea I stumbled across a brief article suggesting ideas around printing and painting 3D printed miniatures in libraries: The-Digital-Librarian.com - Dungeons, Dragons and 3D-Printers
I am a great fan of making things accessible to all. This means that I try to avoid using proprietary or expensive materials. The danger of running a workshop on miniature painting is that people might get the idea that you have to have the expensive Tamiya or Games Designer Workshop paints. Most of the painting I have done on 3D printed objects made use of cheap acrylic paints or house paints. In order to ensure that the material covered in the workshops was going to be founded on reality I wanted to check the combination of paints we would be proposing to use. To this end I painted a PLA miniature using only the cheap paints described here. That is what this article is about – what paints work well on PLA printed objects and are cheap.
As an aside, here is an article on a small 3D Printed flying saucer I designed for a Stop Motion exercise. The model was painted using the paint choices described in this article. A 3D Printed Flying Saucer
The Test Model
The miniature we are considering using for this workshop is the “Dwarfclan Stonethrower (18mm scale)” by Dutchmogul. Not only is it a really cool design it has plenty of scope for people to individualise it. I printed one out on the Libraries’ Wanhao printers. The PLA was green.
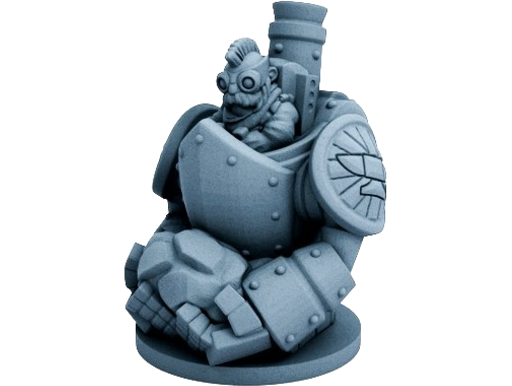
DwarfClan StoneThrower by Dutchmogul - Image from Thingiverse.

DwarfClan StoneThrower – Paint test using really cheap paints
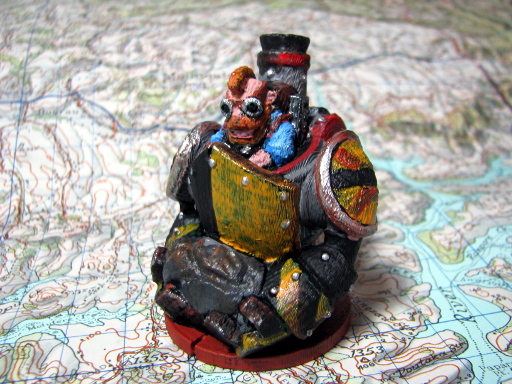
DwarfClan StoneThrower – Another view of the same model with completed paint job.
Priming
To ensure a good robust paint job that is not going to get wiped off with handling, a strong primer is needed. The most successful ones I have come across are all intended for priming metals. For the Discovery model I used some spray on matte gray primers – (Plasticote Industrial Zinc-Rich Cold Galvanizing) which is for protecting exposed steel in extremely corrosive environments. This gave a great mid-gray covering to the model and a good “tooth” for the detailed colouring coats to adhere to. As it happened, the mid-gray was perfect for the main colour of the model anyway.
For the Stonethrower miniature I glued the two halves of the model together using a two part epoxy glue (Norstik Epoxy Glue). This gave a very strong bond as well as helped fill the slight gap where the two halves had bowed a bit after coming off the printer’s plate. The model was primed with a black metal primer which was brushed on. In this case I used the Red Enz High Heat Enamel which is intended for priming and painting wood stoves, barbeques, and other black painted equipment where heat and fire are present. This is quite a thin paint that brushes on easily and gets into the tiny nooks and crevices. A slightly thicker alternative I have used at times is Wattyl KillRust Super Etch Primer.
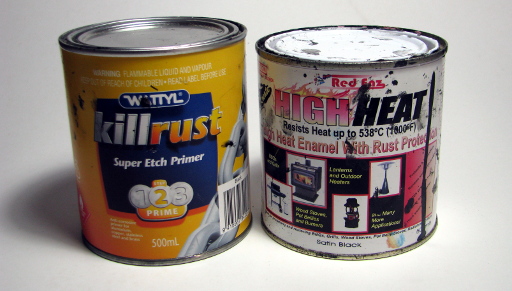
Wattyl KillRust Super Etch Primer and Red Enz High Heat Enamel. Sorry about the less than pristine tins.
An extra bonus is that these metal primer paints are like lacquers and so dry extremely quickly. The downside is that you need to wash your brushes in acetone. Apart from being intended to prevent rusting and able to stick to metal surfaces, there is nothing special about these paints. There will be equivalent metal primer products anywhere in the world.
I tend to use black as the undercoat because it allows me to use the dry-brushing technique to achieve a great deal of depth on complex areas. As it happened I didn’t use any dry-brushing on the StoneThrower miniature. Obviously the primers are available in other shades and would be selected to suit the particular project.
The Colourful Bits.
The Discovery model did not require much in the way of colour. I just sat down with a smear of white and black acrylic paint on a tray and mixed various grays. I tended to wash them on so they would flow into the gaps and details. It was a bit of a quick job because I was running out of weekend. Ideally I would have used to airbrush to achieve a smoother colour across the various panels and plates. The paints used were the cheapest student acrylic paints I had to hand. When I say “cheap” I mean “really cheap”.
The StoneThrower required stronger colours and more of them. For this project I dragged out the full selection of paints at my disposal. This included a selection of Chromacryl acrylic paints, the very cheap Artworks Acrylic paints, a big bottle of FAS black acrylic paint, and all of my Resene test-pots (aka acrylic house paint samples).
The flesh tones were all done with a Resene acrylic house paint because I had a test-pot that was exactly the right colour. Generally I used the Resene paints because they brush on very smoothly. I have also found (after doing a multiyear colour fastness test) that the house paints have a far superior colour fastness to any of the art paints. The same colour fastness tests also showed me that the Chromacryl paints were pretty good.
The down side of the Resene paints is that they are generally not pure colors and so mixing them tends to create muddy colours. They can be shaded or lightened with ease by adding white or black. Whenever I was looking to mix my own colour, I would tend to use a Resene colour as the starting point and shift the tint using the Chromacryl paints because the colours are more pure.
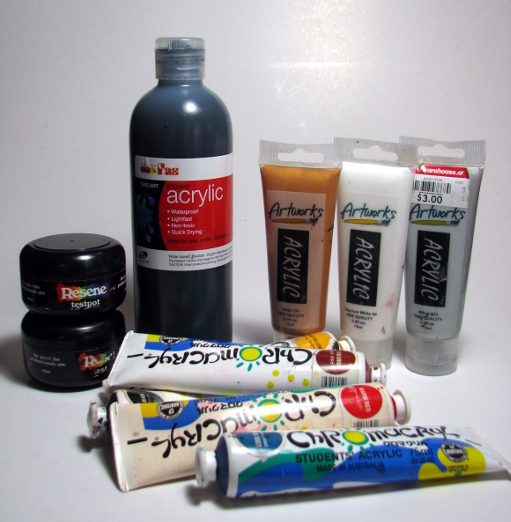
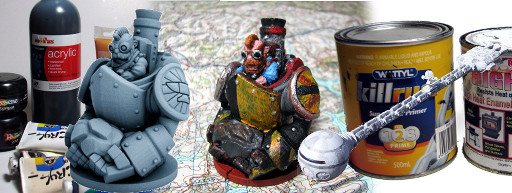
You use what???? A selection of cheap acrylic paints.
Despite being quite cheap, the FAS acrylic is a nice paint. It applies well and mixes well with the other paints.
For the metallic coloured parts of the model, I used the mega-cheap Artworks Acrylic gold and silver paints. These worked surprisingly well on this model, but I have found on other models that they don’t dry-brush so well and you need to work them onto the model a bit harder than you would if using a better quality paint. Because I was applying it quite thickly to the StoneThrower model, it performed well.
Conclusions
Cheap paints work well for painting PLA 3Dprinted miniatures. The critical component is a good strong undercoat. For this I would recommend using a rust protection metal primer paint. Admittedly the rust prevention metal primers can be a little more expensive than the equivalent volume of standard acrylic house paint and only come in 500mL tins, but because they are quite thin and go a long way, 500mL will allow you to prime many models.
For the top coat and detailed colouring I would suggest raiding the local house-paint store and getting an armload of test-pot acrylic paints. Having some cheap tubes of acrylic paint in pure colours will be useful for adjusting the test-pot colours in the directions you need.
Other things that might interest you.
If you are looking for guidance on painting techniques, and weathering there are some excellent guides in book form or on the web.
“Painting and Weathering for Props and Replicas” (eBook) by Harrison Krix.
I purchased this ebook as part of one of the HumbleBundle ebook bundles. It is an excellent guide to the techniques and design considerations for painting and weathering props. Although this is for full scale objects the techniques and considerations are equally applicable to working on models at a scale that will make you go cross-eyed.
Step by step guides to painting and weathering techniques for scale models.
www.scalemodelguide.com - painting and weathering
A discussion on paints and techniques for painting and weathering an x-wing fighter.
www.starshipmodeler.com - painting and weathering an x-wing fighter
Designing 3DPrinted Miniatures - Tips by Dutchmogul
Also, Dutchmogul, who designed the Dwarfclan StoneThrower model used in this paint test wrote an article on designing miniatures. You can find it here: Pinshape.com - Tips for Designing and 3Dprinting Custom Miniatures