PS2 Controllers on Arduinos
It appears that the Playstation 2 controllers are still actively produced and sold for very good prices. Because they are packed with quite a number of switches, and some excellent joysticks all in a well designed package they seem like a ideal choice for controlling the ROV. This page describes connecting the PS2 controllers to an Arduino but there is a more detailed description of using Playstation2 Controllers for Arduino projects which can be found on the following page: “Using A Playstation 2 Controller with your Arduino Project”.
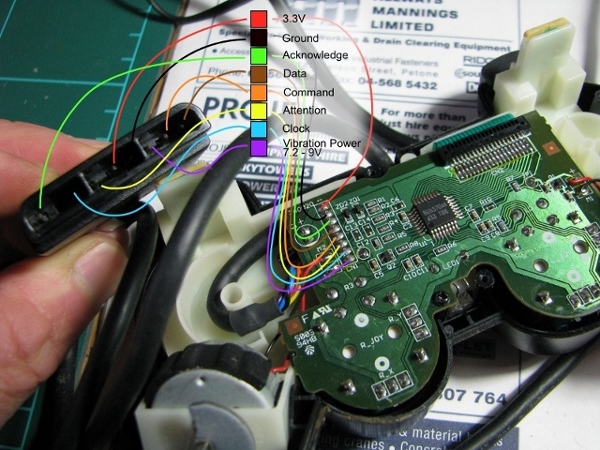
These are the internal connections for a pair of genuine Sony Playstation 2 controllers.
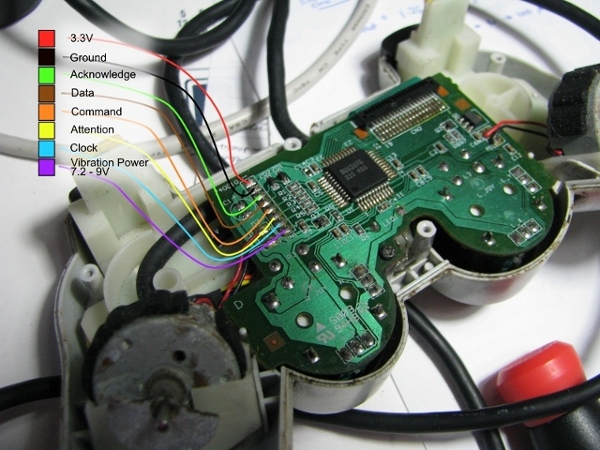
and another similar model.
Connecting the PS2 Controller to the Arduino
The following arrangement works and the Arduino successfully reports button presses and joystick movements through the Serial Monitor for both the genuine Sony Controllers and the cheap knock-off versions.
Connections are:
- Data (Brown) - Arduino Pin 12 - This requires a 1kohm pullup resistor
- Command (Orange) - Arduino Pin 11
- Attention (Yellow) - Arduino Pin 10 - This requires a 1kohm pullup resistor
- Clock (Blue) - Arduino Pin 13
- 3.3V Supply (Red) - Arduino 3.3V Pin
- Ground (Black) - Arduino GND Pin
- 5V connection from the 5V Arduino pin to the pull up resistors
If the vibration is required for some sort of feedback then a 7.2 to 9V supply is required to the Purple wire on the PS2 controller.
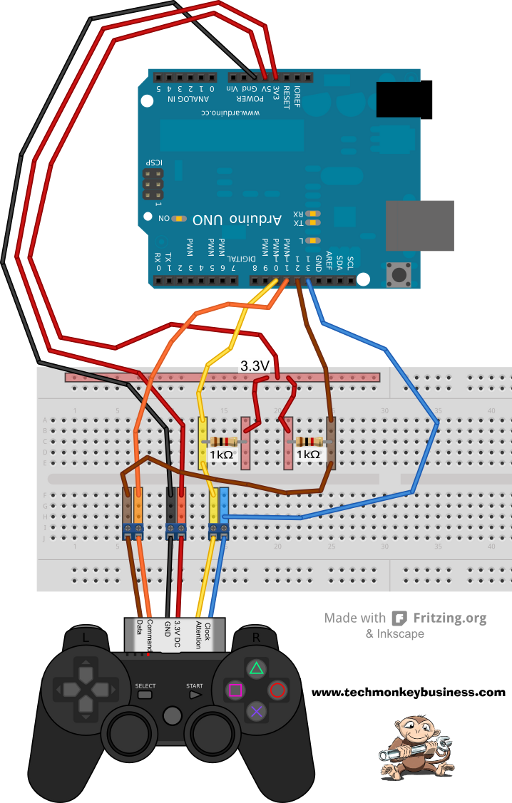
Fritzing Diagram of the connections between a PS2 Controller and an Arduino UNO
The code and library used was directly from The Mind of Bill Porter. You will need to go to his website to find the code and library. No changes were required and the library worked in the Arduino 1.0.5 environment. You can also download the PS2X library from the following webpage: A Collection of Arduino Libraries Used in This Project.