Making Little Planets

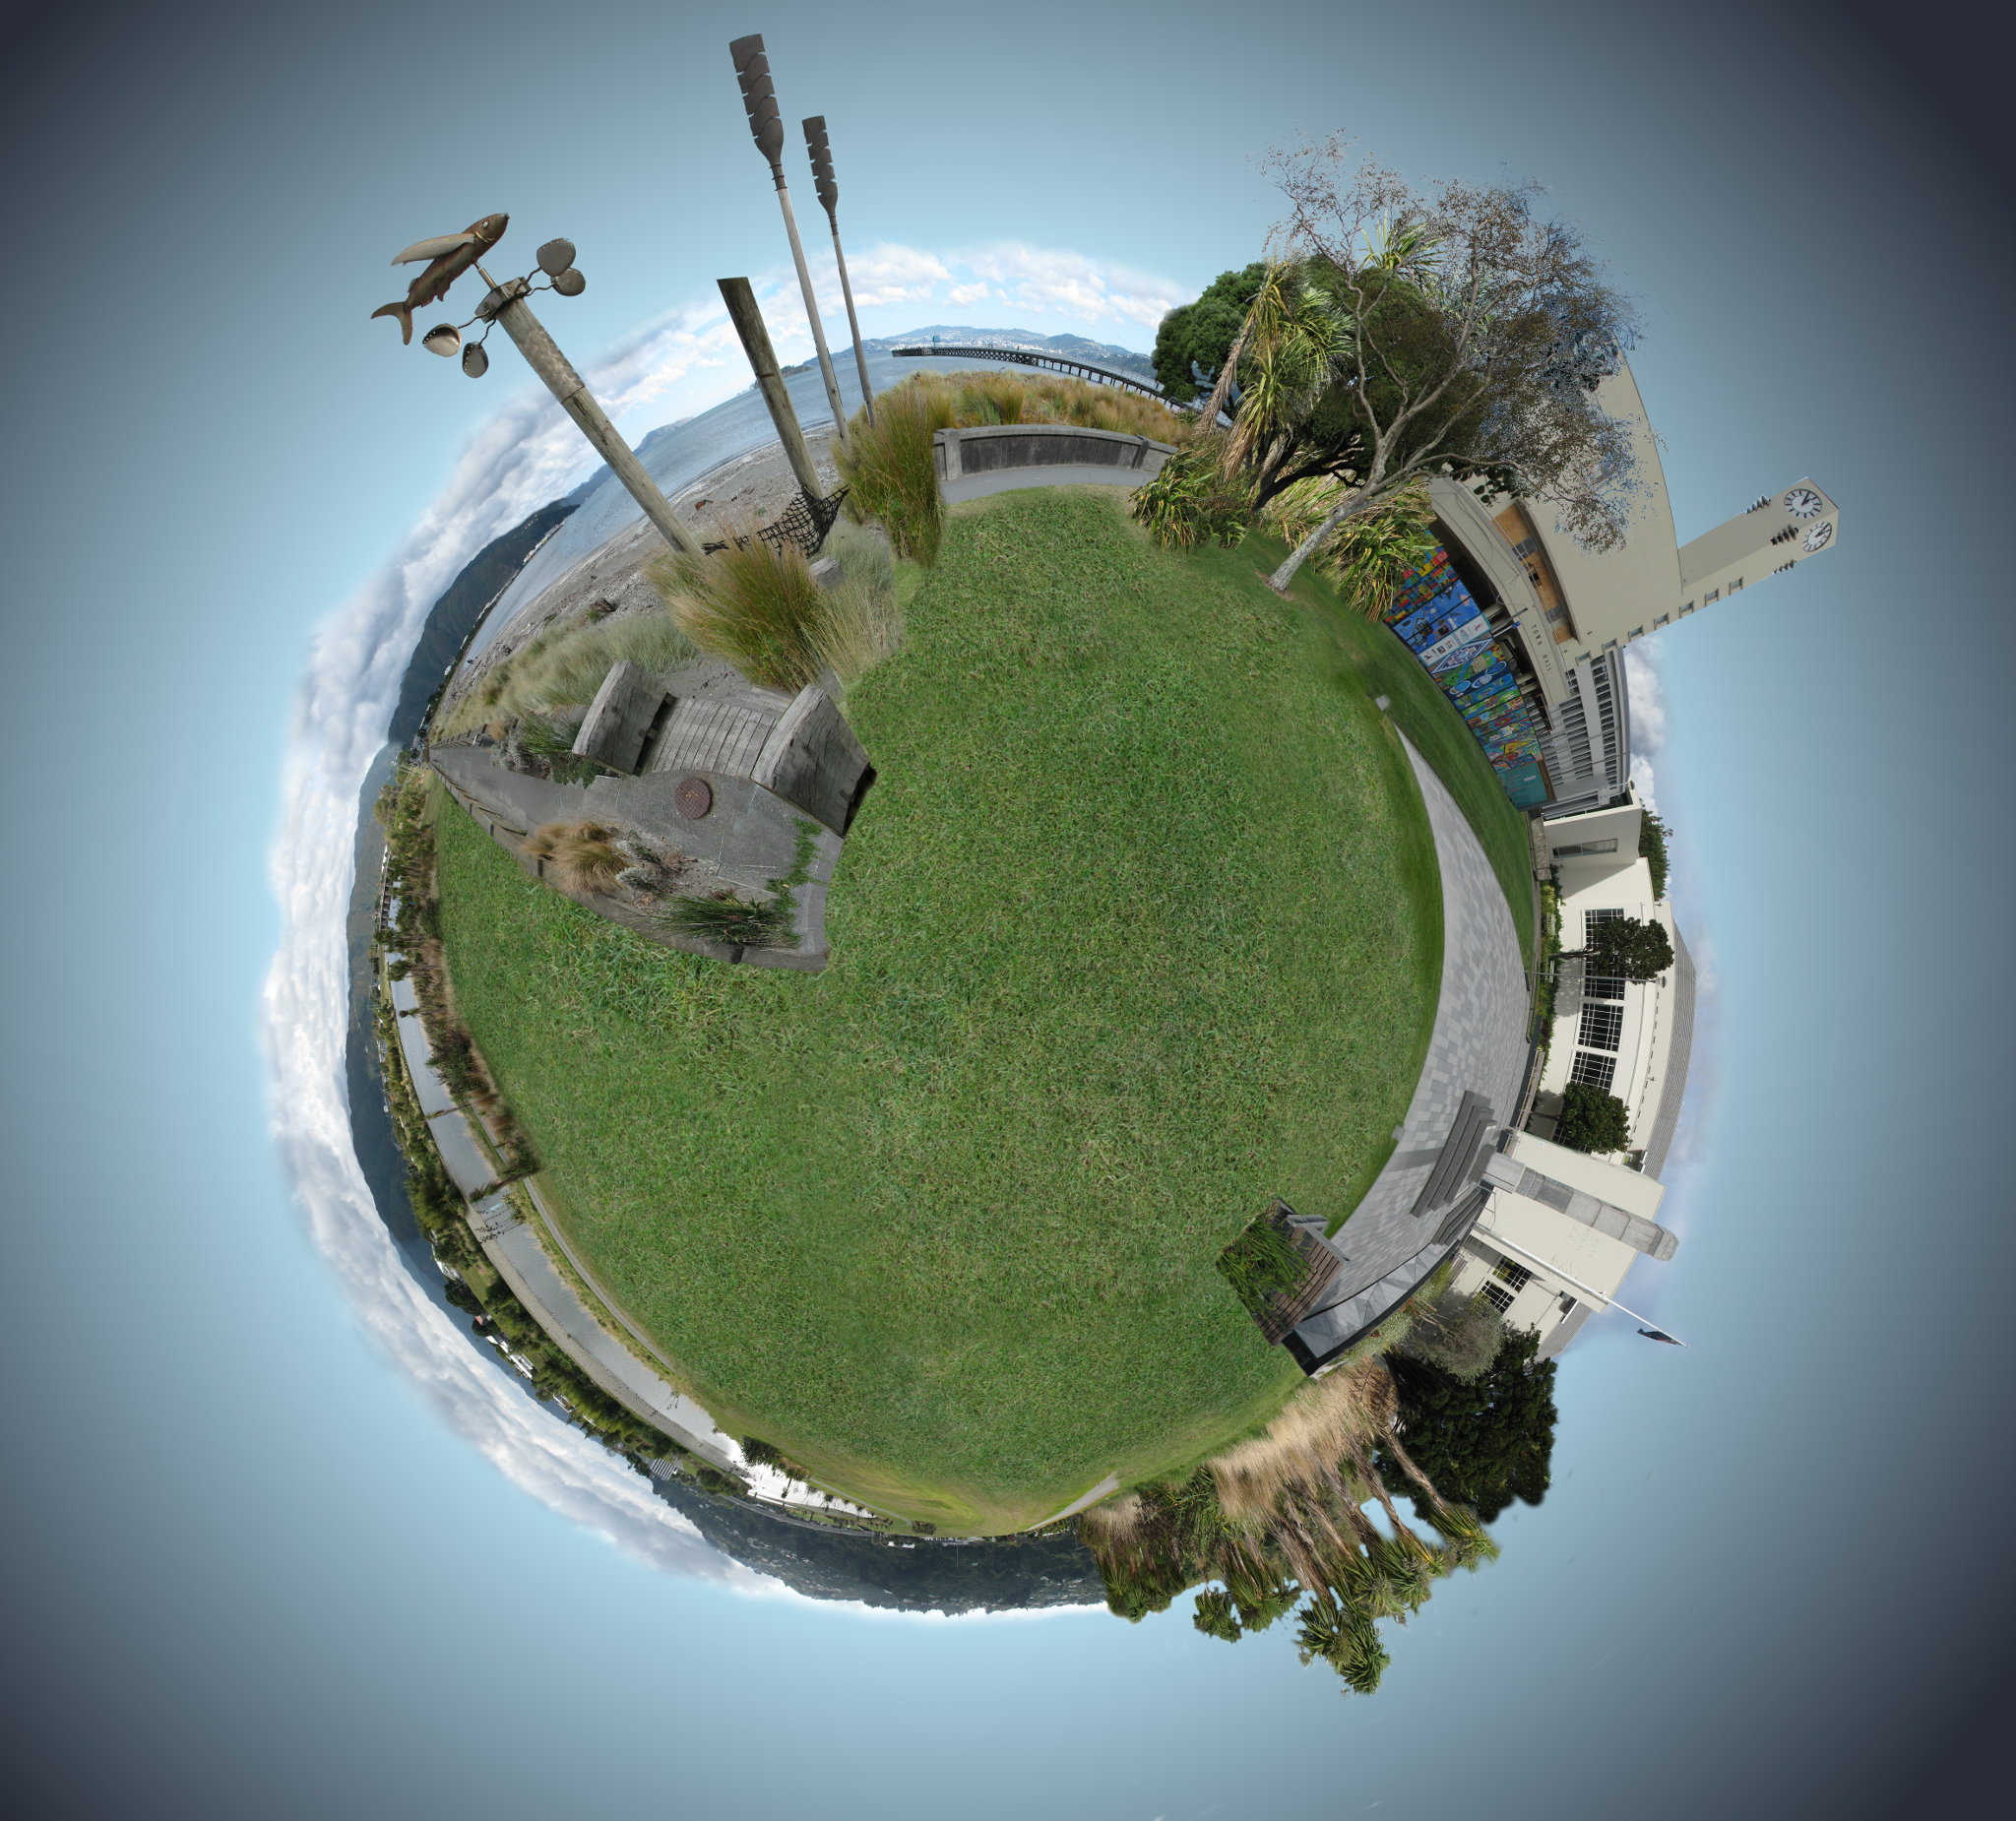
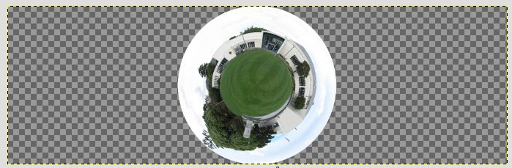
I little while ago, the local library ran a competition to “Design a Planet” as part of Global Astronomy Month. The competition was “open to space enthusiasts of all ages” but, I suspect, mainly aimed at 6 year olds. Anyway, I had initially thought about designing a plausible looking planet based on some of the fictional planets I made for a Celestia star system. Then I thought, “Nah! Lets make something kinda cute, even better, let’s make it local featuring iconic Hutt Valley things such as the Hutt River, the Petone Beach, and the Civic buildings.
After a little photography jaunt around the valley, I mushed them all together, and eventually produced the following image for the competition.
So what I would like to do is share the method for producing a similar Little Planet image using the GIMP. It is likely that other 2D graphics packages will have some similar tools or plugins to achieve the same results, so hopefully what I present here will be fairly transferable. There is a good webpage about the use of projections and various plugins to achieve these effects here: SubBlue - Little Planets.
Please note: The images shown here are somewhat lower resolution to those used in the actual project.
Gather your Images
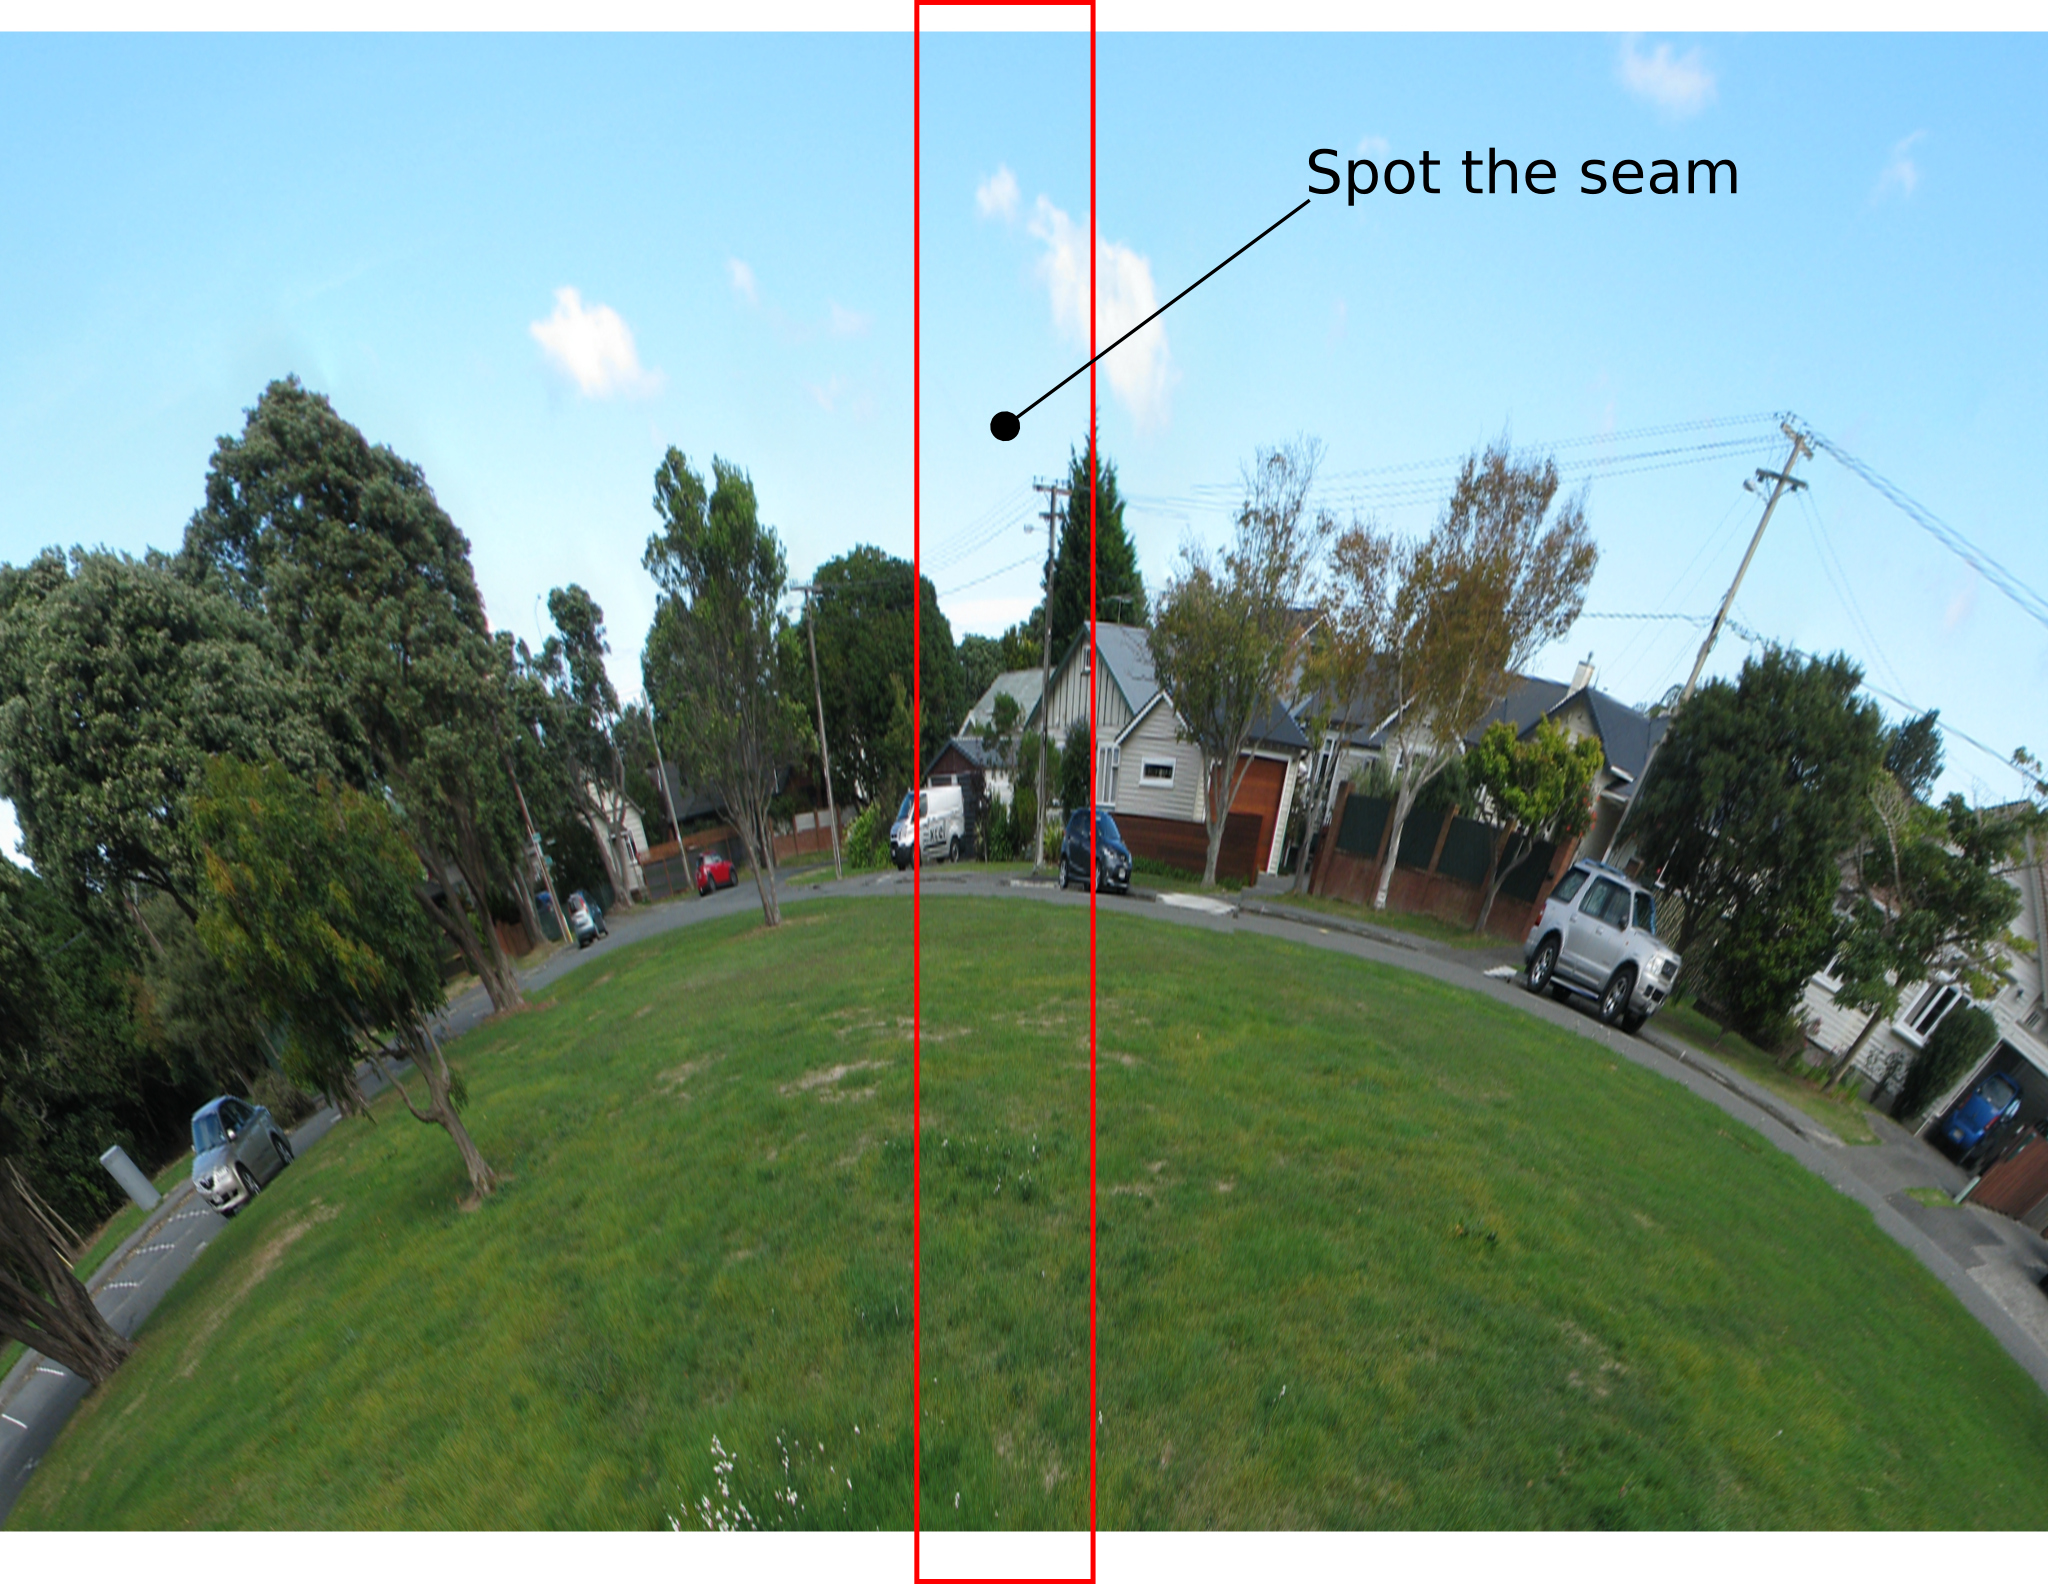
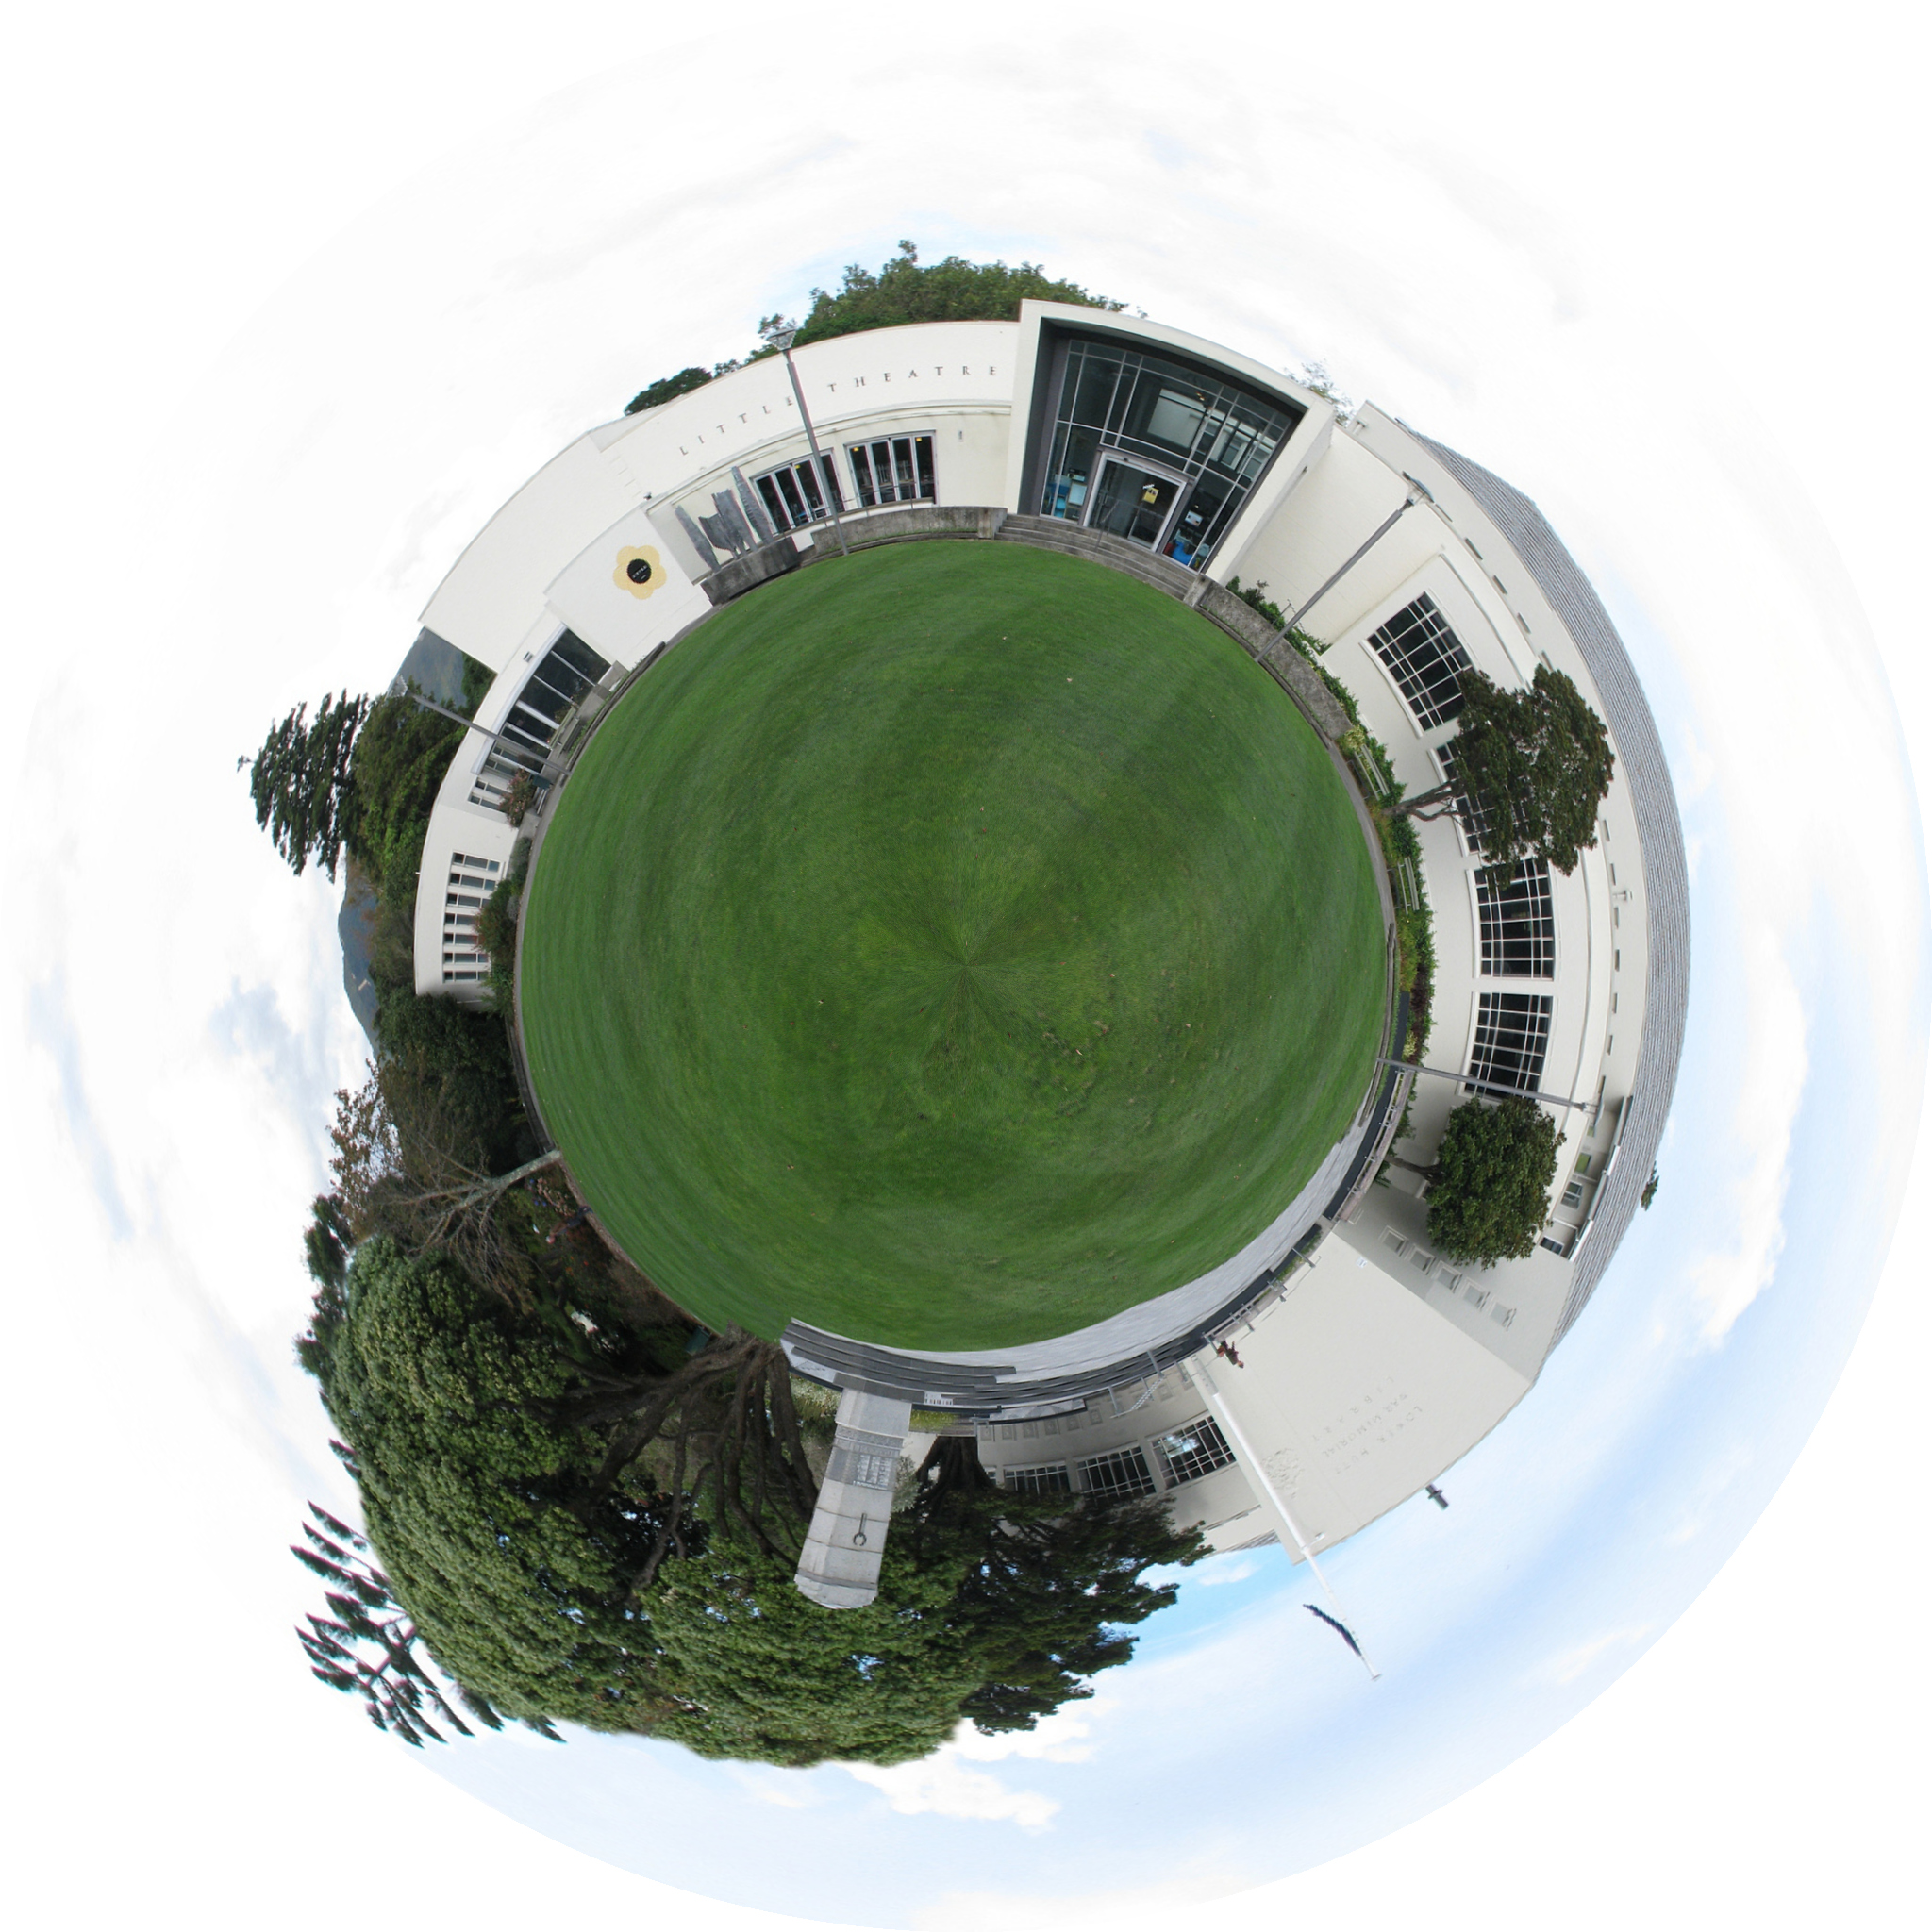
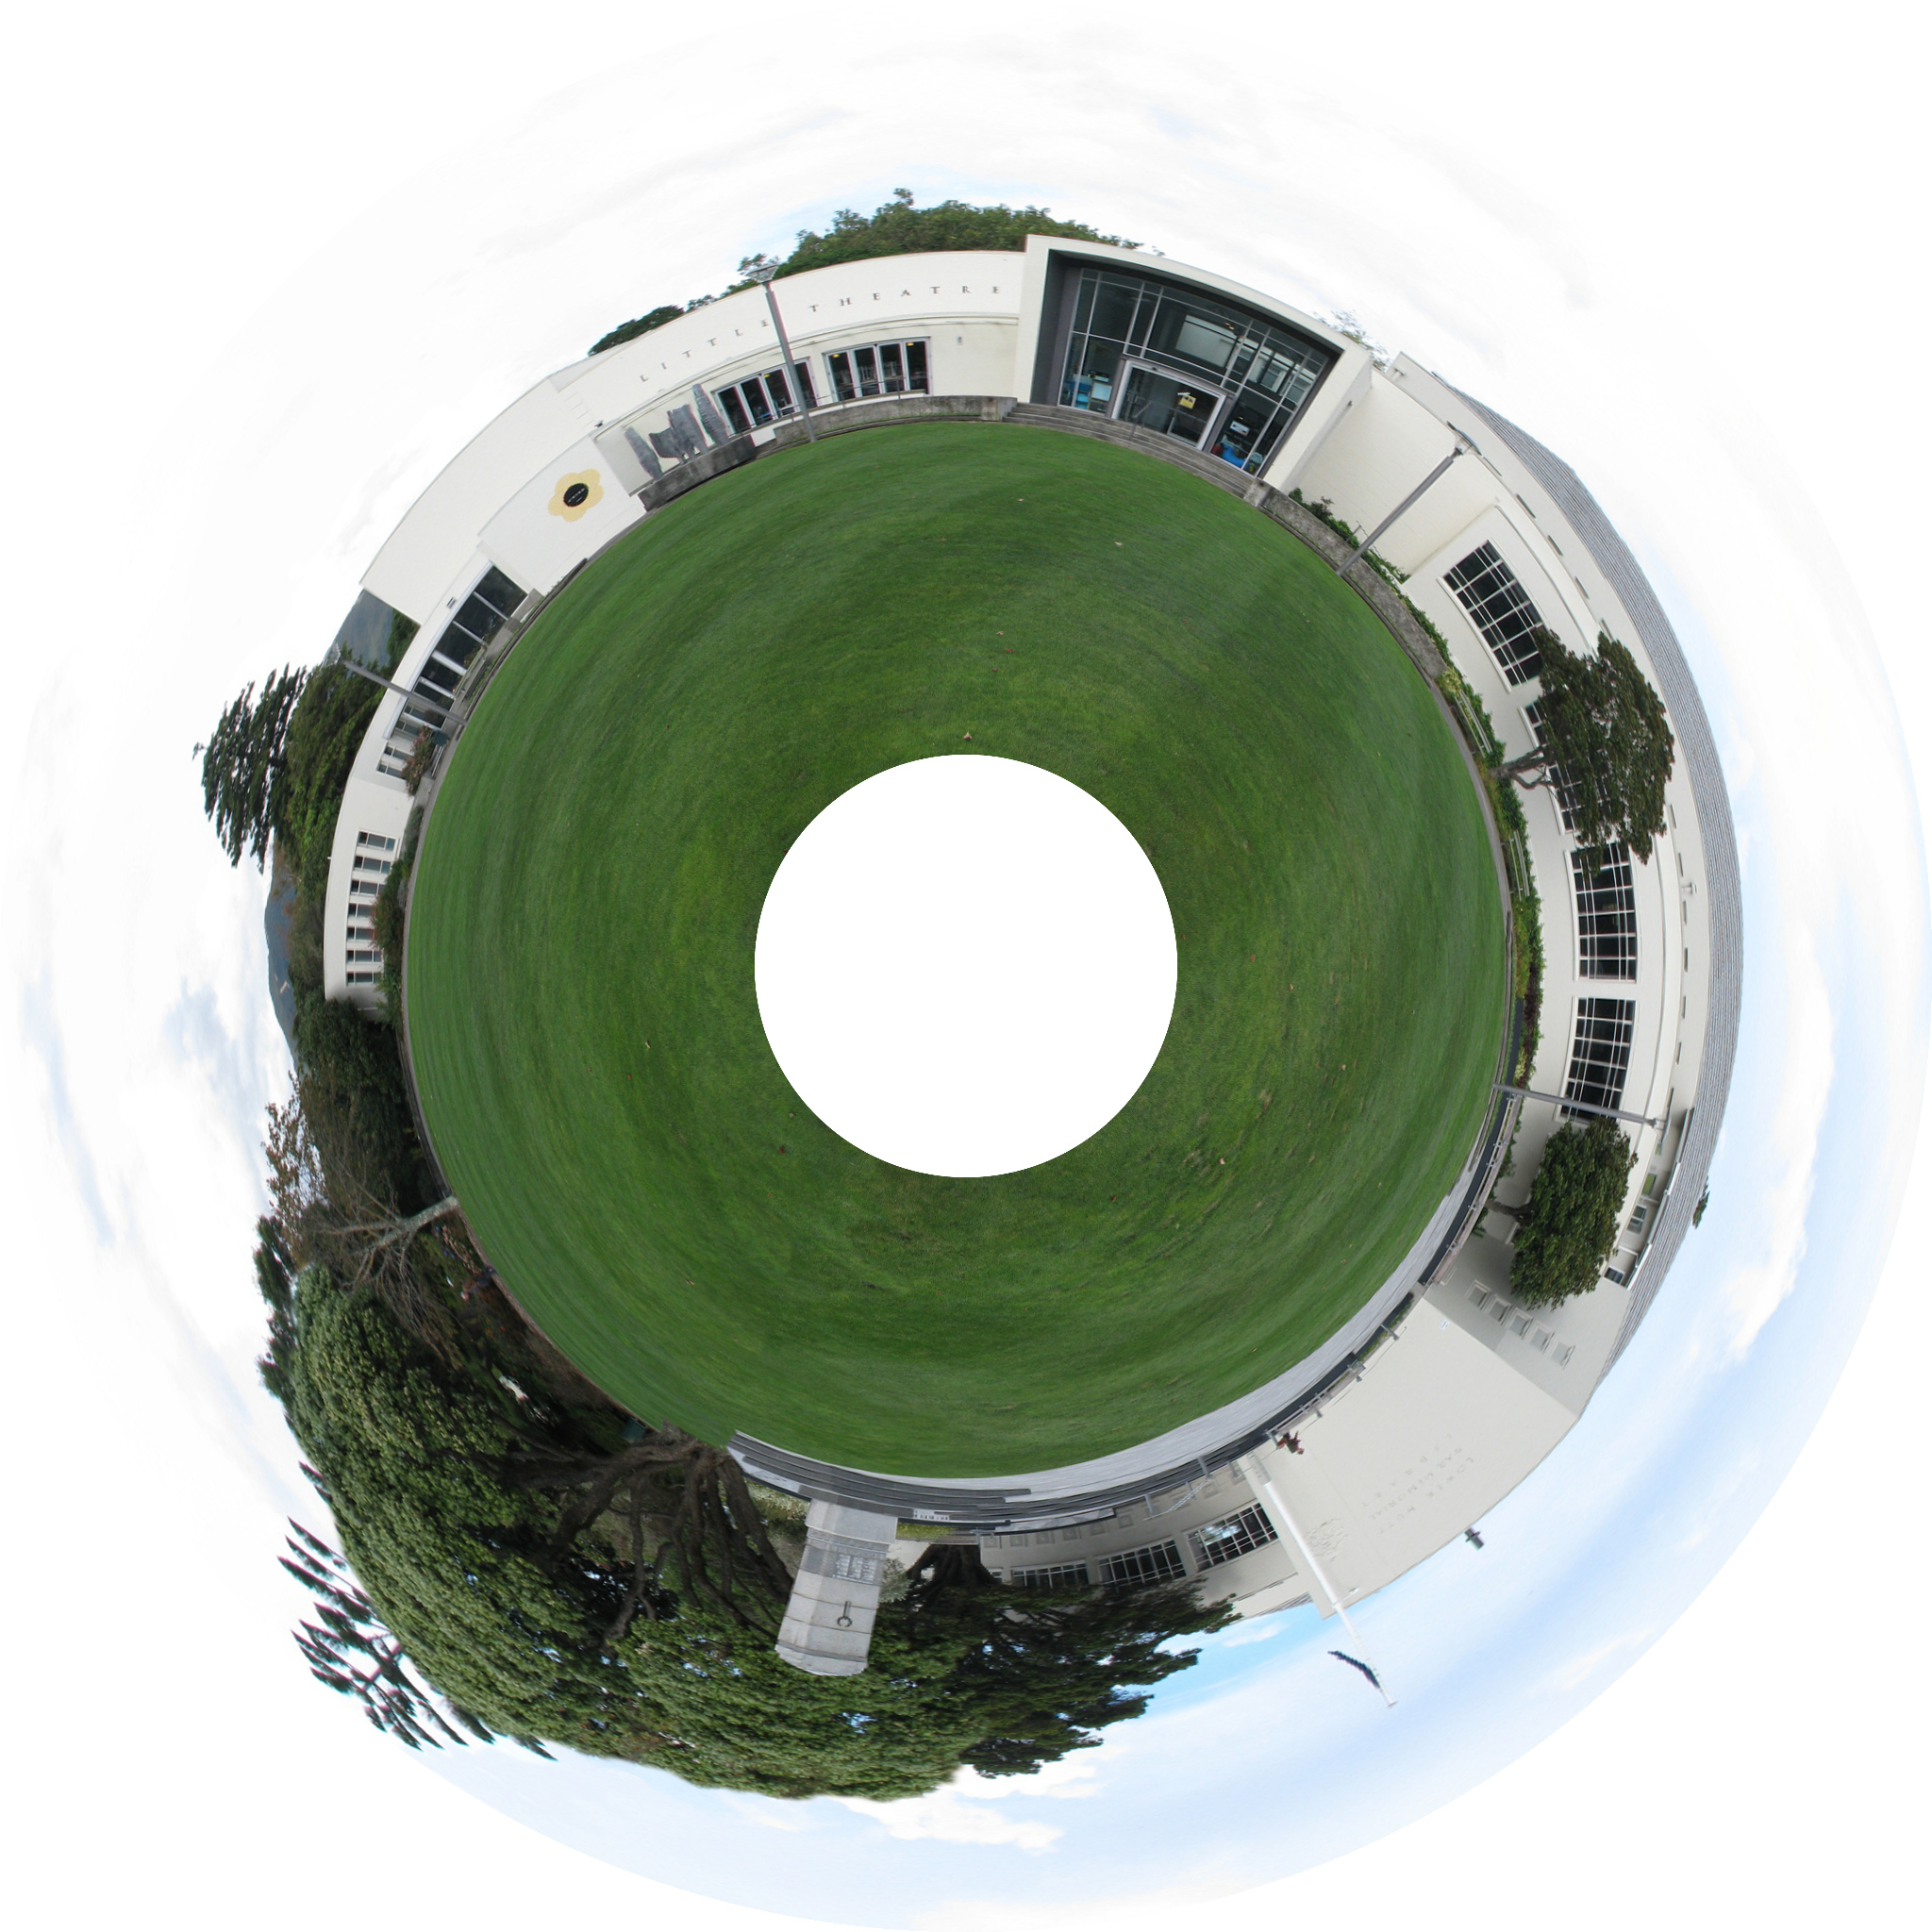
The ideal images are 360° panoramas. This means that the two ends of the image match when they come together through the process described here. The image below was stitched from a series of photographs taken in a nearby park. There is nothing fancy about the camera used for this image, and a simple point and click camera will do the job. The software I used to stitch the photos together is Hugin.

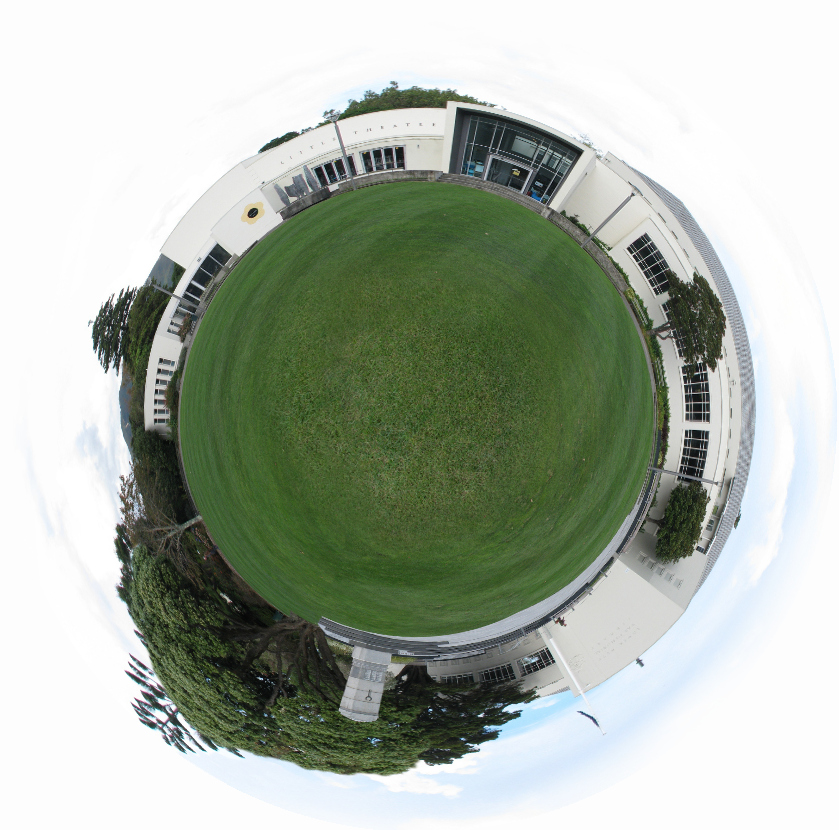
As you can see the panorama photo creates a seamless Little Planet once it has gone through the process described below.
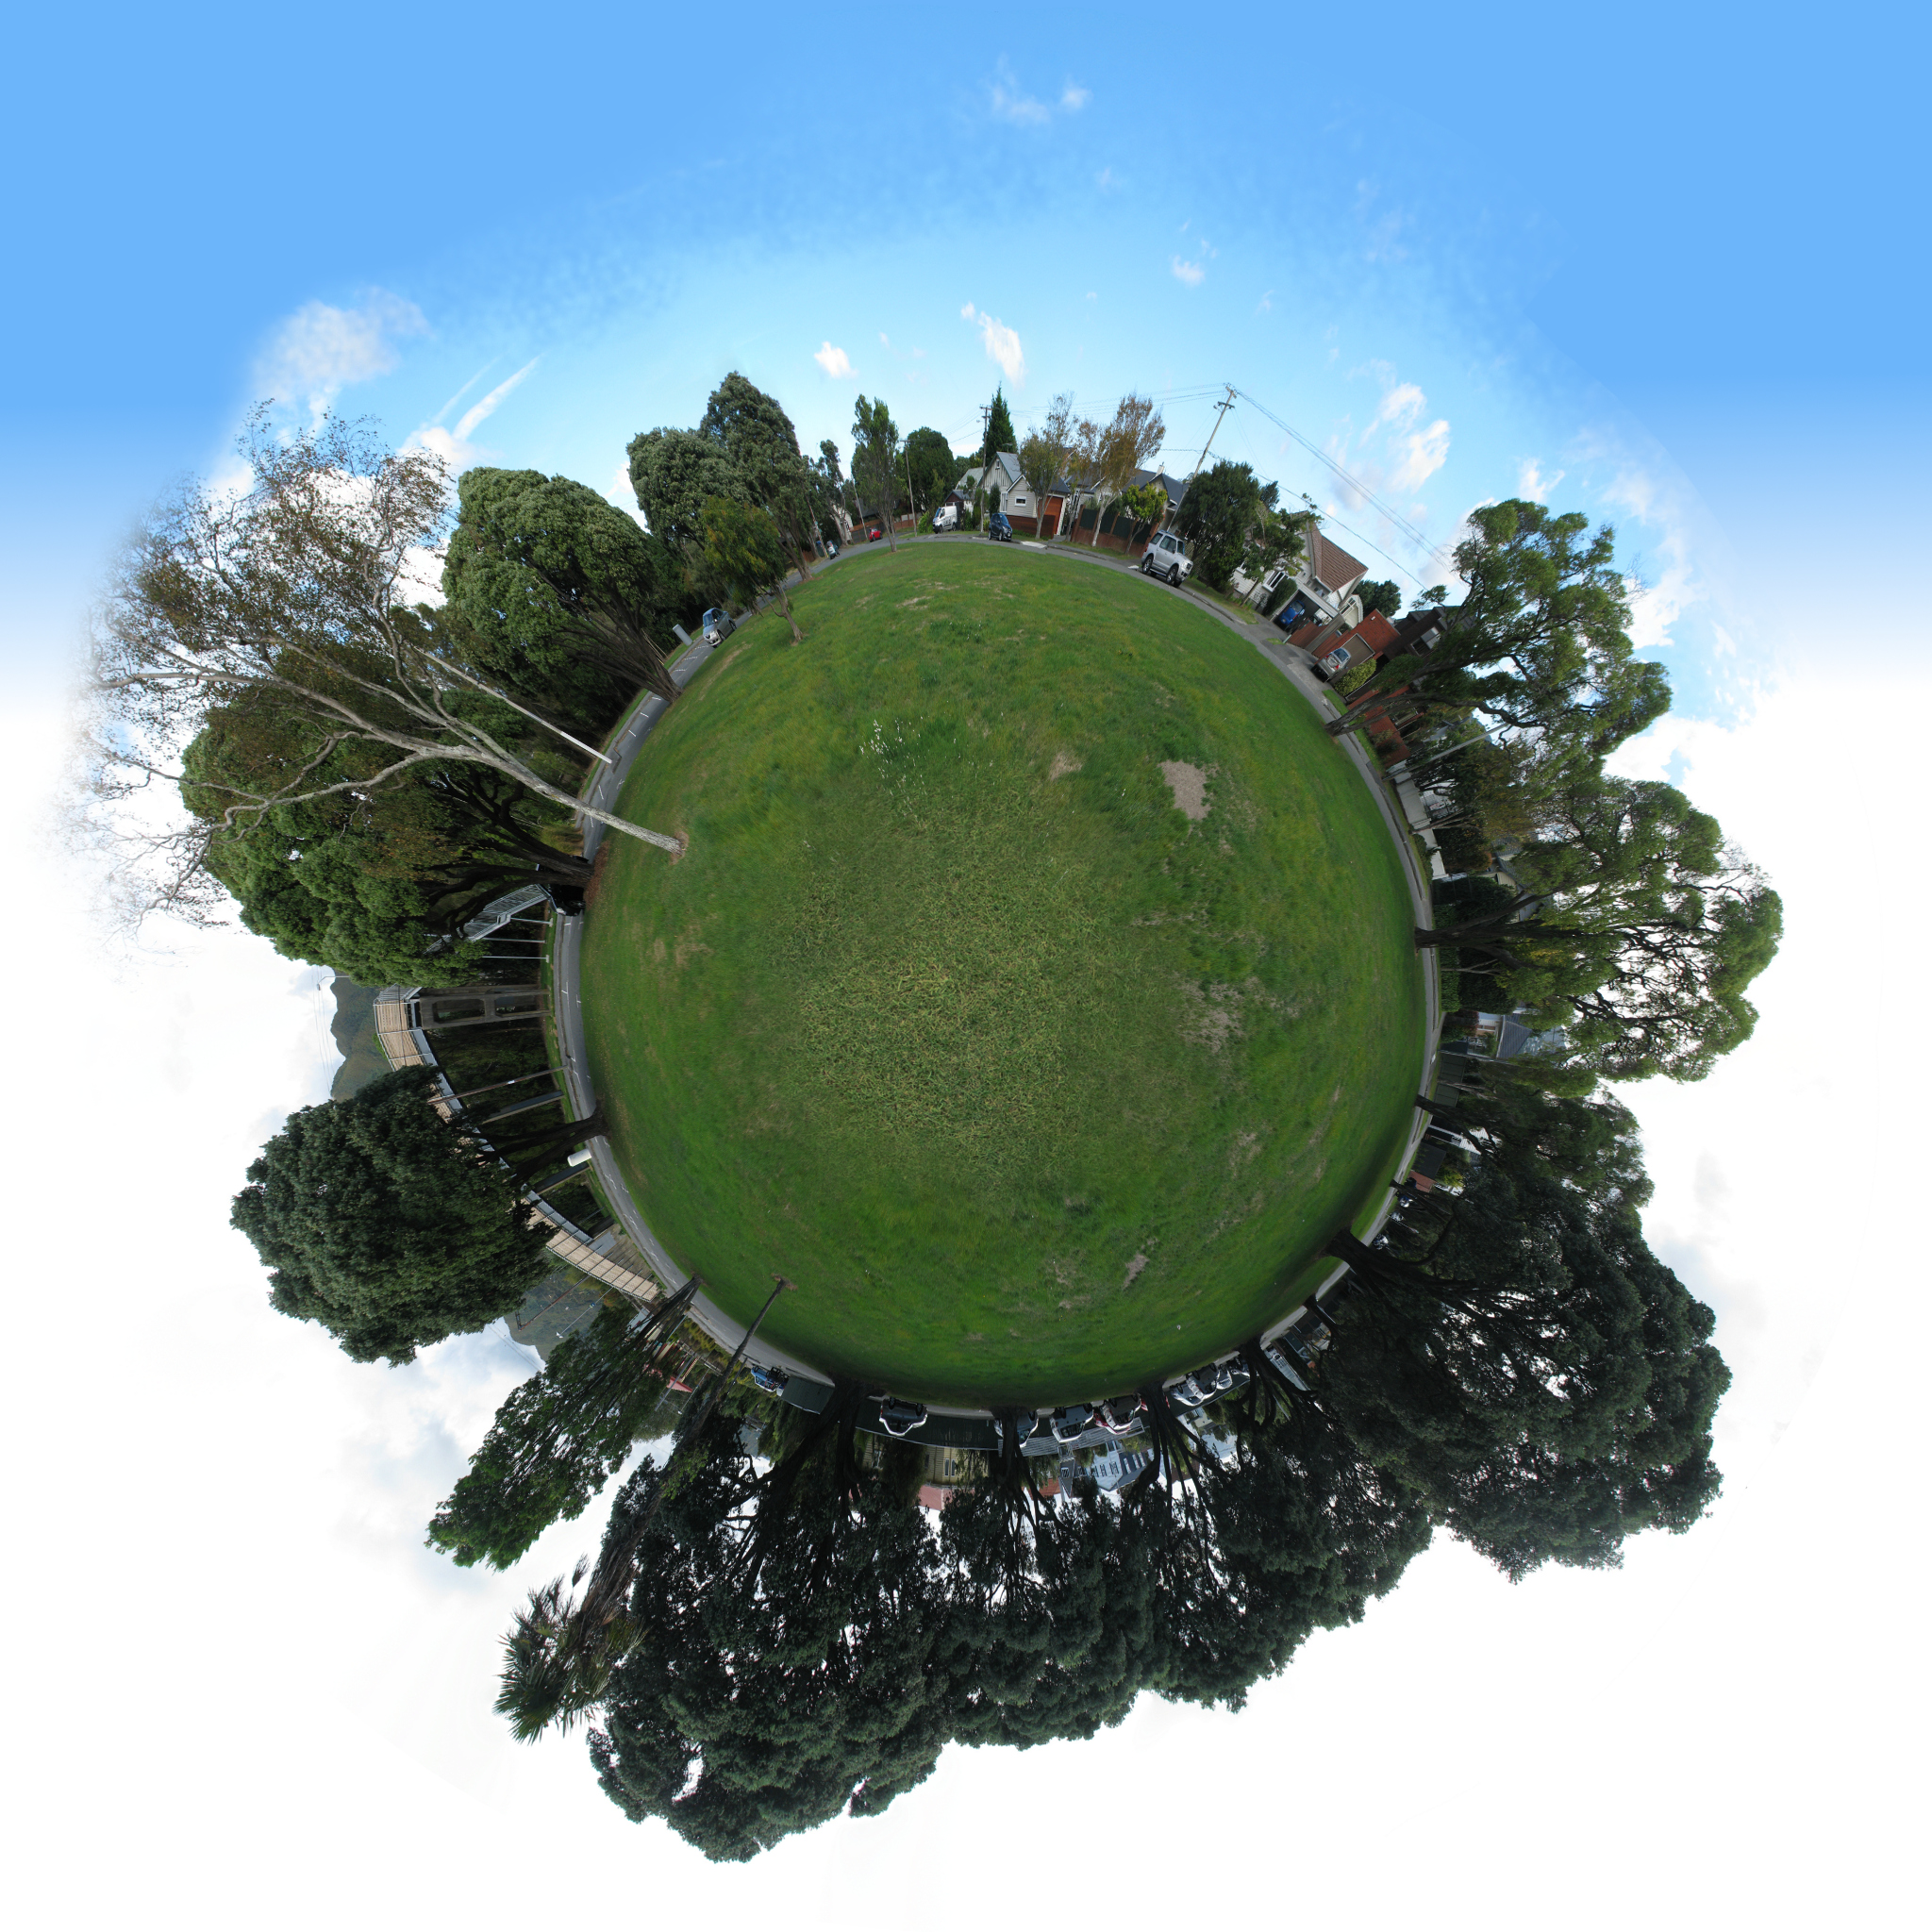
And below is the final planet using this panorama.
To create greater emphasis on the houses or the trees in the final Little Planet image, a smaller space could be used and a wide angle lens if you have a camera with the ability to change lenses.
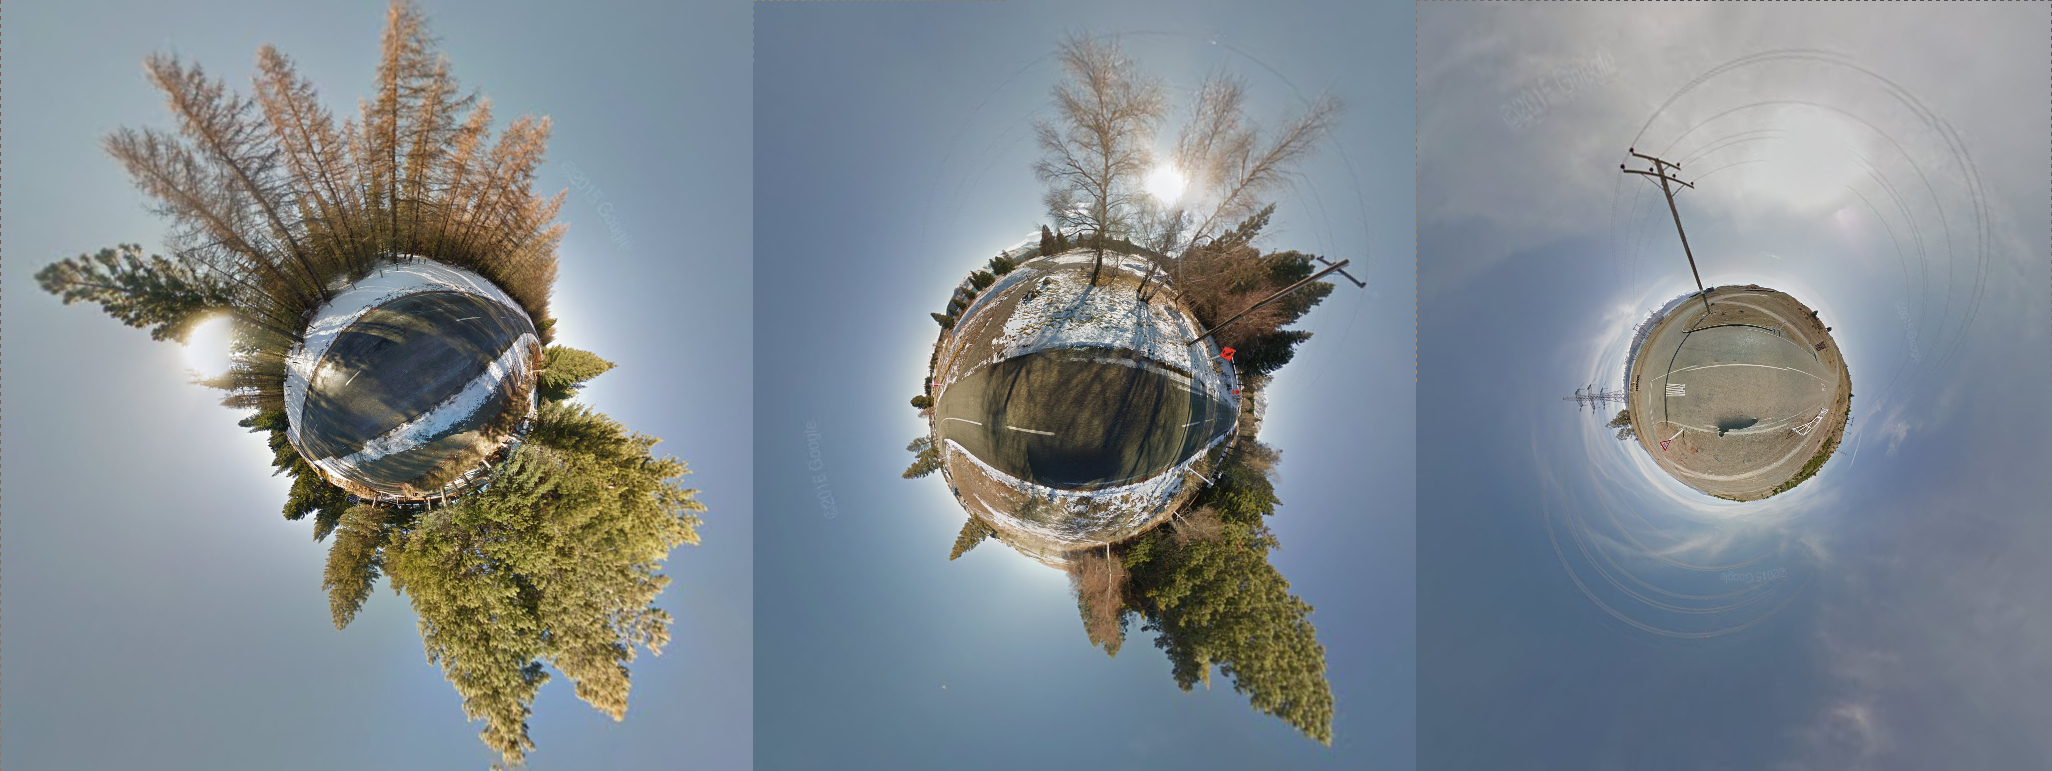
Google Streetview is a good source of panoramas and with a bit of screen capturing, trimming and stitching you can patch together some Little Planets. That’s if you want to do it manually. For a real bit of amusement Ryan Alexander has created a fun webapp called Streetview Stereographic using Google Streetview and WebGL to create Little Planets (and Little Tunnels) for anywhere you select. You can access this here:Streetview Stereographic. You will need a computer and web browser capable of handling WebGL.
Here is a bunch of little planets my partner captured using Streetview Stereographic while “cruising” around the Lake Tekapo region of New Zealand’s South Island. We found the best results were where Google had been through recently with their high resolution cameras. New Zealand’s South Island yielded some particularly good Little Planet images.
If you don’t have a 360° panorama.
If you are not using a 360° panorama, you need to make the image horizontally tile-able. The best way of doing this is to split your image into two sections, and then shuffle them past each-other to opposite ends of the image. You will be left with a seam in the middle of the image which you can then patch over with other details such as adding a tree or a lamppost or a little work with the clone brush.
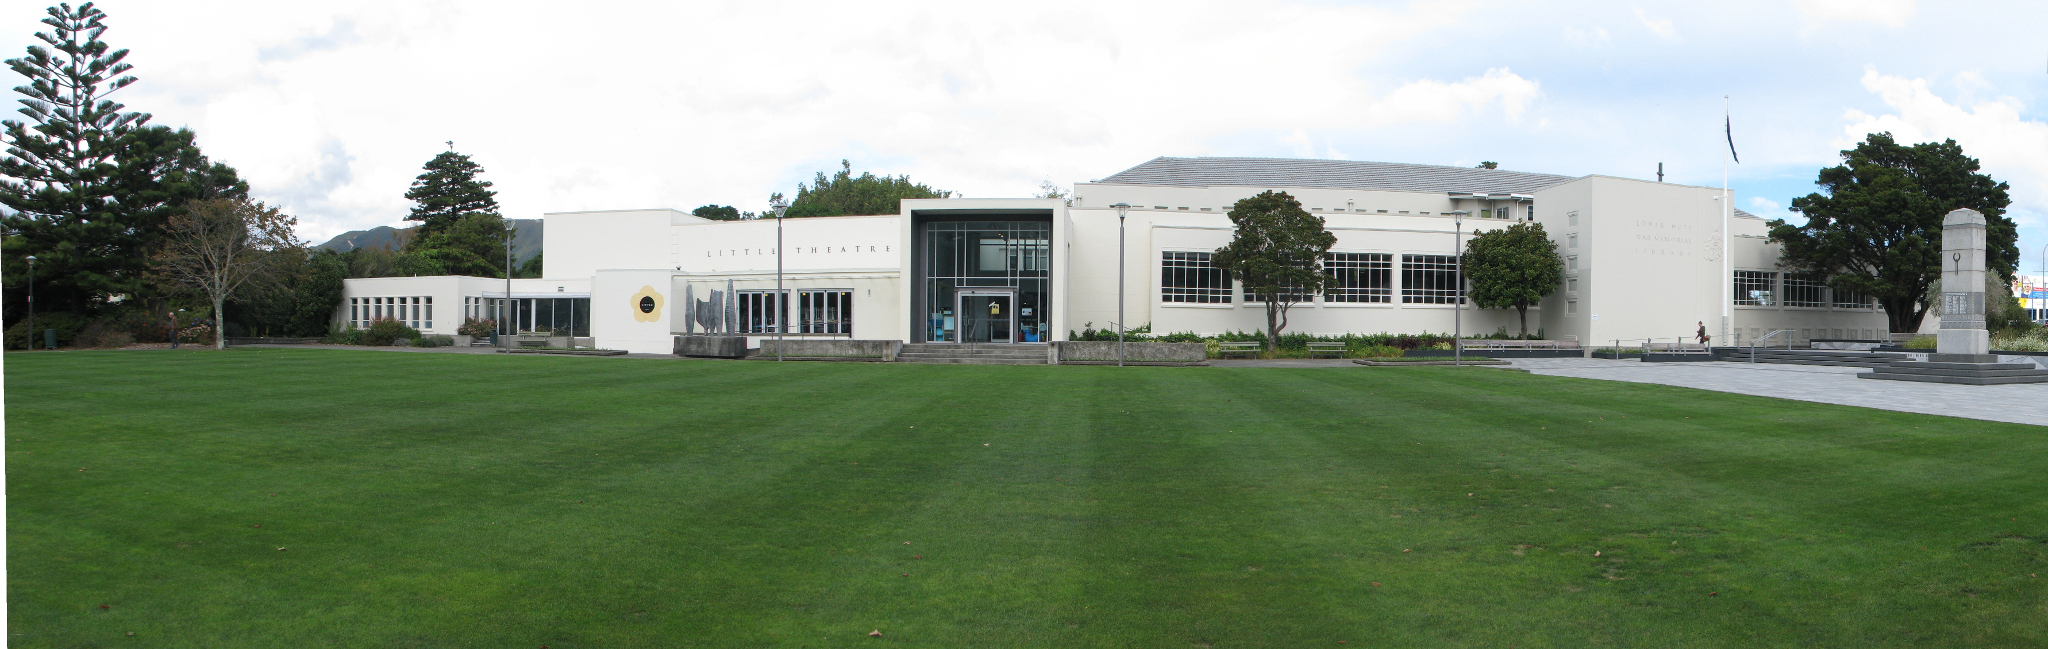
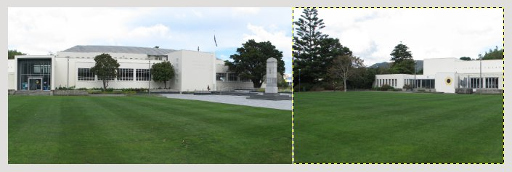
As an example here is an image of the Main Library in Lower Hutt we shall turn into a seamless cylindrical tile.
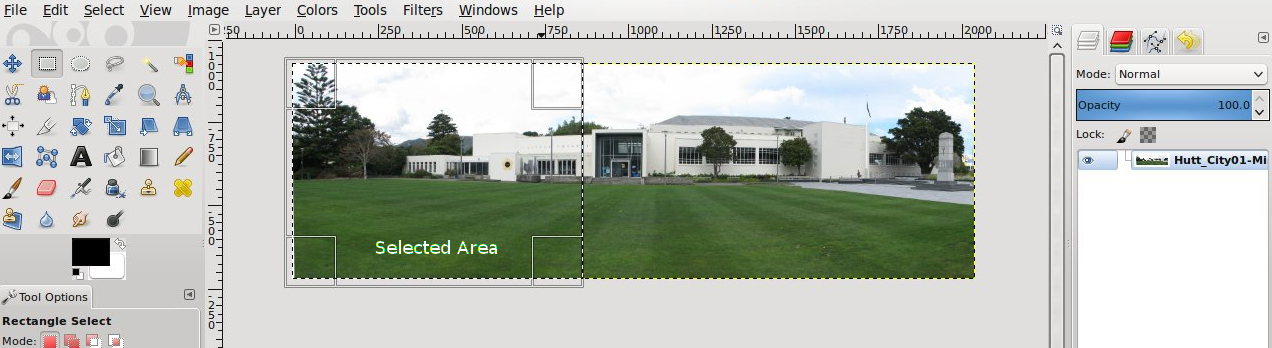
Step 1: Chop it in half.
Yep, just use a rectangular select anywhere in the image. It does not need to be split at exactly the halfway point.
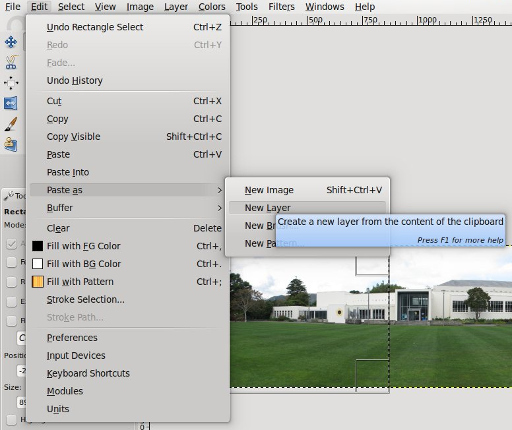
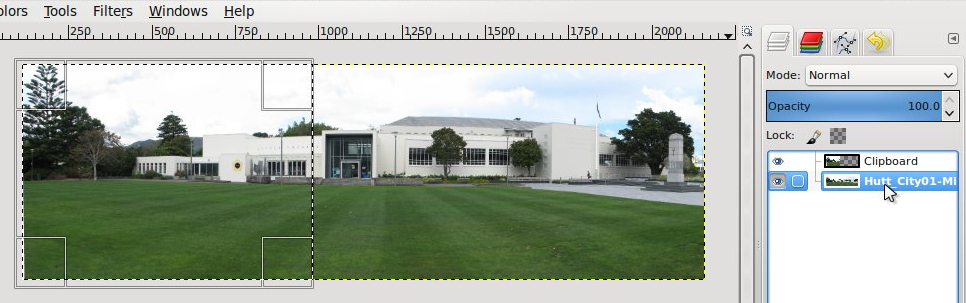
Step 2: Copy it and paste the section in as a new layer.
Step 3: Now make the background active again,
Step 4: … and invert the selection to exactly capture the rest of the image.
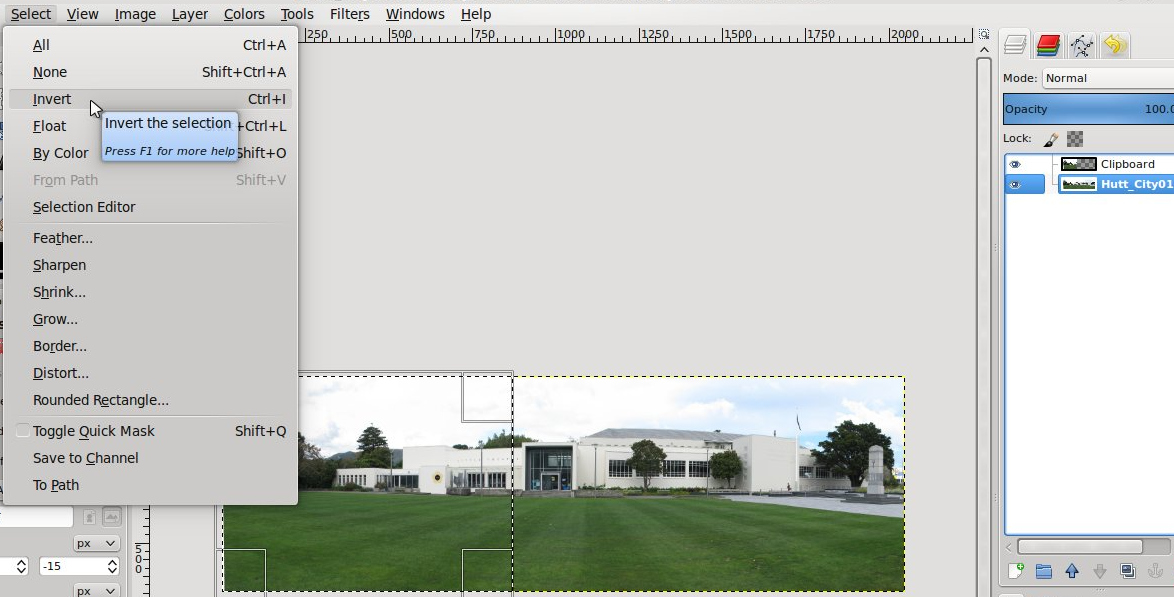
Step 5: Copy and paste the new selection in as another new layer.
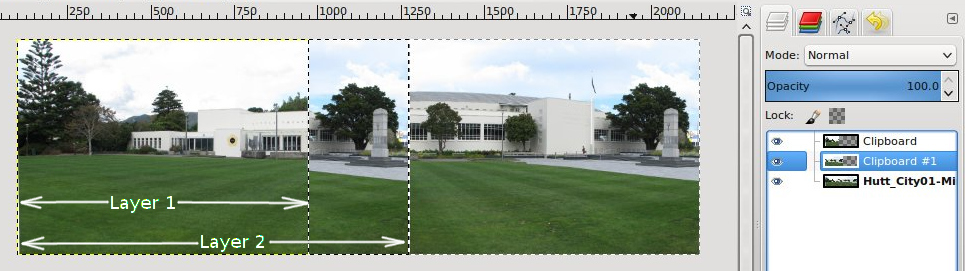
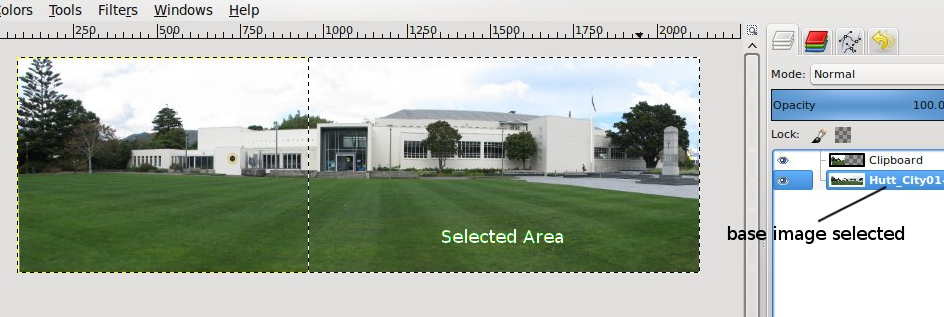
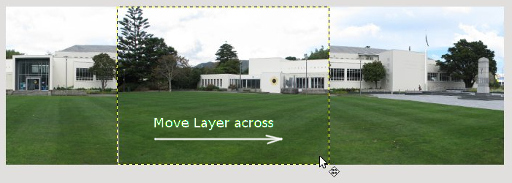
Step 6: Making each of the new layers active, jog them horizontally, using the left and right cursor keys (or shift + cursor keys) until each has swapped places and is lined up exactly on the end of the image. In theory one of the layers will already be nicely lined up on the left hand edge of the image anyway.
So now the two sections have been swapped (and I see I had a funny edge on this image from some previous cropping – whoops nevermind, we’re getting rid of that seam anyway.)
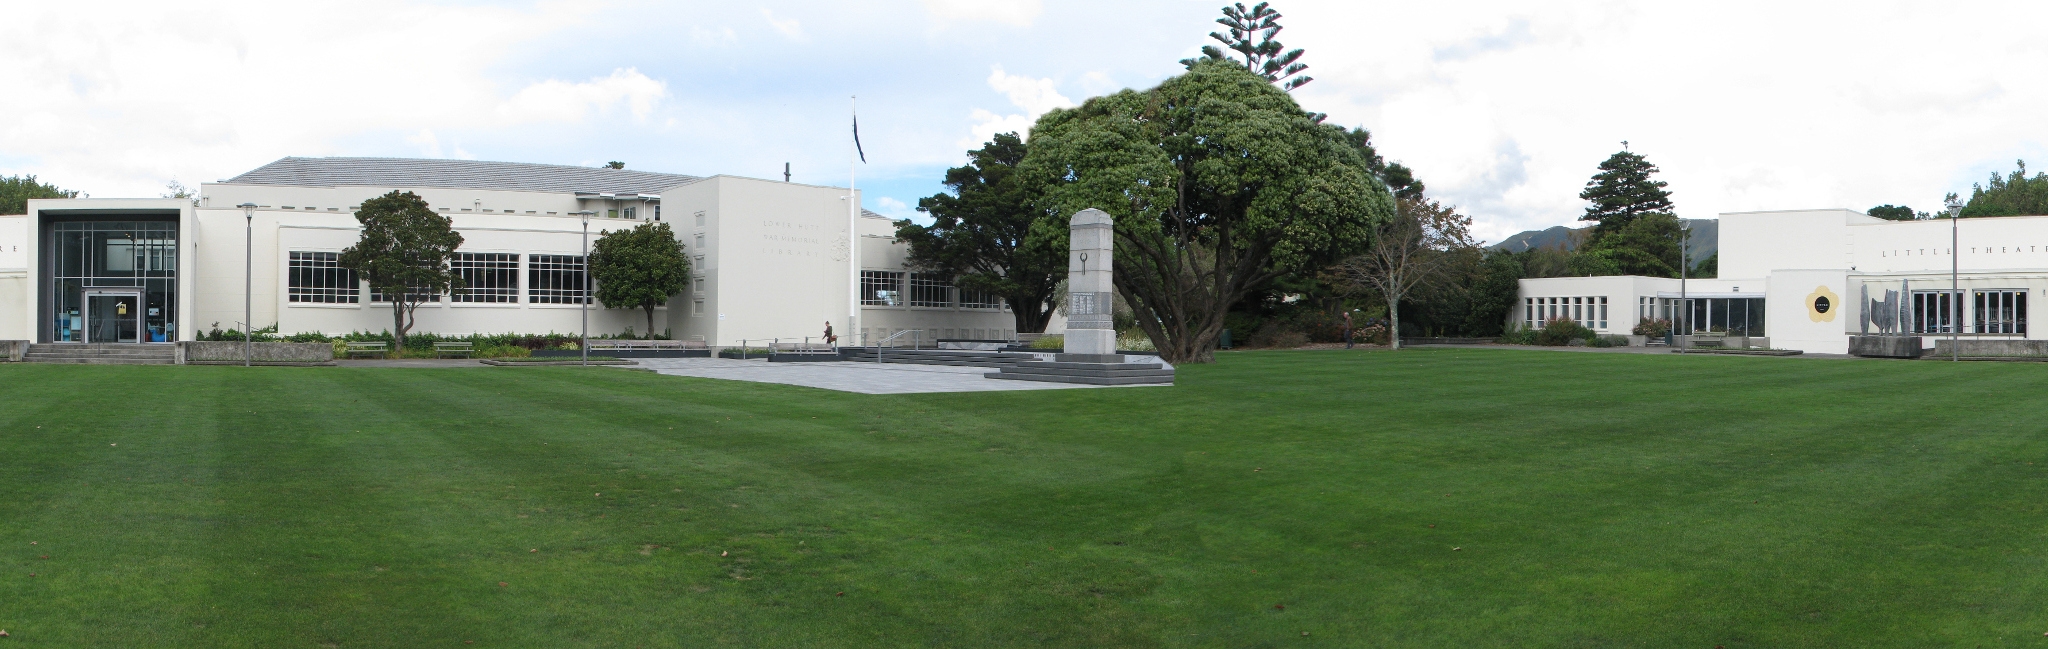
Step 7: We need something to hide the seam which is now in the centre of the image. With a bit of clone brush-work on the grass we can tidy that bit. I have merged both layers down to work on them with the clone brush. Transplanting a large tree from another photograph also helped hide the seam. Here is the photo now as a seamless cylindrical version ready for “planetifying”.
This is pretty much the same method as used in the “Creating Seamless Spherical Textures” tutorial and described in the section “Making the texture – part 2”.
Turn them into a Little Planet
Creating a Little Planet image from your panorama or horizontally tile-able image is relatively straight forward. We make use of the Polar Coordinates tool to re-project the image.
Optional Step: Preparing the Image
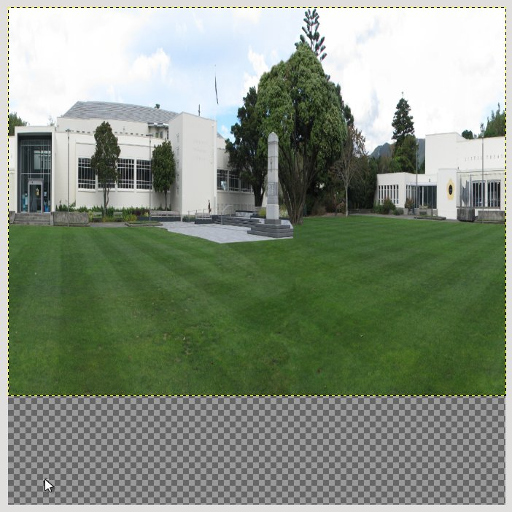
After you have merged your layers into one single layer, you are ready to proceed. Although it is not strictly necessary, I tend to ensure the image I want to turn into a Little Planet is a layer rather than a background image. This gives me transparency around the Little Planet produced which allows me the slip other images and layers in behind it to finish the image. If your image is on the background, copy it, and then paste it back into the image as a new layer. Delete the original background image.
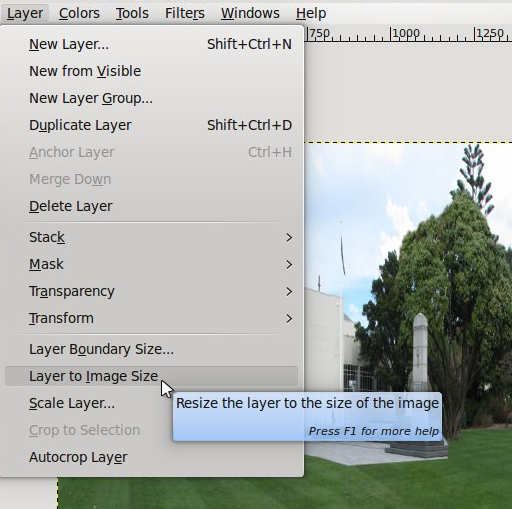
The Polar-Coordinates tool.
So now you have your image on a new layer and you’re ready to go. You can find the Polar Coordinates Tool under the Filters menu and Distorts sub-menu.
You will be presented with a dialogue like this:
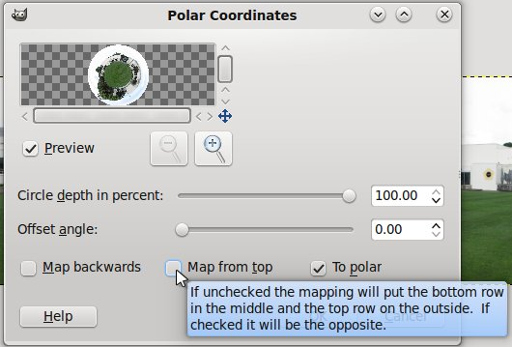
Remove the tick from the “Map from top” button and click OK.
You will end up with an image like this if the original image was a layer rather than a background. If the image was a background layer then the background colour would be in place of the transparent areas.
A word about final image dimensions
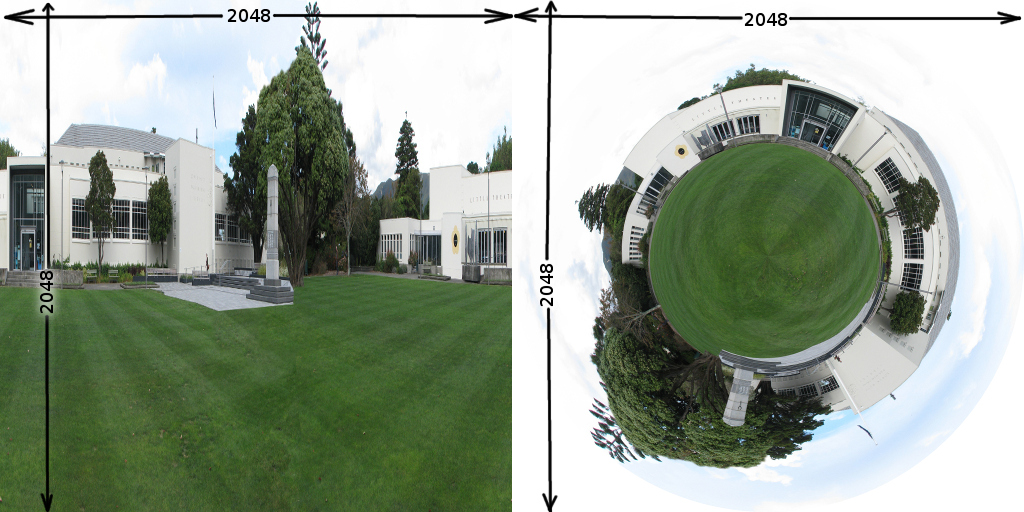
The final dimensions of the Little Planet image are the same as the original layer. This is to say that we have lost some of the vertical pixel resolution through this process. We can preserve the resolution by scaling the height of the original image to at least twice the vertical size. It may even be desirable to scale the image in the vertical direction until it is square.
As an example, the image used here is 2048 x 649 pixels. If I were to apply the Polar Coordinates Tool straight off, the final Little Planet image would be 649 pixels high. To make the best use of the image I have available I can stretch it to 2048x2048 pixels. Now when I apply the Polar Coordinates Tool the Little Planet image is 2048 x 2048 pixels.
Adjusting the planet’s diameter.
As mentioned above, the diameter of the planet is dependent on the size of the layer it is being applied to. By default the Little Planet image produced will condense the bottom row of pixels to be the centre pixel of the Little Planet. In our composition, we may want to enlarge the centre section of the Little Planet. To do this we need to move our original image up or down the canvas and expand the image layer size to the expanse of the canvas.
The canvas has been resized and the image layer stretched vertically, but not to the full height of the image.
The layer size is then adjusted to match the image size. This does not stretch the image but merely extends the layer’s boundary to the canvas boundary. The Polar Coordinates Tool still works on turning the bottom edge of the layer into the Little Planet’s centre but now there are no image pixels there and we end up with an empty core and a Little Planet that starts to emphasise the clear ground surrounding the camera.
Methods for Patching and Finishing
To go an extra step, you may want to tidy up the area outside your little Planet by adding a colour fill or a starscape perhaps. You may also want to fix up the stretching and distortion that happens at the centre of the image. By using a non-background image layer through the Little Planet building process described above, we have transparency around the outside of the image and maybe a transparent patch in the centre. The transparency makes it very easy for us when patching and tidying the image.
What to do about the Centre
Whether you have a transparent region in the centre or a streaky distorted center a suggested way of fixing this is to cover the area with another photograph of a ground cover that matches the image. In the example above, I took a photograph of the grass at the time I took the photo of the building.
I could have placed this image behind the Little Planet layer, scaled it, and adjusted the brightness and contrast to get a matching patch of grass in the centre. Using a soft edge eraser tool on the Little Planet layer would allow me to create a transition from the Little Planet layer into the grass texture layer.
What I did instead was create a grass tile that I could use as a texture in Blender. This mas mapped onto a sphere, and the texture brush used to tidy the texture as applied to the sphere. Finally it was rendered with only environmental lighting to get an image as shown below.
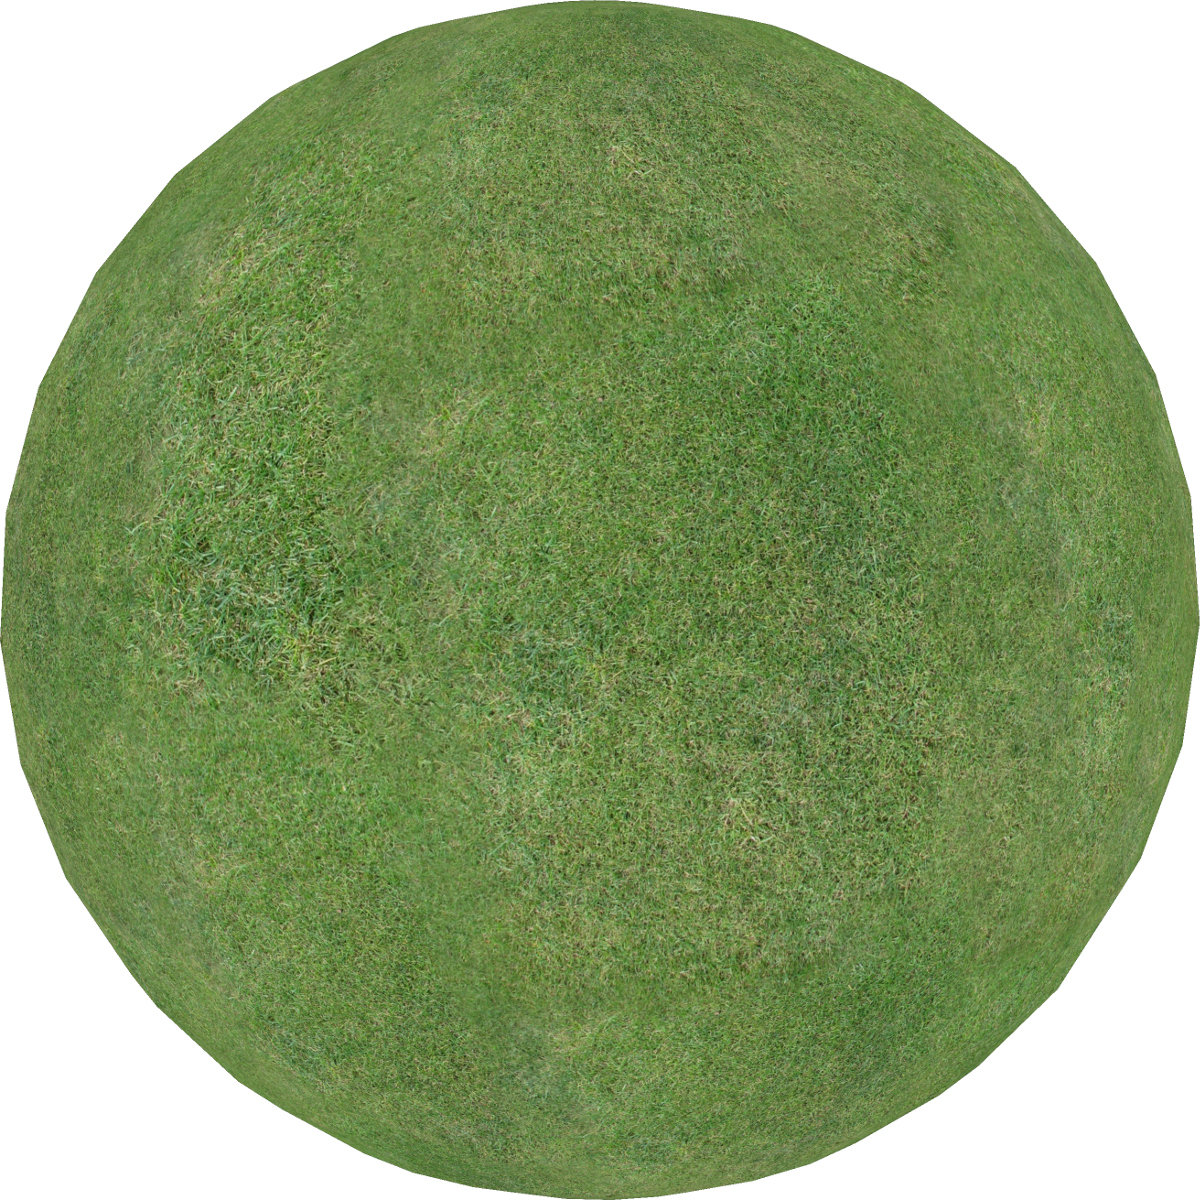
Once rendered as a .png file it was imported into the GIMP and scaled to suit the apparent size of the Little Planet and placed behind the Little Planet layer. Some quick erasing with a large soft eraser tool produced a reasonable transition between the layers.
What to do about the Outside
Unless you have a fisheye lens to capture a lot of the sky when you take your photos you will end up with an “atmosphere” with a harsh edge that you need to deal with. The easy solution is to create a new layer with a fill that matches the colours of the sky in your photos. Alternatively you could add a starscape image behind your Little Planet layer for that more spacey look.
Either way, a bit of work with a soft wide diameter eraser is required to soften the edge of the Little Planet layer and help blend it with new background.
Gradient Fills
A gradient fill is a good method for achieving a background that matches your image. Use the eye dropper tool to take a sample of the most vivid colour on the periphery of your Little Planet layer and do the same for the palest colour and apply that as your background colour.
Use the Foreground to Background gradient (FG to BG (RGB)) fill on a new layer. You may need to have several shots to get the colour transition happening in a manner that best suits your Little Planet. Just click and drag from where you want the 100% foreground colour to the 100% background colour point on your image. Depending in the colours on your Little Planet layer the Radial gradient fill shape or the Linear gradient fill shape may be better suited. Using the small Reverse button beside the gradient may also help you achieve the gradient you are trying to create.
Working the edge of the Little Planet layer with a soft eraser brush will help achieve a nice transition between the Little Planet and its new background “sky”.
Other cool tutorials on this stuff
Here is another tutorial on this that adds some extra interest to the images created.
Photojojo - Create Your Own Panorama Planets