Creating Planetary Rings In Blender

The following tutorial is for creating planetary rings in Blender. Blender 2.60a has been used for this, but the same method can be used in Blender 2.49b as well. To create the textures the GIMP has been used. The method used is based on that described in the following forum http://blenderartists.org/forum/archive/index.php/t-729.html.
Creating the Texture
There are two textures to create. You will need a colour map, and a transparency map. Both of these textures can be quite small. The method described is for the GIMP but could just as easily be any other 2D graphics package. Both maps created here are 16px wide by 256px tall. They could be smaller but it begins to get a bit tricky to handle in the later stages of the process.
Colour Map The colour map does not define the rings but rather the overall colour range across the set of rings.

Transparency Map
The transparency texture defines the thickness and gaps in the rings. The image shown here is a representation of the transparency map. The actual transparency map used is a .png format file that varies between white and transparent. This means that it just looks like a white rectangle when on a “white paper” background and so is not much to look at.

Creating the Colour Map
There are two ways of creating a suitable colour map;
- you can use gradients to create them. This can give some nice smoothly varying colours, but can be frustrating and time consuming to get exactly the gradient you are after.
-
You can just paint splashes of the colours you are after and then use a resampling process to squish it all into something that will work well. This allows you a great deal of control of the colours and their distribution and is quite quick. This method is described below.
- Create your image. Use the usual dialogue, but open up the “+Advanced” option so that you can set the fill to “Transparent”. This is useful for when you come to make the Transparency map later. The image does not need to be very big, and a 16px x 256px image is quite fine enough.
- Add your colours. Load up a large brush with a soft edge, and set it’s opacity down to 40-60%. Select your colours and splash them onto the image as you please. There is not need to ensure your paint strokes are straight across the image, just as long as they are in about the right place up the image.
- Resample your image smaller. Scale your image (or resample it) so that it is only one pixel wide but still the original height.
- Resample your image back to the original size. Now scale your image back to the size that you had before. Now all of your colour bands are straight and parallel across the image.
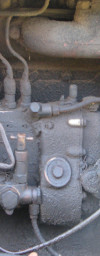
As an extreme illustration of the process described above here is a snippet out of a photograph used to yield a colour swatch suitable for using to colour some rings.
Original image cropped from photo.
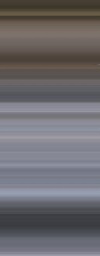
After resampling width to 1 pixel and resampling back again to the original width.
That’s the colour map done. Save your image as a .jpg.
Creating the Transparency Map
This is done more or less the same way, but just use a white loaded brush lightly over a new image with no background leaving plenty of transparency showing through. Using some of the fancy shaped brushes you may have in your library can be a good way of getting very fine dust lanes in your ring structure.
The steps are;
- Create a new image the same size as your colour map, and make sure the background is transparent.
- Paint on the white paint.
- Resample the image to 1 pixel wide
- Resample the image back to the original width.
- Now save the image as a .png format and make sure you chose the option that preserves the transparency because this will give us our alpha channel when we use it in blender.
That’s the textures done.
Building the Ring in Blender - 1st Part
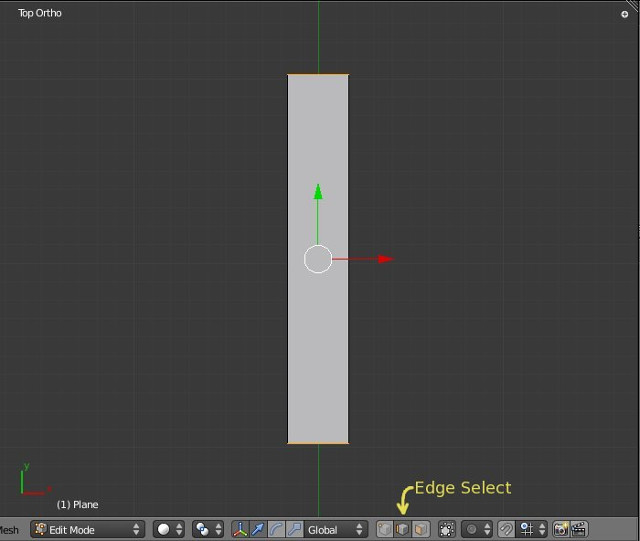
- The first step is to create a plane in the top view.
- Tab into the edit mode and scale the plane in the x-direction until it is a fairly narrow rectangle.
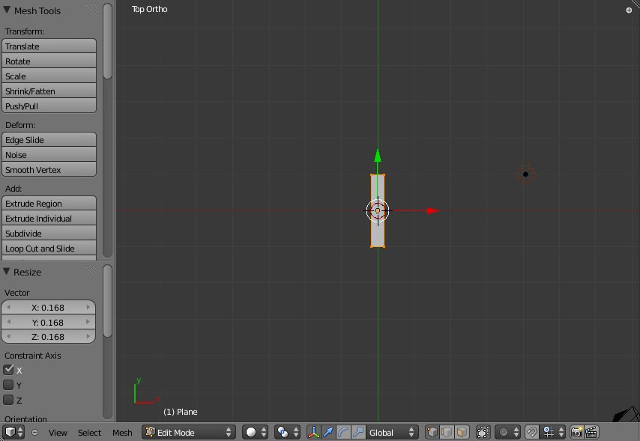
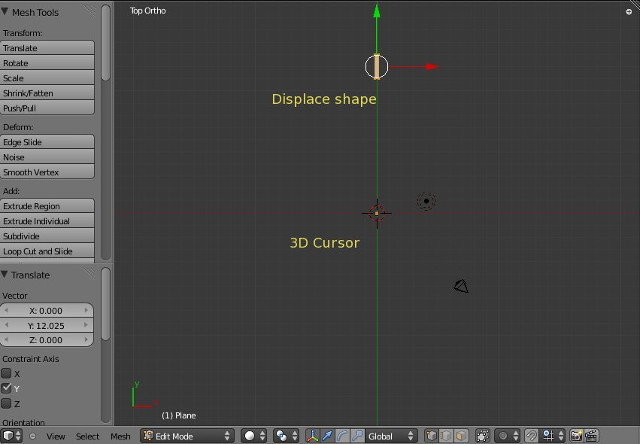
- Move the rectangle along the y-axis until it is a distance away from the 3D cursor that will be the radius of your ring.
- Deselect everything then go to the Edge Select Mode and select just the top and bottom edges of your rectangle.
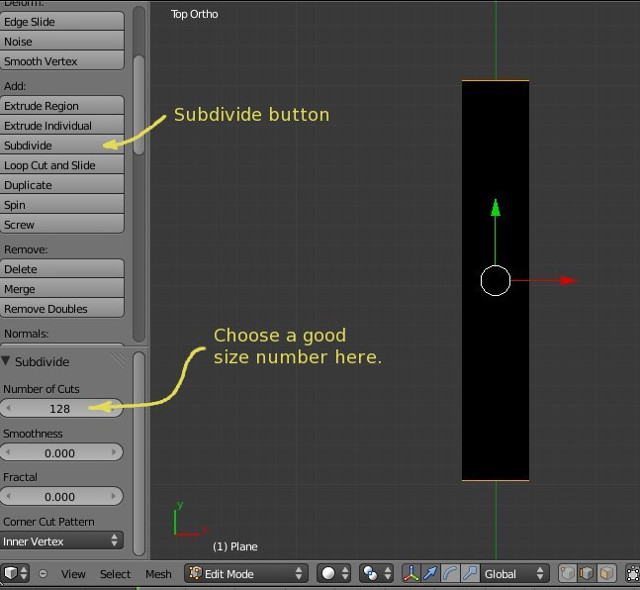
- Subdivide this a large number of times. 128 times gives pretty good results, but 256 is probably better and seeing as it is not going to create too many polygons you could quite easily go to an even higher number and ultimately end up with a very smooth edge to the ring..
Setting up the Texture
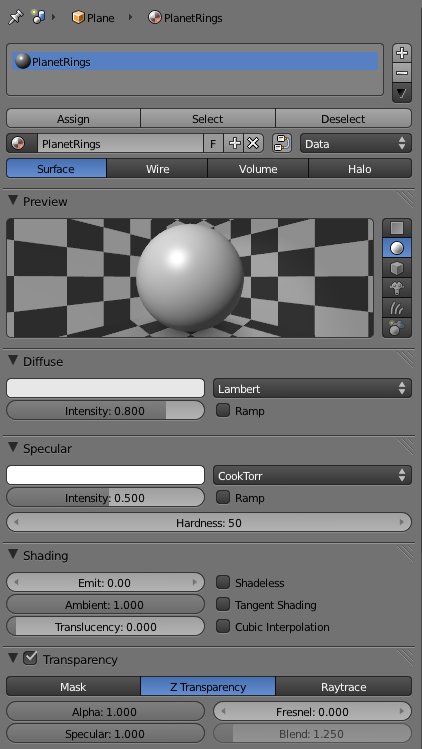
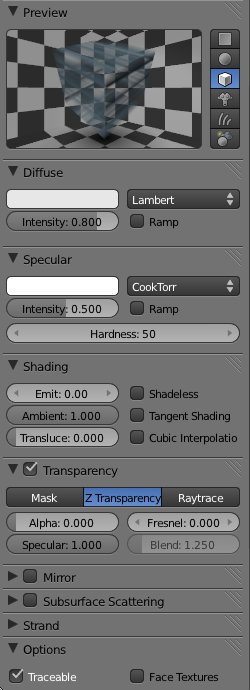
Create a new material for the ring. Because you will be using some transparency make sure the Transparency box is ticked. The other settings such as specular settings are things you will need to play around with to suit the scene.
In the texture tab, create a new texture and set it to use an image. Load the image file for your colour map and set the mapping coordinates to UV. It will only be influencing the Colour, so the default settings will be fine.
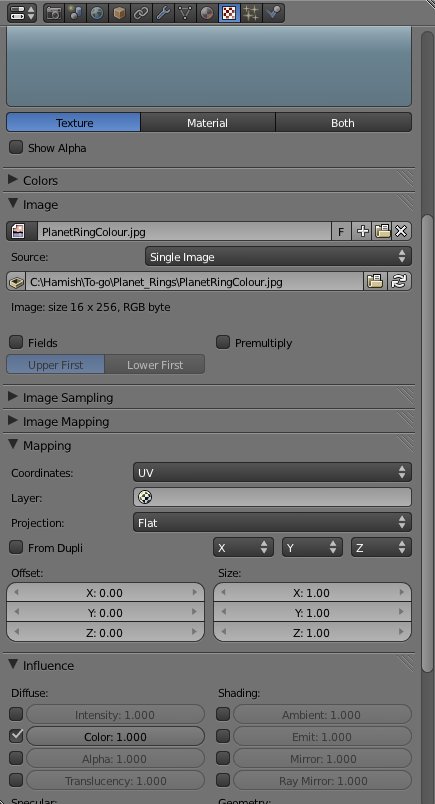
Now create a new texture in the texture tab. This will be the Transparency channel. As before, set it to be an image file and load your Transparency Map. Set Mapping coordinates to UV. This time the influence is on the Alpha, so tick that box and untick the Colour box.

Finally, the texture is ready to go. Under the Transparency heading of the Materials Tab, set the Alpha to 0.
Applying the Texture
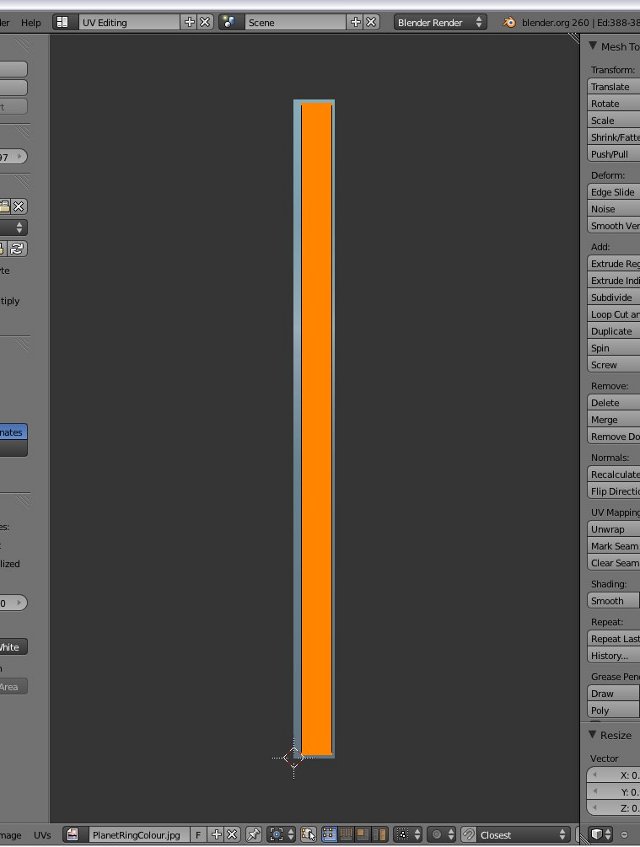
The texture is applied to the rectangle in the usual way using the UV Editing screen. First select your rectangle, tab to the edit mode. Select all of the rectangle vertices and hit “U” to unwrap the rectangle. From the top view either choose Project from view or Project from view (bounds).
Go to the UV Editing windows using the drop down at the top of the screen and fit the rectangle into the ring colour map (if it is not already nicely fitted.)
Ok, so that bit is done. Now we can continue and turn this rectangle into a ring.
Building the Ring in Blender - 2nd Part
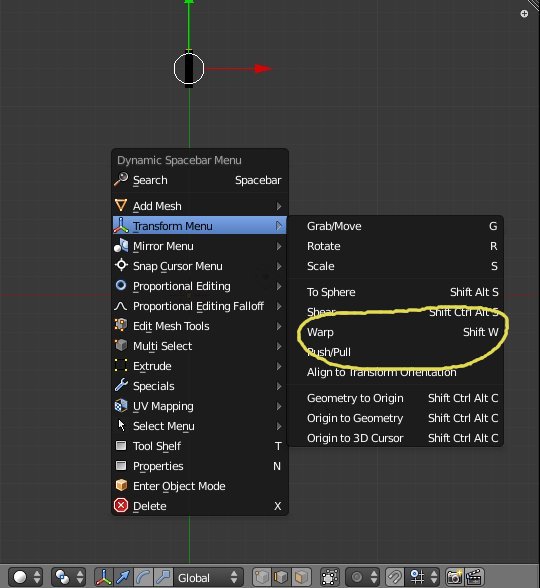
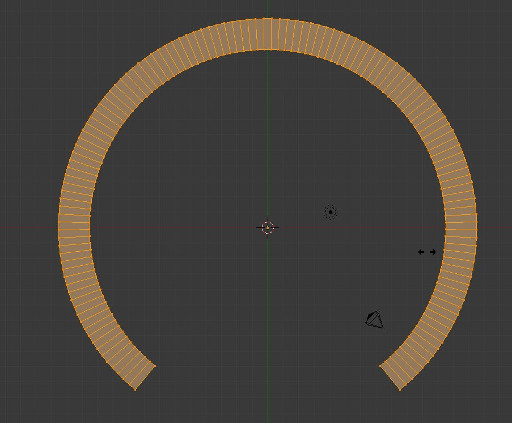
Still in the Edit Mode, select all of your subdivided rectangle, and either hit Shift+W or select from the space bar menu the transform submenu followed by the Warp tool. This will spread your shape around the cursor. You will need to have zoomed out to see the whole ring. By dragging the mouse you will extend the shape around the curve. Judge it so that the two ends are just touching. Either use remove duplicates or select each pair of overlapping vertices and use the merge at centre vertex edit option to join the two ends.
Getting it to look right
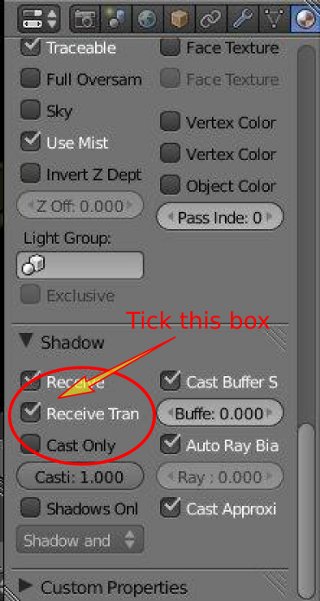
If you have a very light ring system that is mostly transparent, then you will get some strange effects if you have the ring shadow falling on the planet. Namely the ring will cast a solid shadow which looks kinda odd. In order to make it look right, you will need to set the planet material to accept transparent shadows.
You will find this under the materials tab. Scroll down until you see the heading Shadow and tick the box called Receive Transparent Shadows. Now your render will look correct.
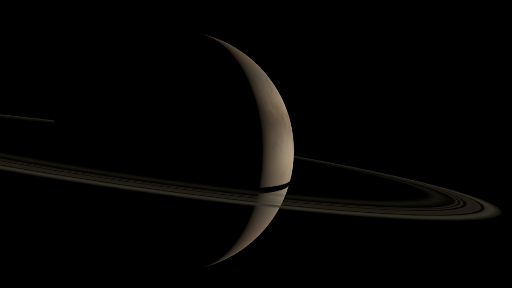
Solid ring shadow cast onto the planet.
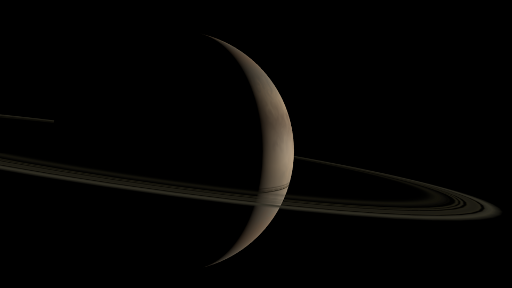
Ring shadow on planet with transparent shadows enabled.
Some Planet Surface Textures to Download
If you are looking for some planet surface textures to use in your own scenes, you can find a bunch of them in the Texture Galleries page.