Robotics 2a - Introduction to the Lego Mindstorm EV3s
To go back to the Overview page click here.
To go to The Next Session - Robotics2b - Mindstorm EV3 Body Building
To download this as a .pdf:

What we’re going to do in the session.
- Introduce you to the Lego Mindstorm Kits
- The Design Process
- Design Our Robot’s Chassis
What Have We Got to Work With?
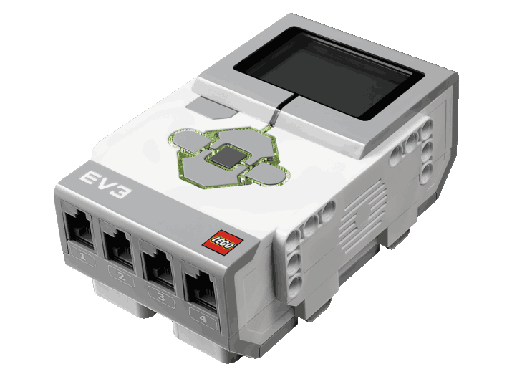
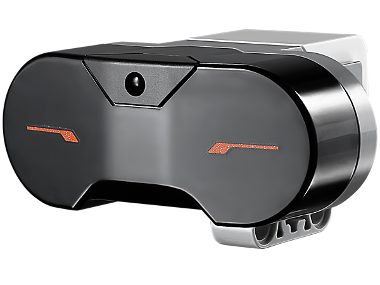
Programmable Brick
The EV3 Brick is the brain and power station for your robot.
- 4 Input ports: 1, 2, 3, 4 (to connect sensors)
- 4 Output ports: A, B, C, D (to connect motors)
- 1 Mini USB port (to connect it to the computer for programming)
- USB host port
- Micro SD Card port (to increase on-board memory)
- Built-in speaker
- LED lights
- Battery pack
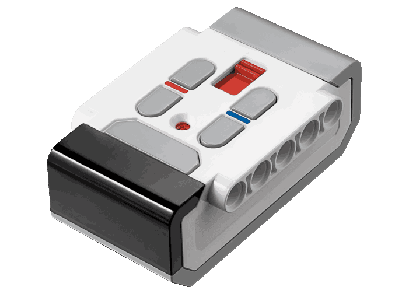
Infrared Remote / Beacon
The Infrared Remote / Beacon can be used to control the robot from a distance, but it can also be mounted on the robot to act as a beacon. If set up to act as a beacon, other robots can be programmed to detect it and respond to it.
Sensors
Color and Light sensor
Recognizes seven different colours and measures light intensity.
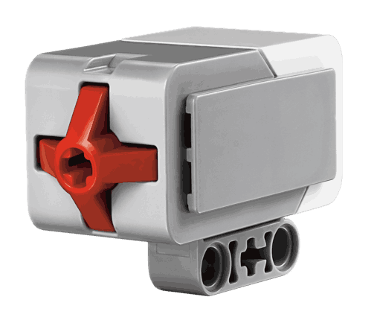
Touch Sensor
Makes your robot respond to touch, recognizes three conditions: touched, bumped and released.
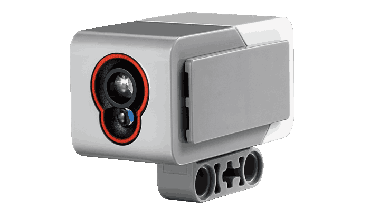
InfraRed Proximity Sensor
Detects Objects around the Robot and Also Recognises the InfraRed Beacons.
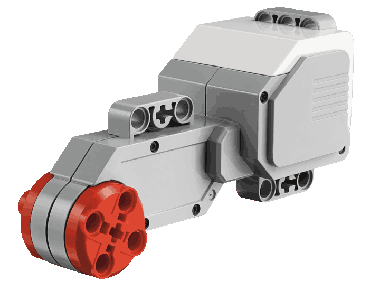
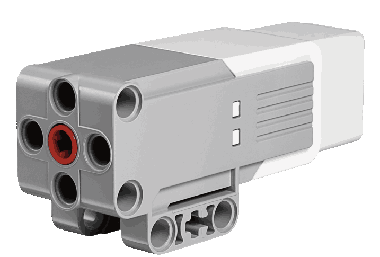
Actuators
2 x Large Motors
Lets you program your robot for precise movements and speeds.
Medium Motor
While not as powerful as the large motors the medium motor is quicker but still just as precise.
Chassis Design Considerations
The Lego Mindstorms kits offer us the chance to build chassis or bodies for our robots which can fulfil particular tasks. With this opportunity, we need to think carefully about what our robot needs to do and how we build something suitable.
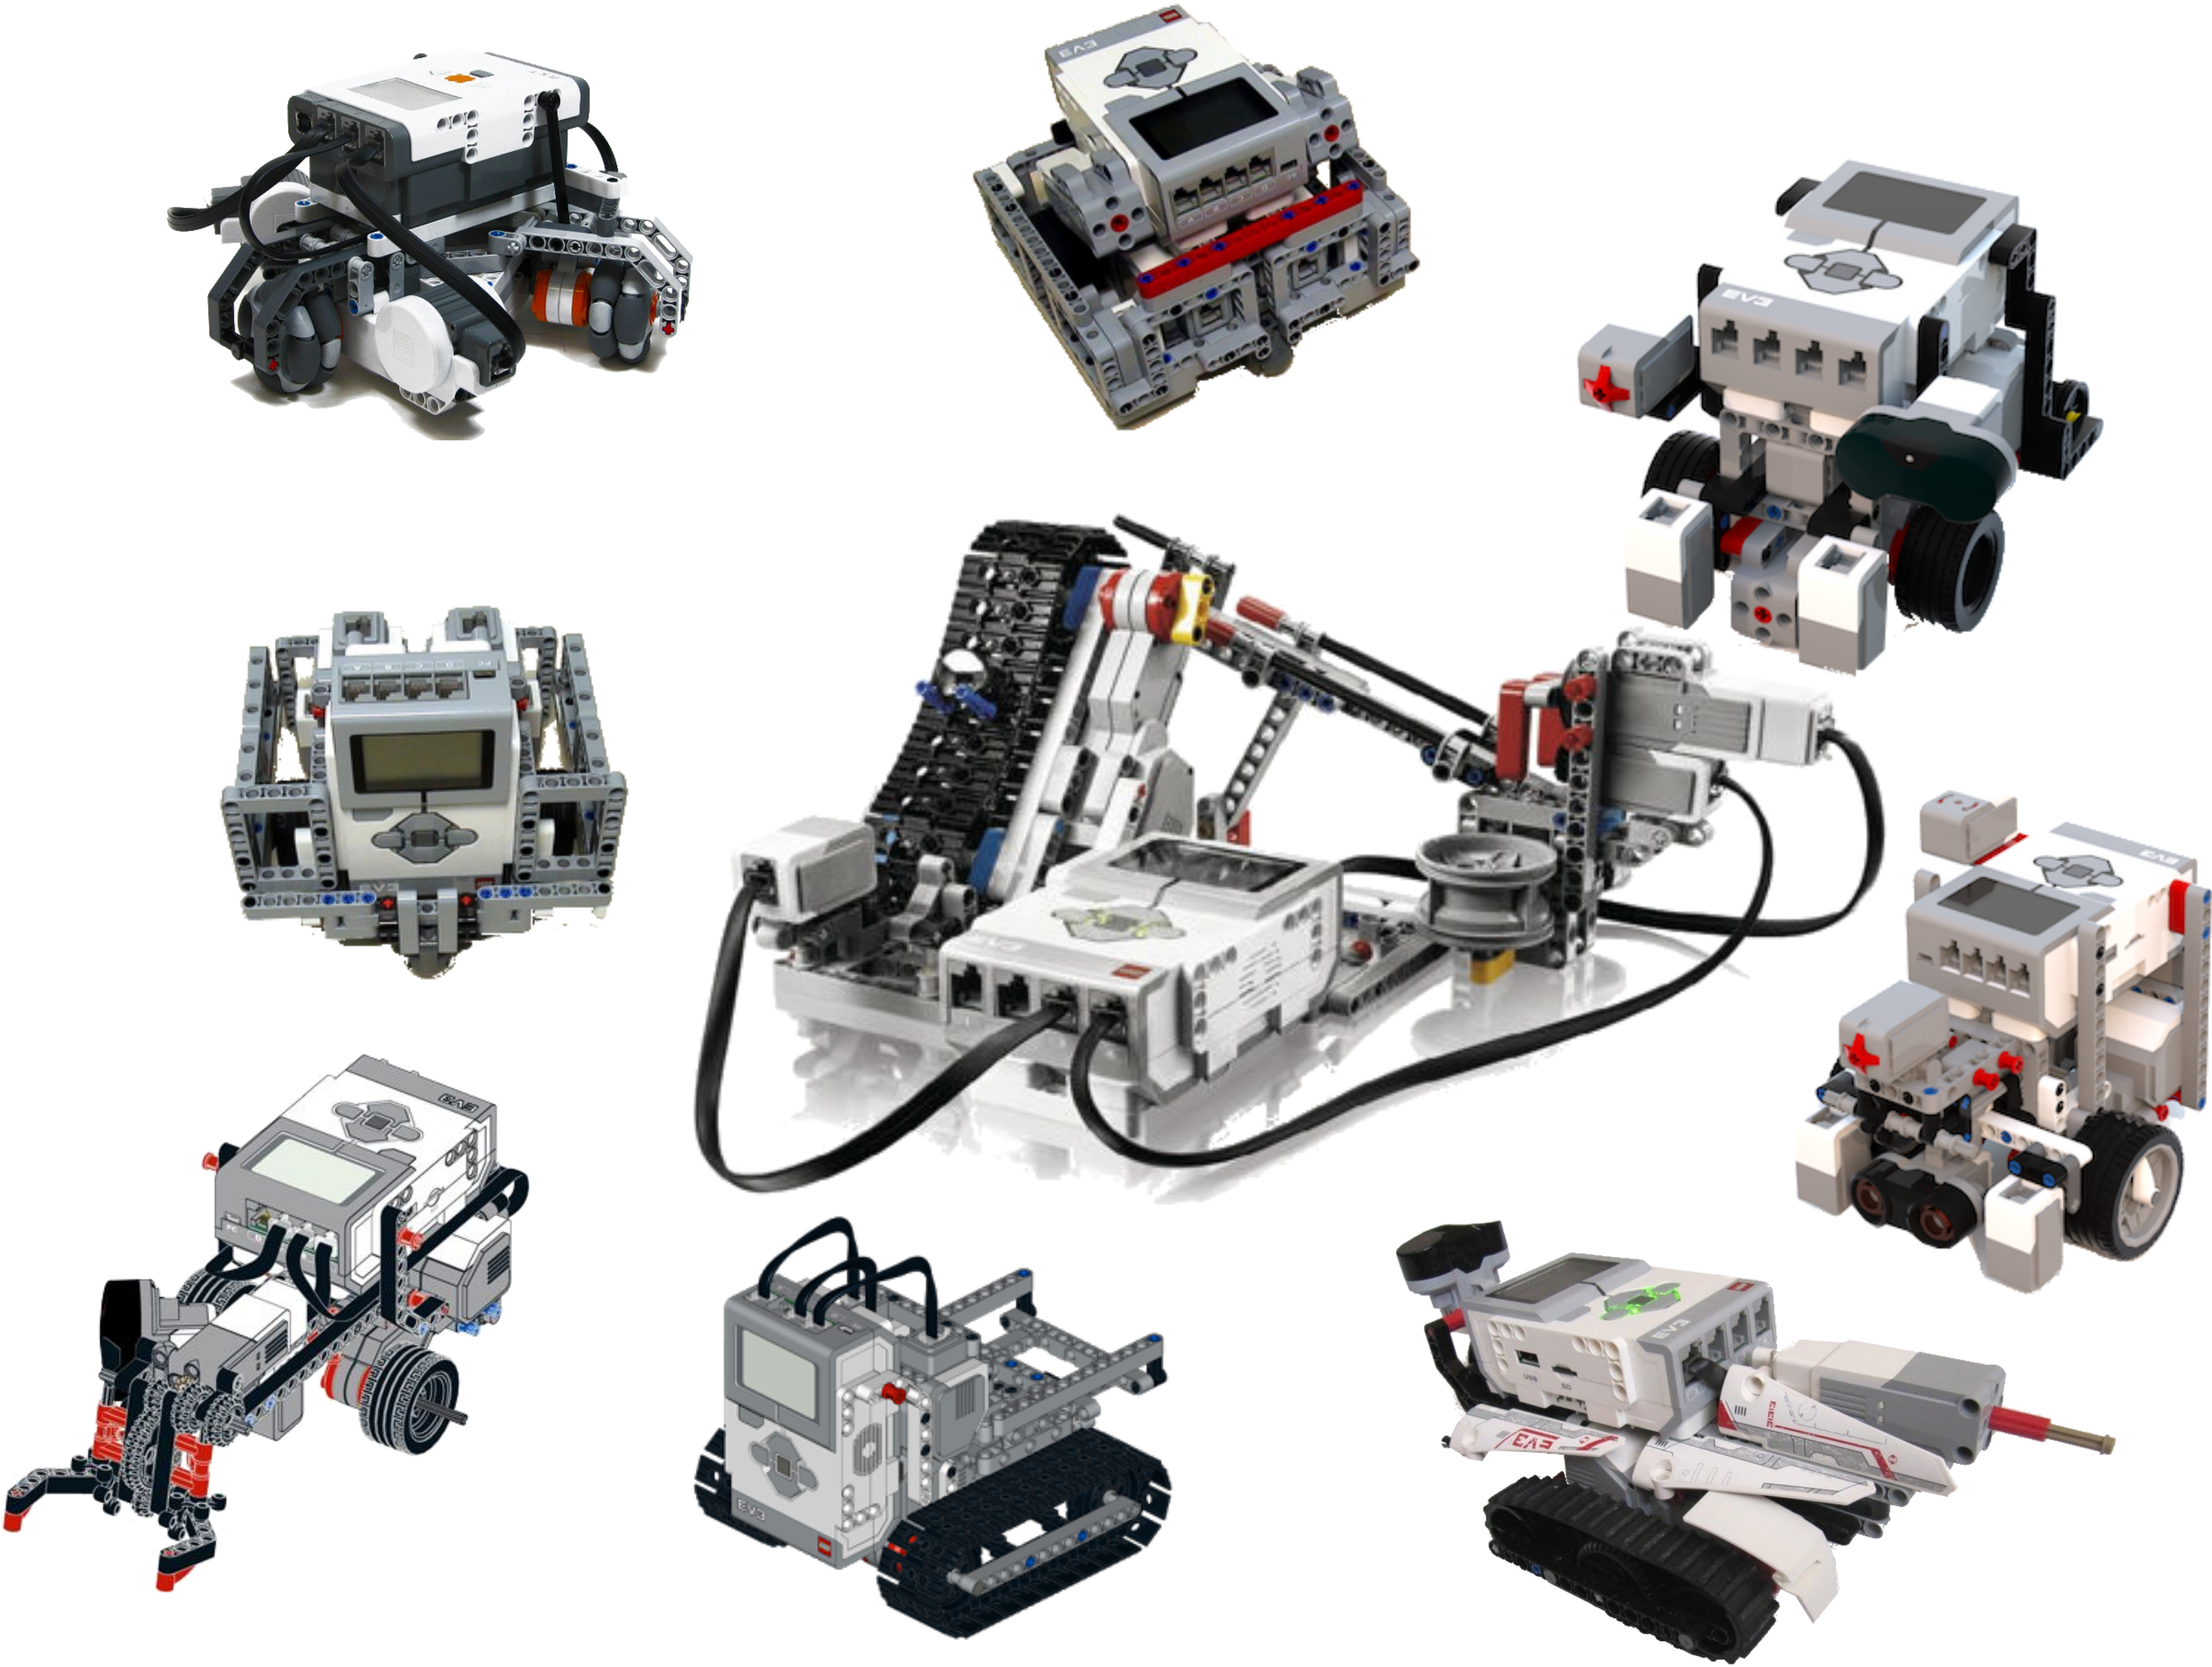
It is very important to build a good chassis for your robot. You can have the most amazingly well thought out programming in your robot, but if the chassis is poor then you will have a poor robot. If you have a well-built chassis and rubbishy programming, you will still have a good robot.
Great Programming + Rubbish Robot Chassis = Rubbish Robot
Rubbish Programming + Great Robot Chassis = Great Robot
So, for those of you keen on building things this is where your skills and experience are called for.
The Design Process
There is a process we can follow that will help us come up with a suitable body for our robot. This Design Process is used by engineers, some software developers, and anyone looking to develop something to fulfil a particular need or meet a challenge.
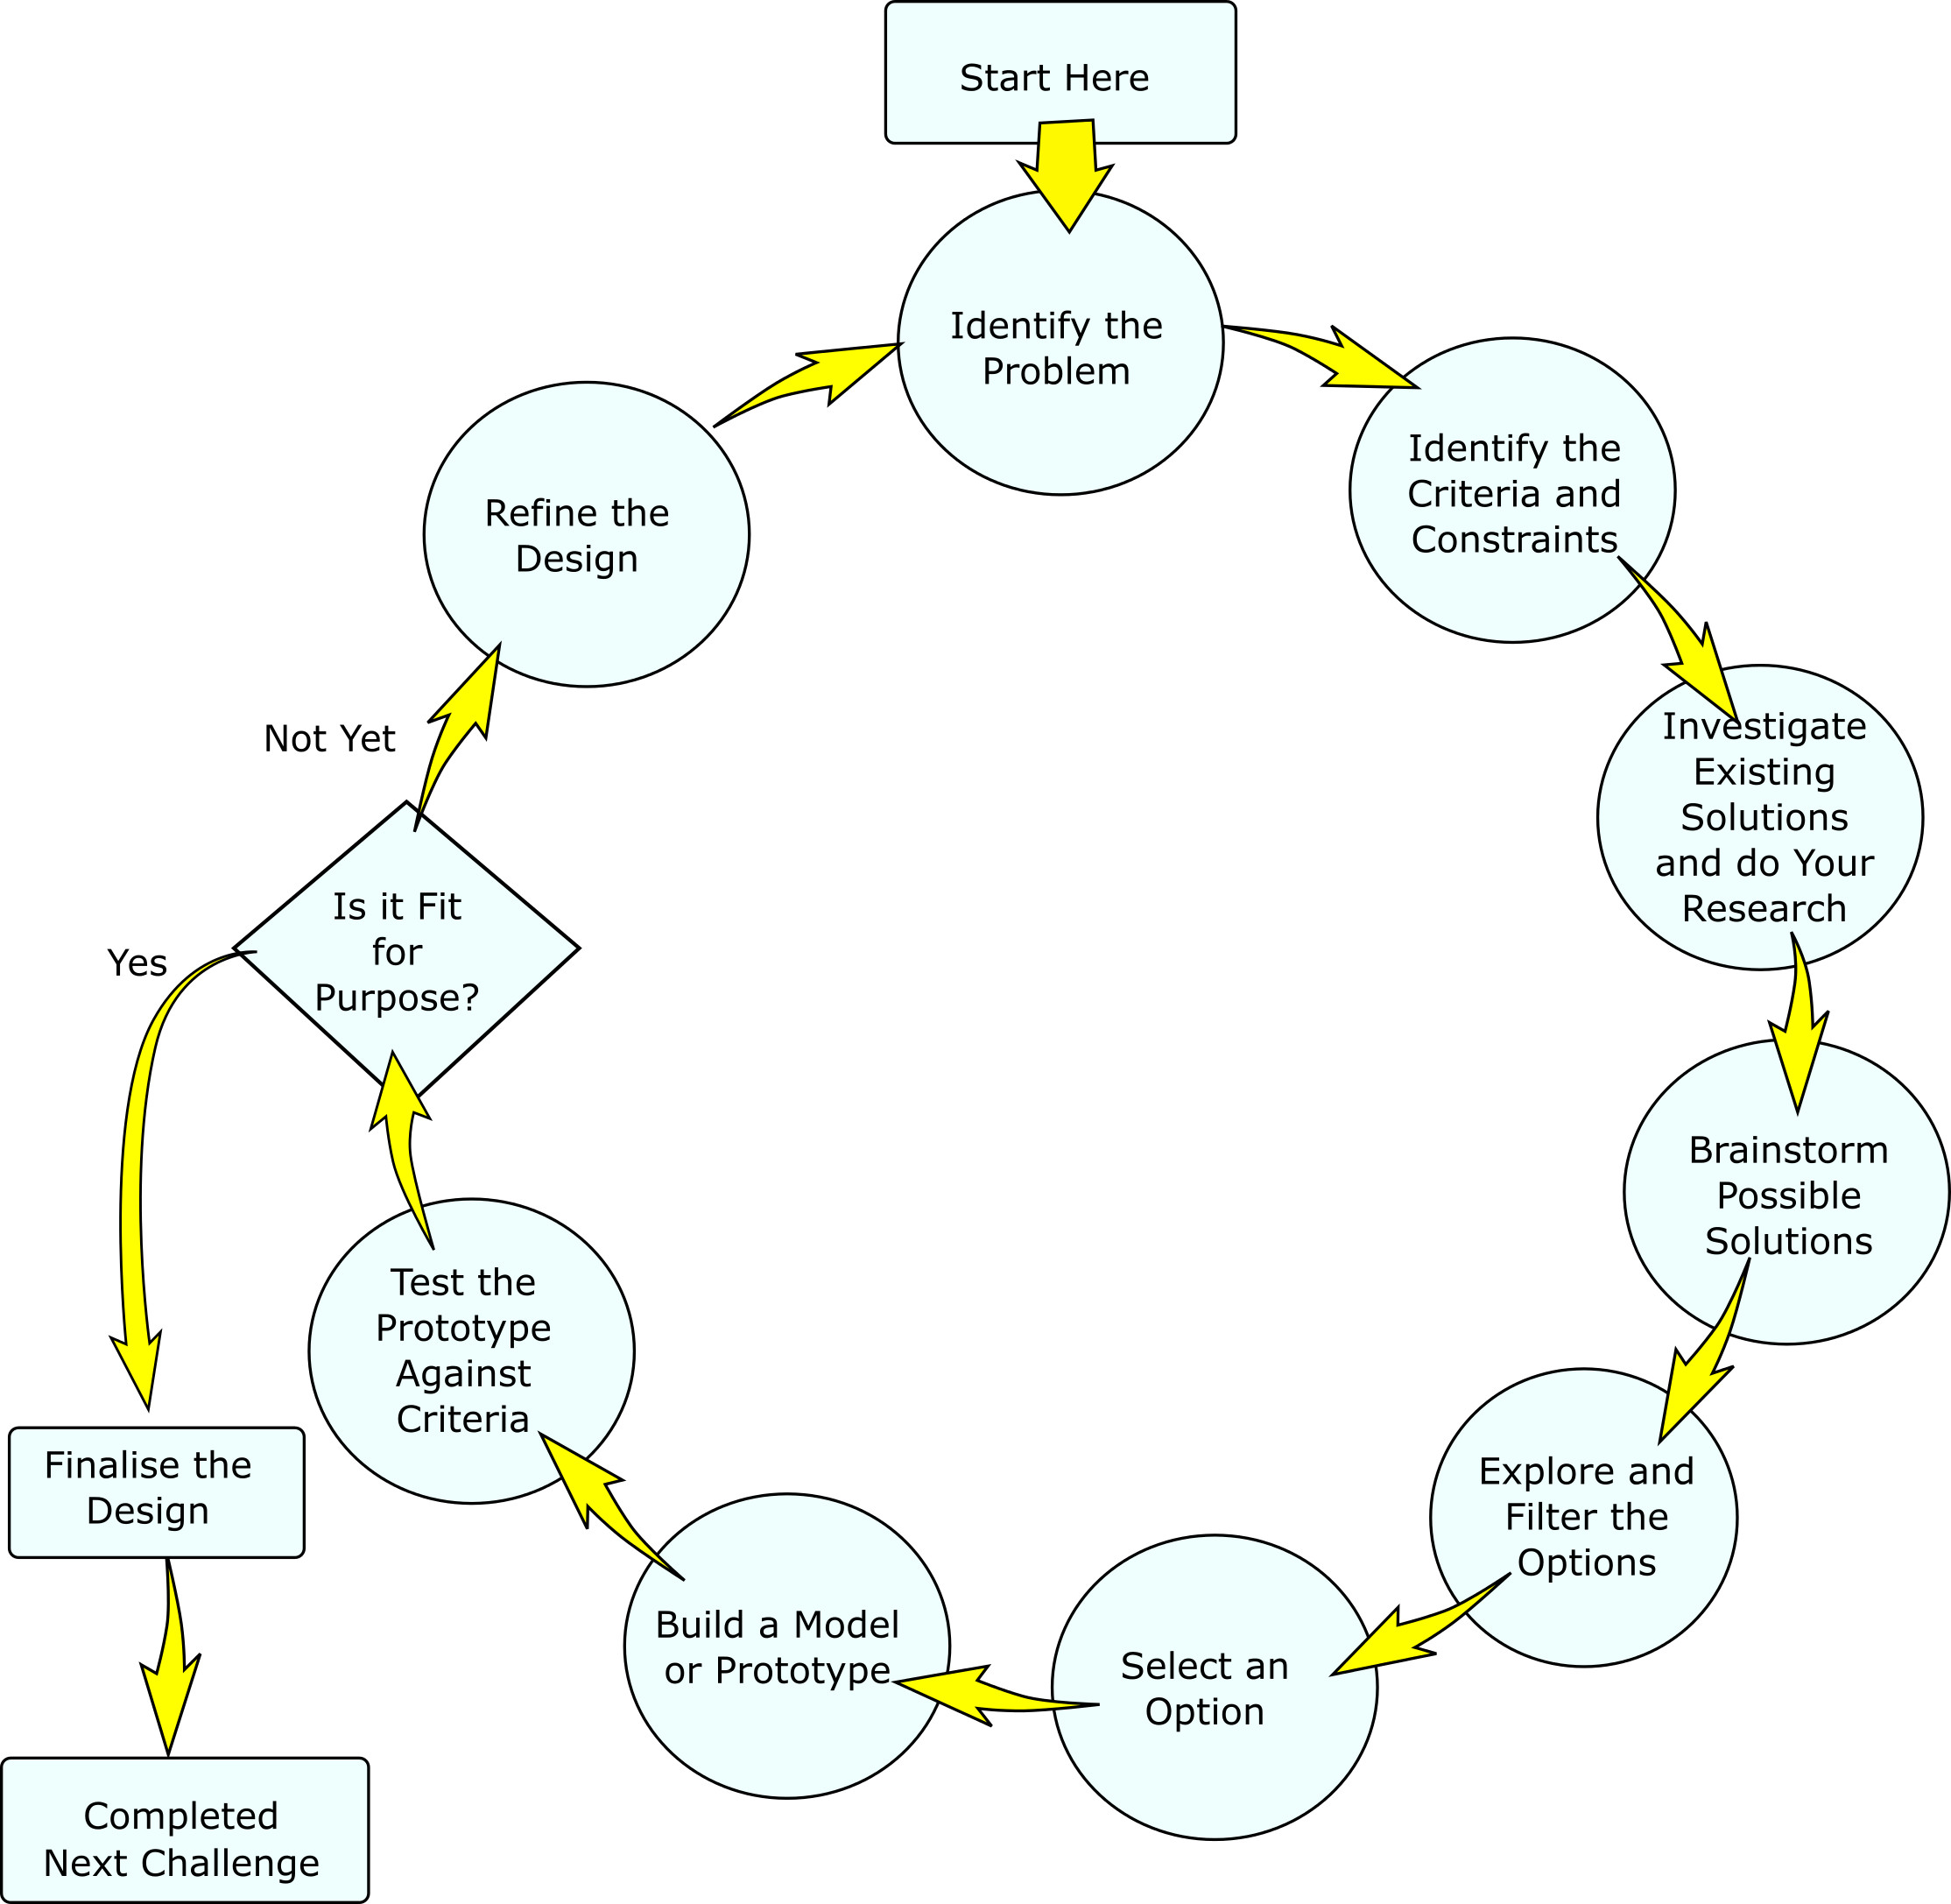
Click on the image for a higher resolution version.
The Design Process is iterative which means it goes around through the process several times with the output (your robot’s body design), getting better and better each time. Here is a diagram of the Design Process.
Eventually the process will yield a solution that is acceptable and the executive decision will be made to halt the design process and move onto the next thing. It is possible that the whole process may start again once the solution is out there in the world being used. Users might have some feedback or identify new problems that will mean the process does another round or two to improve the design solution even more.
Creativity and observation are key skills in this process.
Let us use this process to develop a design for our robot’s chassis?
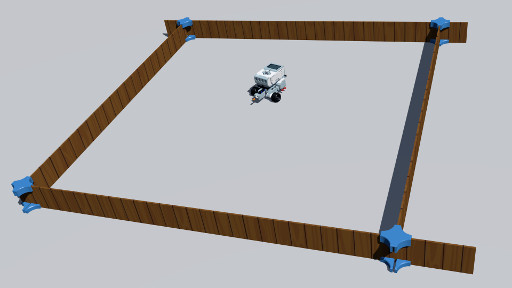
The Challenge
We’re going to trap our robots in a square(ish) fenced off area. We want the robot to tag each wall once.
Identify the Problem
Have a think about this challenge and let’s see what it is we’re trying to solve. As a team discuss the challenge and work out what the robot is supposed to do. Break the problem down to simple blocks and be sure to include things that may have an effect on the robot’s ability to perform the task. For instance: Does the robot need to solve this problem for all types of ground?

Identify the Criteria and Constraints
With a simple problem like this the criteria for success is fairly easy to figure out. What is it that the robot will need to achieve in order for us to say “Yep, that’s achieved the goal?”
What are some of the constraints and limitations for this robot? What shouldn’t it do? What could impede the ability of the robot to do its job?
Investigate Existing Solutions and Do Some Research
Normally you would dig into some books, talk to your friends, and look on the internet to see if anyone else has solved this problem before. You may see this as cheating. It is not. This is a smart way of getting to a solution very fast and very efficiently. It is also possible that it may yield ideas that you would never have thought of before. Think about it like this:
Nothing is designed from nothing. There is always something else that preceded it that the new design builds on.
This is called Design Evolution, and with the power of the internet, is why technology has moved so fast in the last few decades.
In this case the problem is not big enough for us to bother looking up previous solutions or doing any research. So we will just move straight onto the fun part.
Brainstorming
Brainstorming is where you let your imagination and creativity run. Engineering and technical development are creative activities. The rule of good brainstorming is to get your ideas out and not critique them. So even if they probably won’t work, put the idea out, they might help someone else come up with a similar idea that will work.
So, as a group, think about all the ways we could meet this challenge. At this stage don’t worry too much about the details of the chassis design – we’ll look at that in the next session. While brainstorming, be prepared to ask some fundamental questions like, “why do we need to solve this with a robot?”
Explore and Filter the Options
Now that we have a list of ideas, we can start eliminating some of them by looking at our list of constraints and criteria. Think about what is possible, what is efficient, what could impact whether a design is successful at achieving the task, and what you can realistically build with the equipment and skills to hand. Also consider practical details like;
- What sort of terrain is the robot having to navigate?
- What have we got in the box to build with?
Be prepared to adapt an idea a little so that it better meets the needs of the project. Discuss the ideas in groups and compare the different options against each other.
A very useful filter to have in your back pocket is the “KISS” principle.

Good design is always simple. Simple is efficient. Simple is easy to fix and easy to understand. Simple also has less things on it to go wrong.
Select an Option
Finally, based on our careful consideration we may have two or three design options that will do the job. Now we select one of these to build as a prototype.
Describe your selected option here. We’ll carry this over into the next session.
Next Time:
Building our amazing chassis. As groups we’ll build the scheme you have come up with and go through the Design Process iterations a couple of times with some test code to try it out.


This document “Robotics 2a - Introduction to the Lego Mindstorm EV3s” by Hamish Trolove is provided under a creative commons license - Attribution, Share Alike.