Cutting and Intersecting Vector Layers in QGIS

Recently there have been some changes to the regulations governing the use of RPAS (Remotely Piloted Aeronautical Systems) in New Zealand. This is a response to the rapid rise of ownership and use of model aircraft of one sort or another, and the irresponsible use of them by certain elements. I have set myself the challenge of teaching myself GIS software and as a good useful project set myself the task of making airspace maps of the region that interpret the CAA (Civil Air Authority) rules and how they apply to RPAS pilots and the geography. Hopefully I will be able to produce a printable series of maps that people can refer to to see what, if any, permissions they need to fly there, and how high they can fly.
The software I am using is the open source QGIS 2.2 package (formerly know known as QuantumGIS). You can find it here; http://qgis.org.

The Task
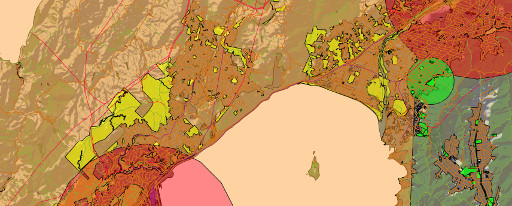
What I envisage is a series of coloured shapes that represent the different level of permission an RPAS owner will need to obtain, how high they can fly, and whether they need to advise the local control tower. The image above is a draft of the type of map I am trying to achieve. To get the various zones I need to break up the New Zealand airspace maps in a way that are meaningful for the RPAS pilot.
Part of the regulations governing where an RPAS pilot can fly is whether they have permission of fly over an area. The local and regional councils of New Zealand have been working hard to develop policies that provide guidance on where RPAS can be used over the public land they are responsible for. For the most part they have been very wise and pragmatic in their approaches and I am pleased to see some good policies have come out. Most of the Councils have GIS layers available for their parks and reserves, and with their policies on RPAS in hand I can see where a particular council has granted permission to fly RPAS and where they are not allowed.
With the GIS layers of the different Airspaces, and the Council parks I can create some new layers that capture the airspace information and whether permission has been granted to fly over it. So I will be using one layer to chop up another layer using the good old boolean operations like Union, Intersection, and Difference.
The First Thing
The layers must be using the same Coordinate Reference System (CRS). If they’re not you will need to do a SaveAs on the layers to create a new copy of the layer with a new CRS which you can select at the time you do the SaveAs.
Our Layers
To illustrate this, I am going to use two vector layers.
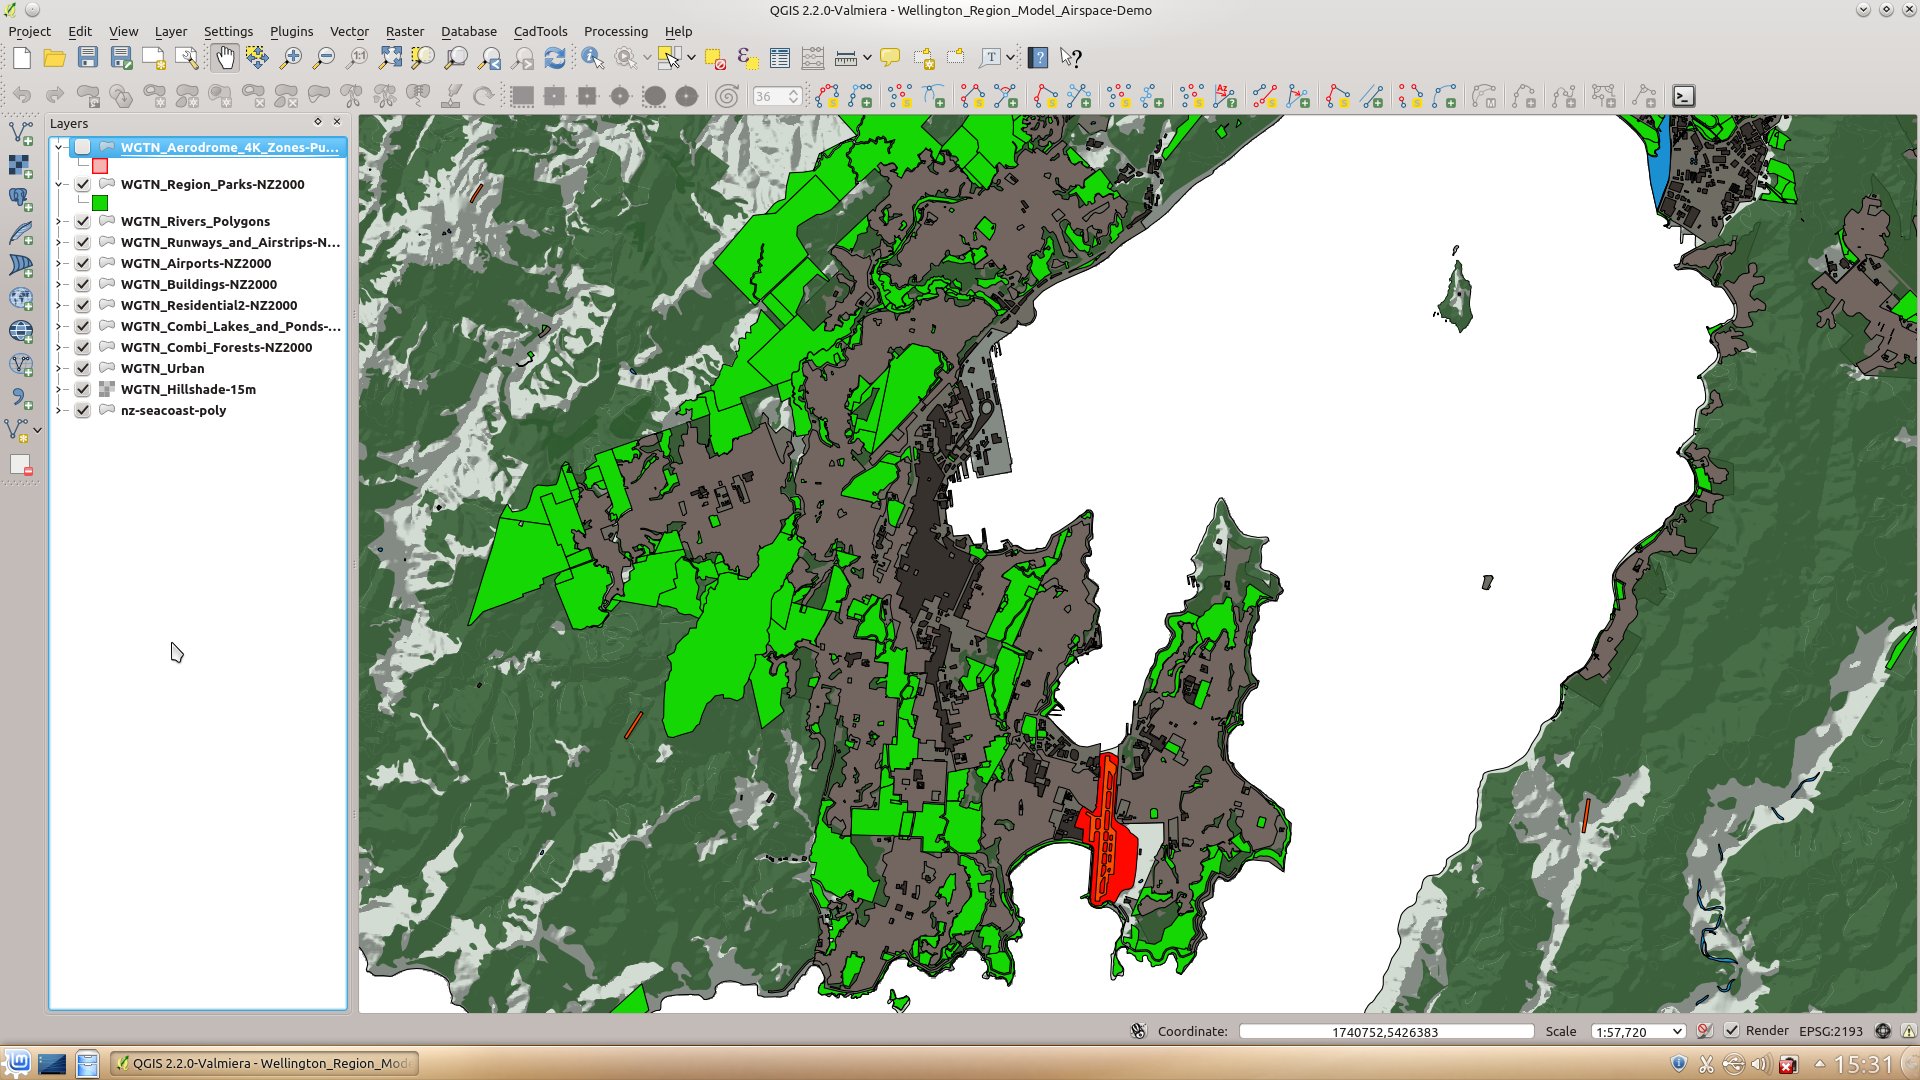
Airspace Layer
Click on the image for a larger view
The airspace layer that has been calculated using a 4km buffer operation around the Wellington airport property boundary, and around each of the listed Helipads (one on the Hospital and the other on Queen’s Wharf near the CBD). Yep, it covers most of Wellington.
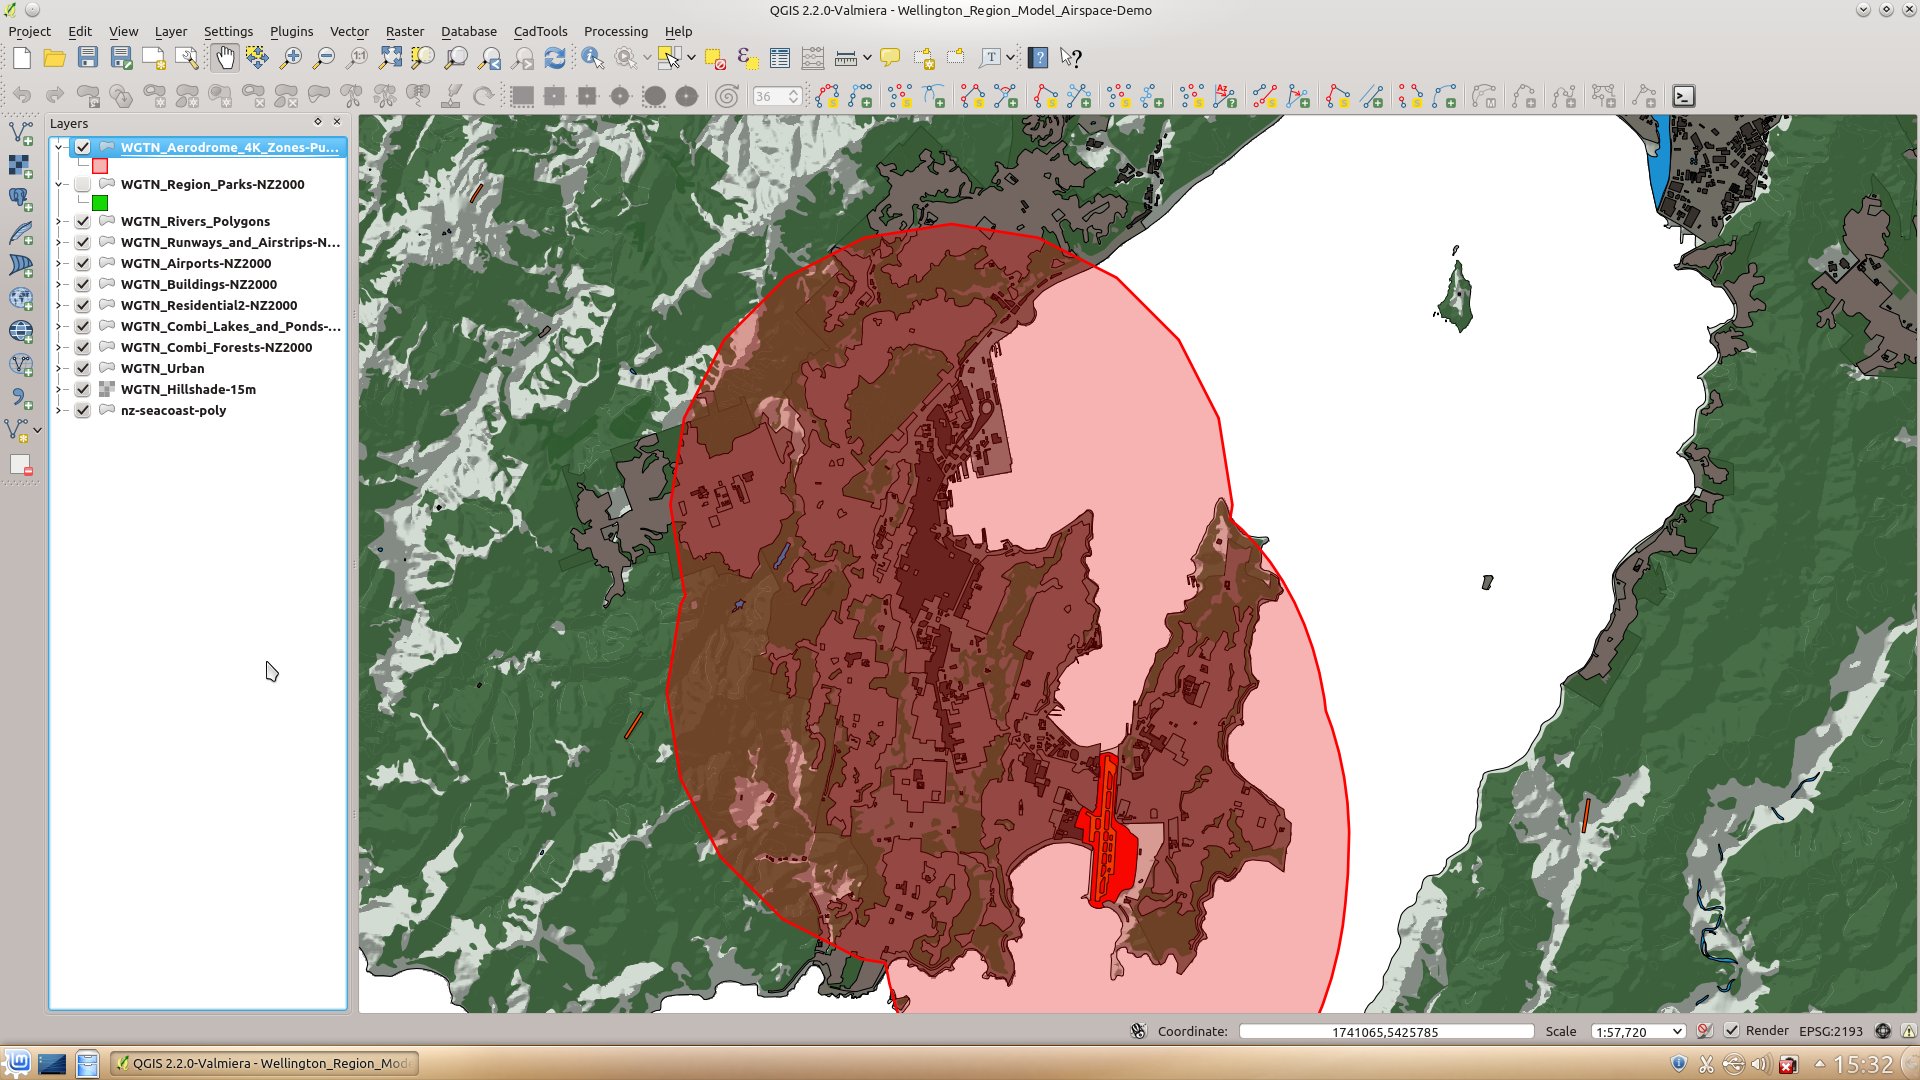
Council Parks and Reserves
Click on the image for a larger view
This is the local council’s parks and reserves. I have not removed those where RPAS have been specifically banned because this is just an illustration…right?
Both Layers
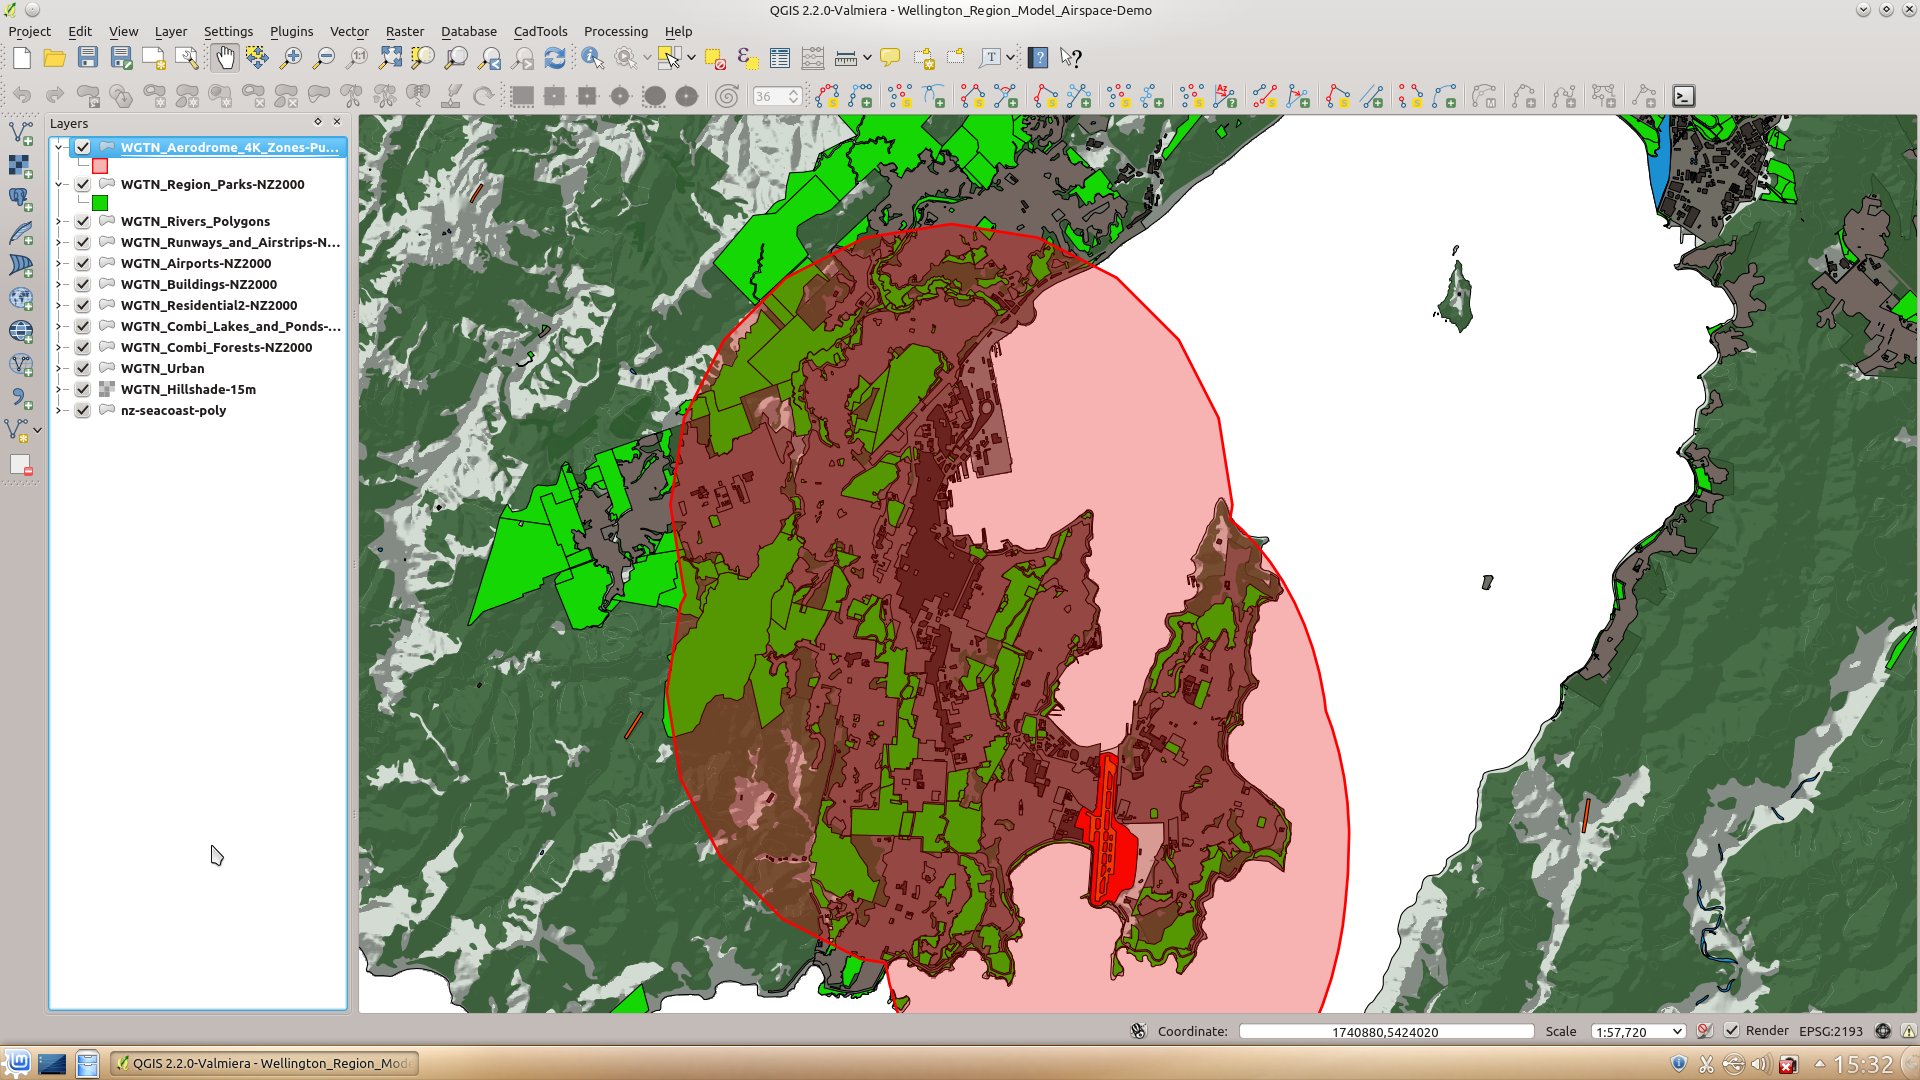
Click on the image for a larger view
For this exercise I want to only capture the parks and reserves that fall within the 4km zone, and capture the 4km zone where it does not cover a park or reserve where permission has been granted to fly an RPAS.
Trimming the 4km Airspace Zone
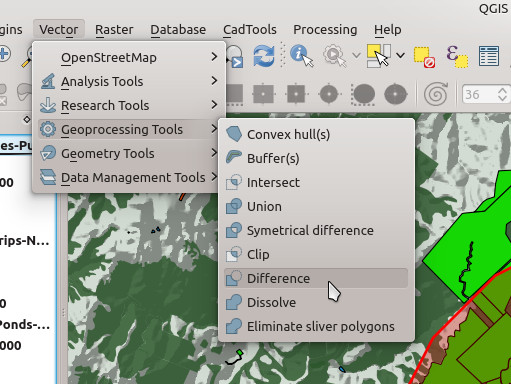
I want to create a shape that shows those areas within the 4km Airspace zone but the RPAS pilot would need to gain permission of the properties over which they intend to fly. Because the public parks have been designated as being OK to fly in, I need to cut those areas out of the 4km Airspace zone shape. This is just a boolean difference operation.
You can access this through the menu bar as shown below. Vector » Geoprocessing Tools » Difference.
This will pop up a new dialogue like the one shown below.
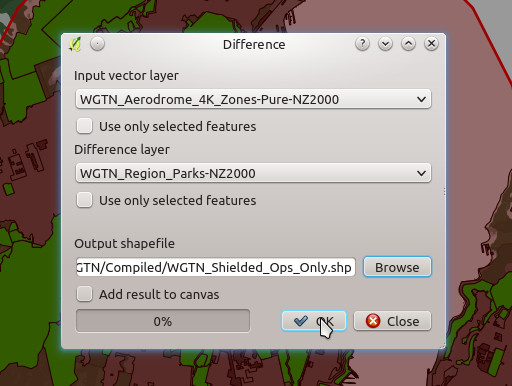
Use the drop down selectors to choose the layer you want to chop up and which layer you wish to use as the “cutter”. You will notice that there is a tick box under each selector to allow you to use only selected parts of a layer rather than the whole layer.
Choose a name and location for the new shapefile that will be produced by this operation.
There is a tick box to automatically add the new layer to the project map if you wish.
When you’re ready, hit the OK button.
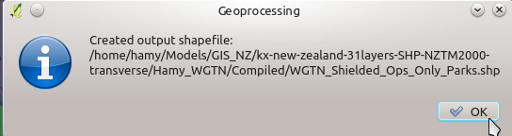
I have found the processing bar at the bottom of the dialogue to be somewhat misleading. It goes to 100% in an instant and then sits there apparently doing nothing. Don’t be deceived, it is working on the process and it can take some time – or at least it does on my old ex-work computer. Wait for the process to pop up the “file created” message before closing the dialogue.
Load the new layer, and admire the patchy shape you have created. In this example this new shape is where an RPAS pilot must obtain permission from the landholder’s to overfly, and must remain below the height of the surrounding buildings and trees. If they intend to fly up to 120m above ground level in this zone they need to get prior permission from the airtraffic control too. As I say there would be an additional slice out of this shape along the airport flight paths where RPAS cannot be used, but that would be another boolean operation on the shape we have just produced.
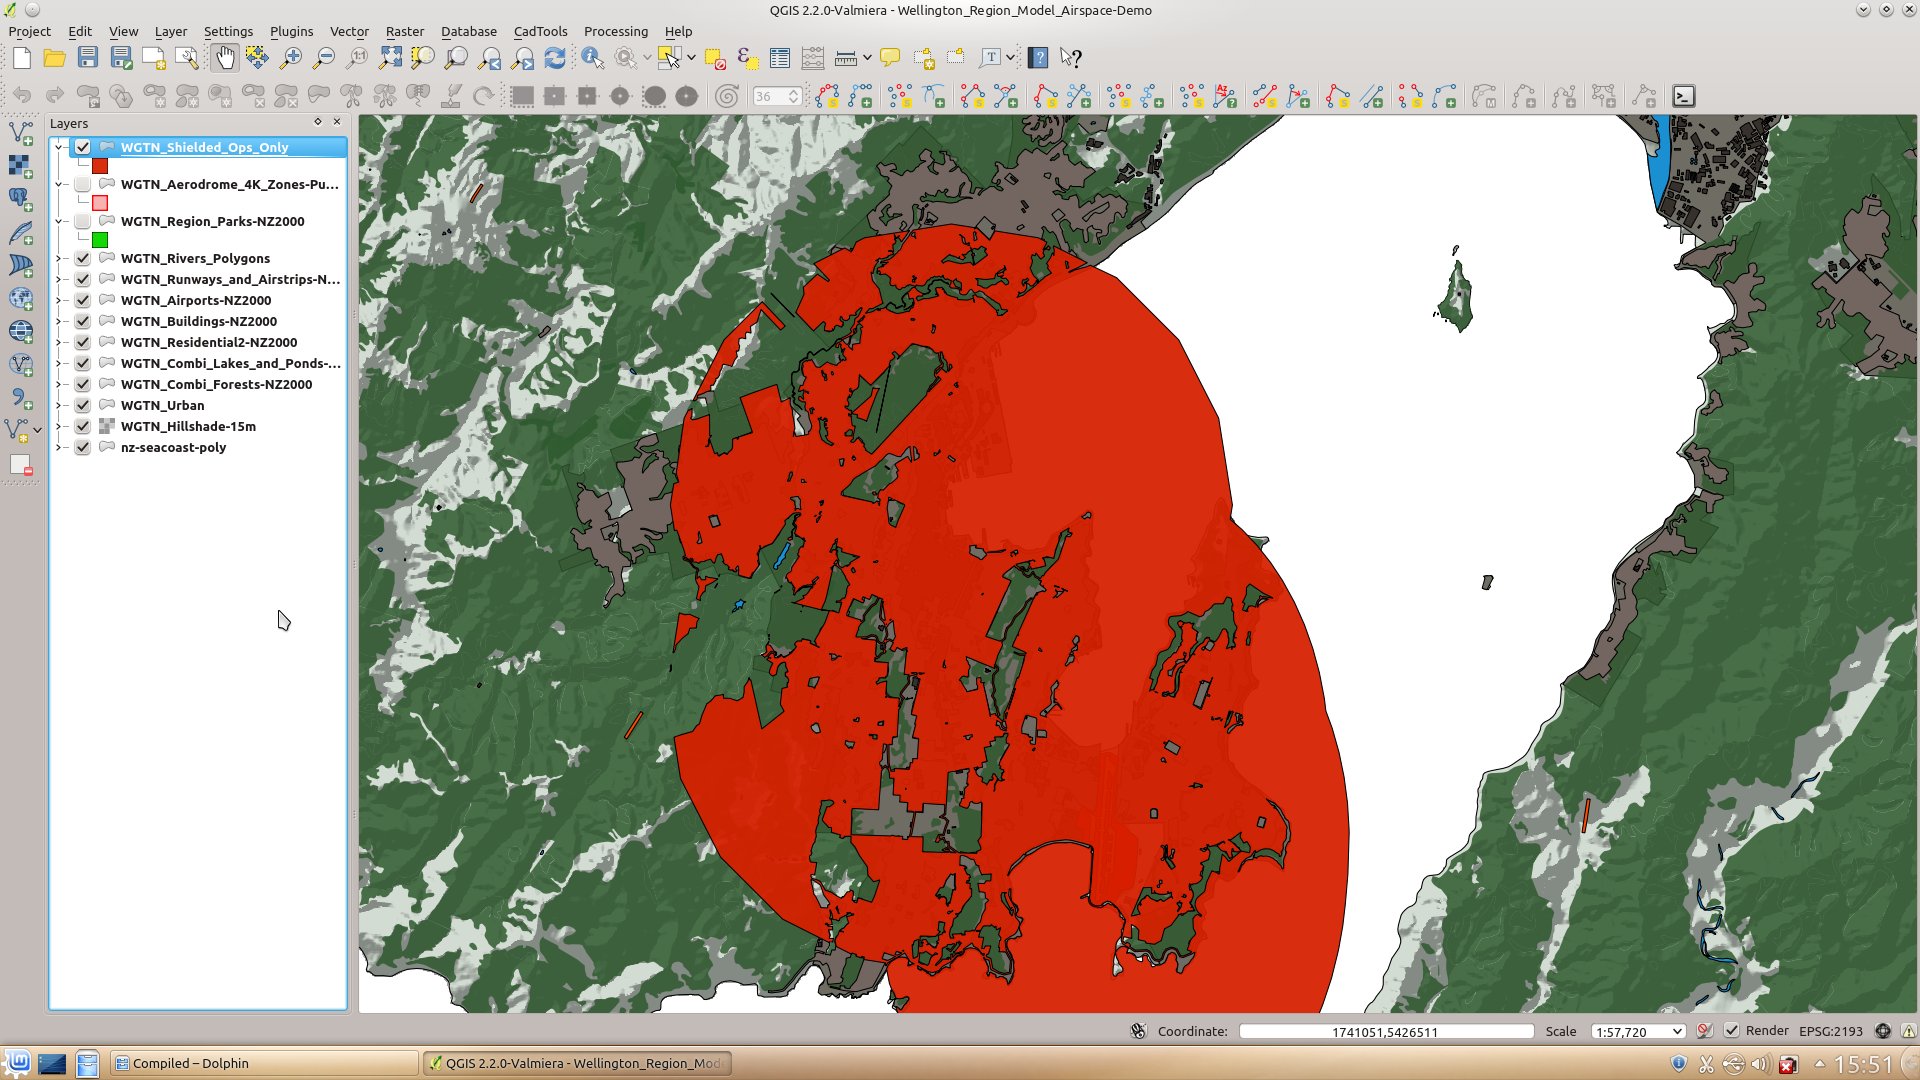
Click on the image for a larger view
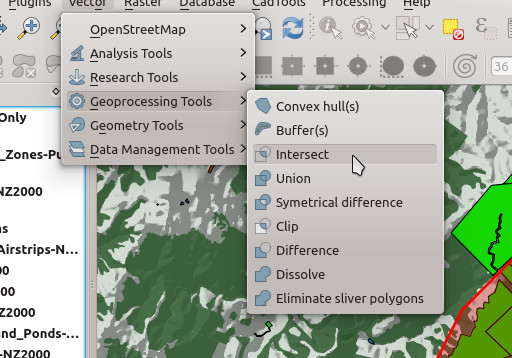
Trimming the Parks and Reserves Layer
The process is the same as for the 4km airspace zone except that we will use an intersect operation.
This will produce a new shape file that represents where permission has been granted to fly AND it is within the 4km Airspace.
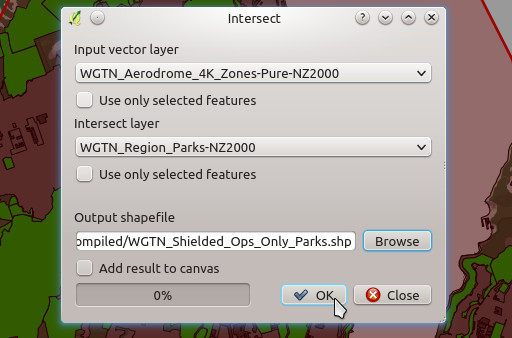
Hit OK and wait for the process to finish.
We now have a new layer which is the parks and reserves that are within 4km of the airport and the helipads.
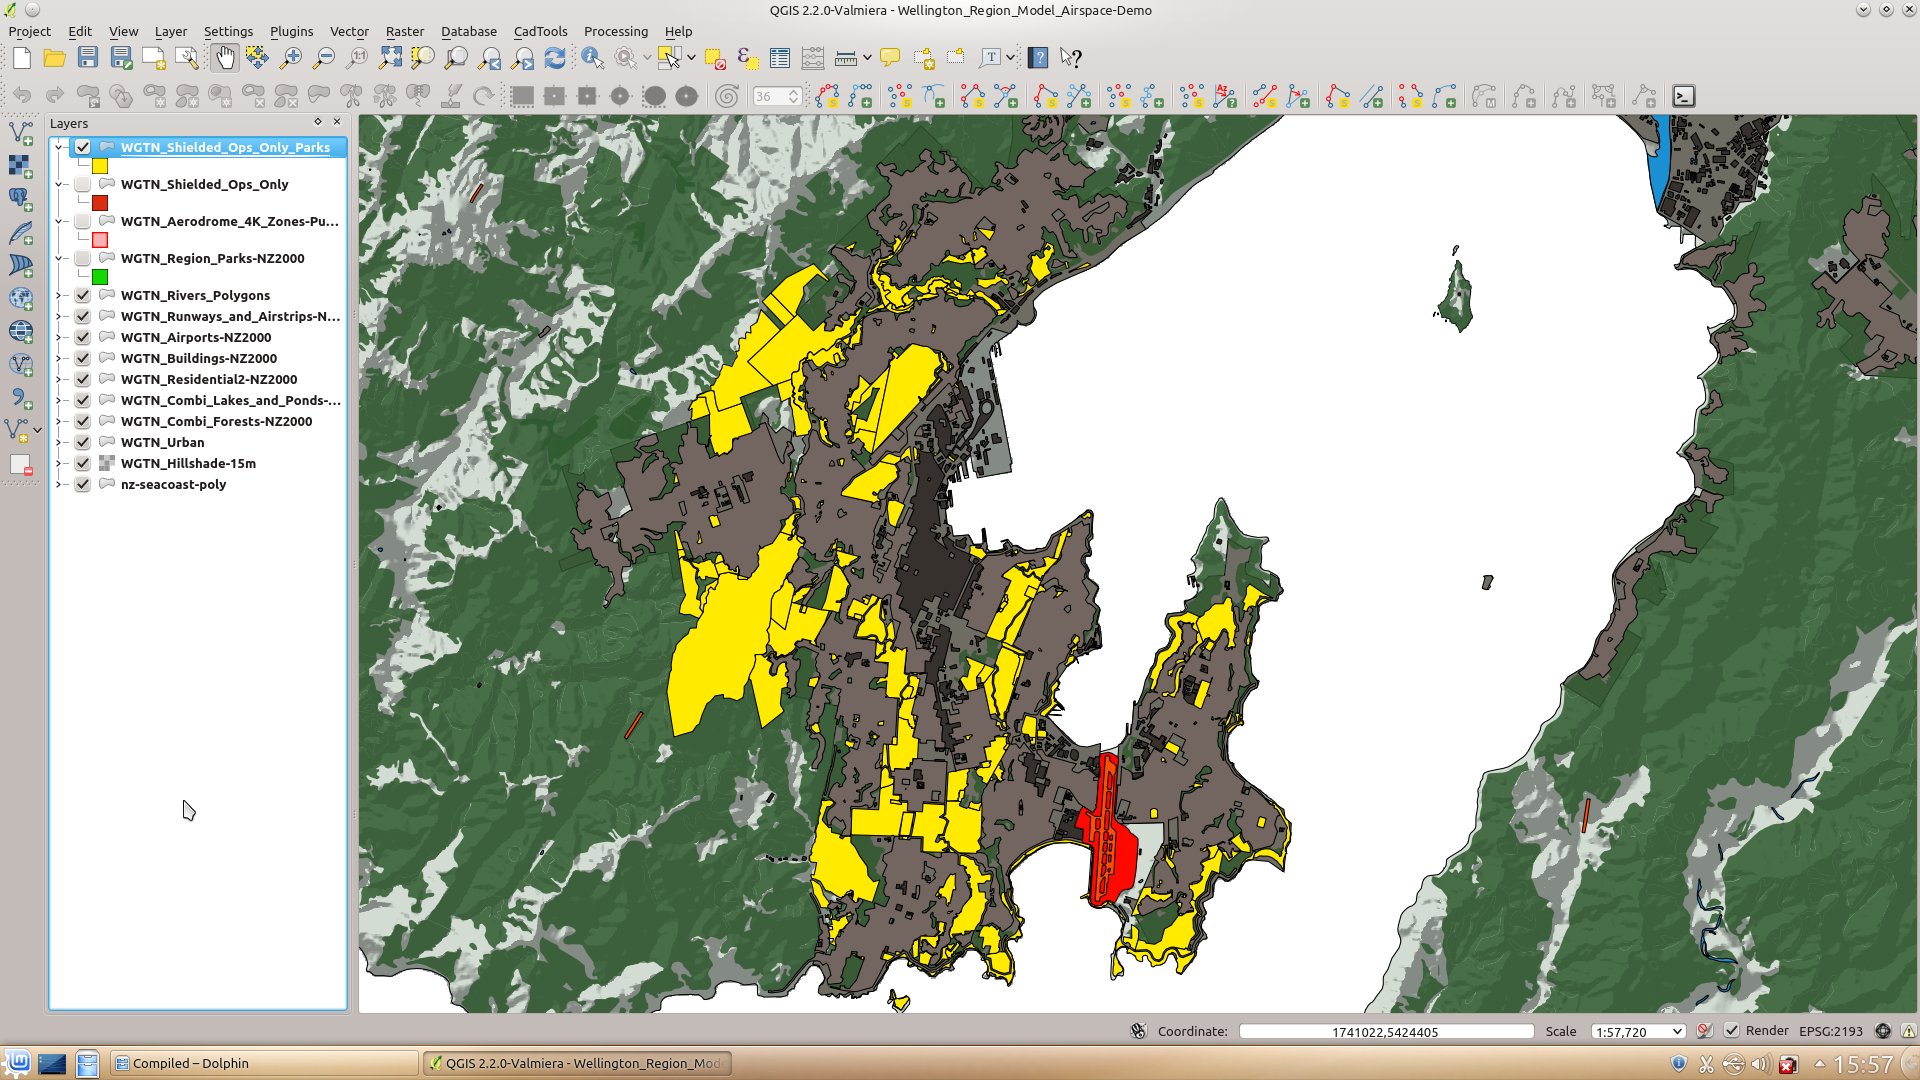
Click on the image for a larger view
It is worth noting that data is retained through the process and so in this example the data such as park names, who manages them, etc. is still available in the new layer that has been produced by the boolean operation. This is useful because it means that despite chopping a layer into tiny bits, I can still find out things about the features within the layer. In this example, I can still find the name of each park within the 4km zone by using the feature information tool.
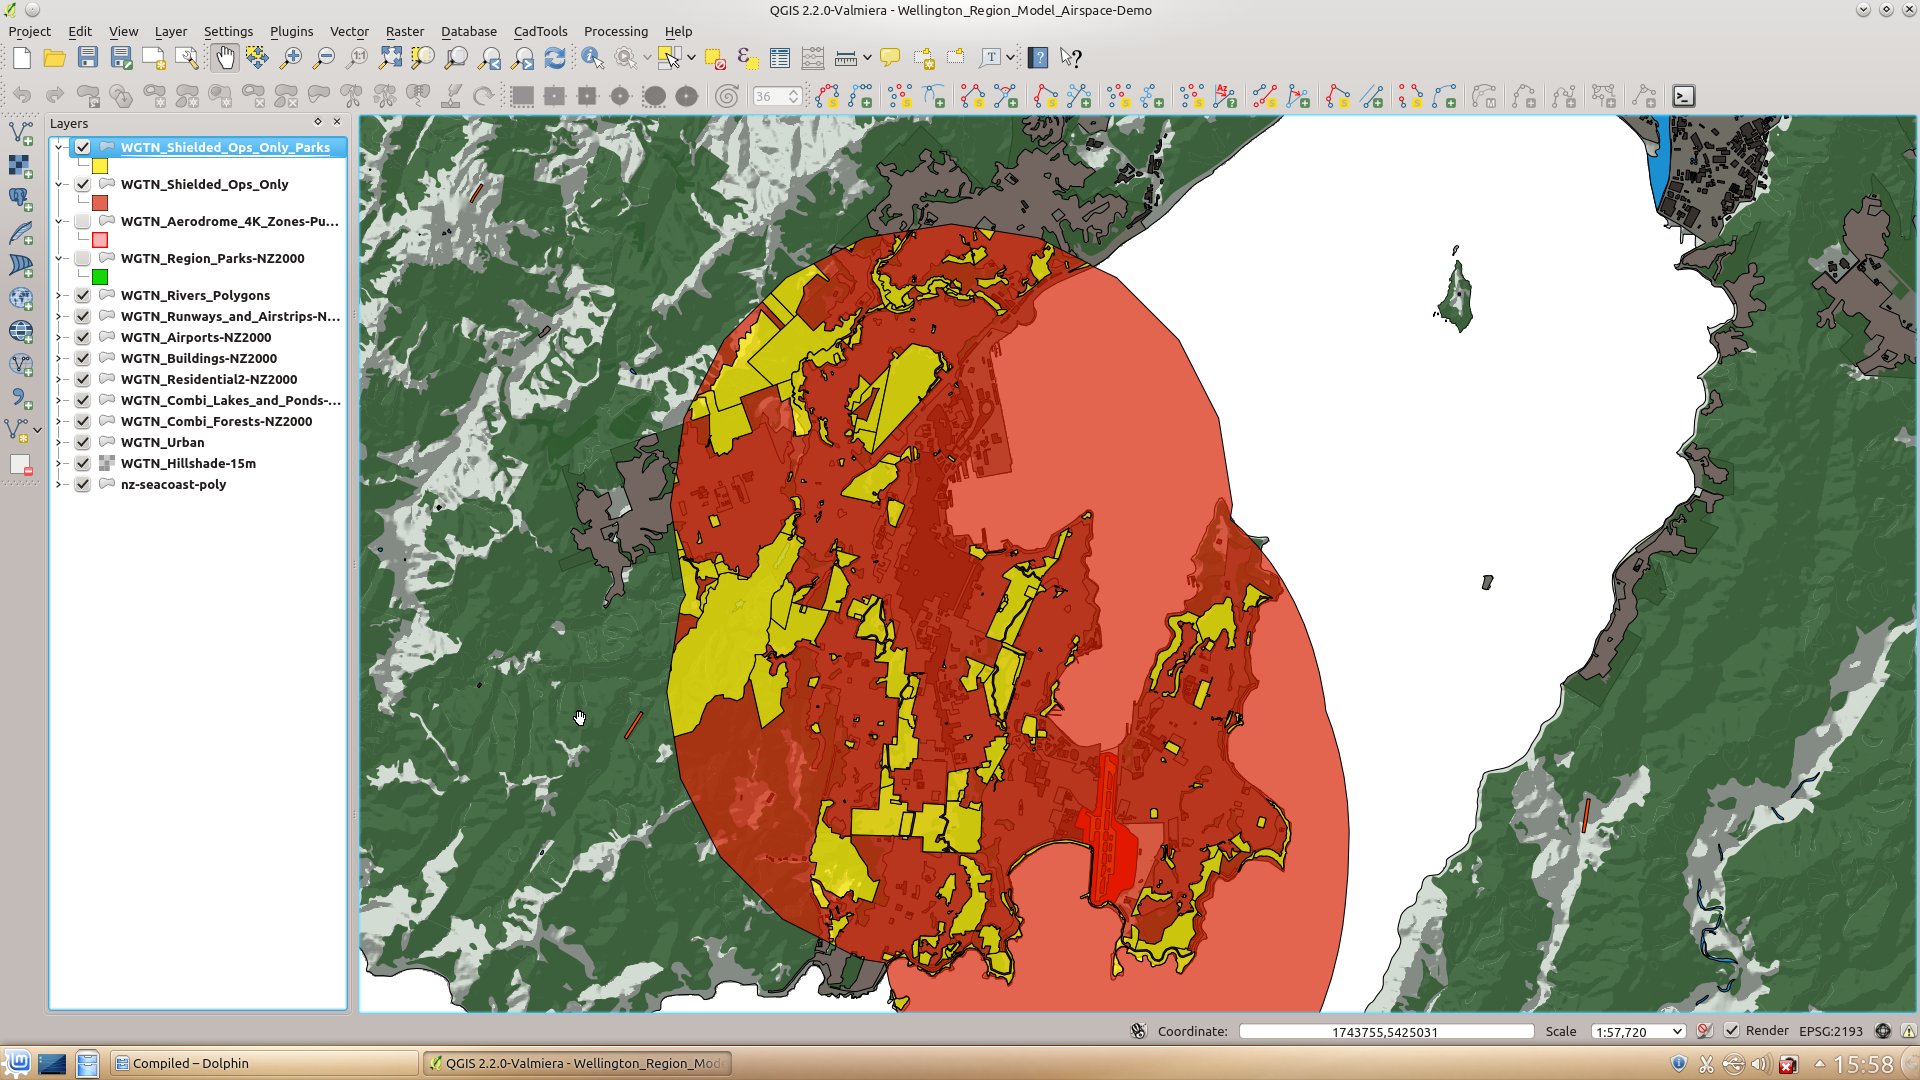
Putting it together
So this is the pair of new shapes produced.
Click on the image for a larger view
The new yellow layer is the local parks and reserves where permission to fly an RC aircraft has been granted by the local council but the user would need to keep below the surrounding trees and building levels in order to not have to advise the airport control tower.
The new red layer is the residential and business areas where the RC Aircraft user would need to gain the land owner and occupier first before being able to fly over the property. They would also need to keep below the level of the tops of the surrounding trees and buildings.
Of course this is not an entirely accurate map because I have not removed the obvious areas where it would be a problem to fly a Remote Piloted Aircraft such as cemeteries, the beaches at the end of the runway etc. In other words if you are in Wellington with an RC airplane, don’t use these images as a guide about where to fly.
Hopefully this is a useful example of using some boolean operations in QGIS.